Custom Resource
Overview
CloudFormation Custom Resources are a bit of logic to run during the provision phase of your CloudFormation template. Custom Resources allow you to extend CloudFormation to do things it could not normally do.
Custom Resources work by firing a webhook when processing the template. You need to write your custom logic to handle this webhook, which might involve making API calls to a third-party service or using AWS SDK to do things CloudFormation by default not allowed. We often use Lambda function to implement this logic.
Here are several use cases of Custom Resource that you might need:
1. Provisioning AWS resources that are not supported by CloudFormation.
While CloudFormation coverage is pretty wide, but there are some cases that are currently not supported. Using Custom Resources, you are able to add in support for missing resources, allowing you to maintain Infrastructure as Code even where AWS does not allow it.
Example:
- Bootstrapping AWS Cloud9 instances.
2. Provisioning non-AWS resources.
Custom Resources allow you to provision resources outside AWS and attach their lifecycle to your CloudFormation stack’s lifecycle. That means your non-AWS resources is created or deleted at the same time your stack is created or deleted.
In this chapter, we will delve into this use case by provisioning a Github Repository using CloudFormation.
Custom Resource Architecture
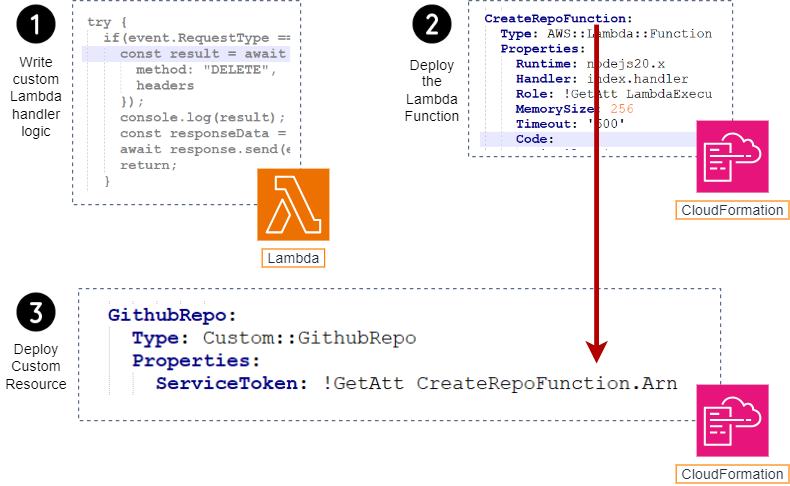
- You define your custom logic; here, you can make API calls to third-party services to provision resources you want.
- You deploy a lambda function with your custom logic manually or via CloudFormation.
- You define a Custom Resource in the template and reference to your Lambda Function via Service Token.
How to write the handle logic
First of all, you need to understand the flow of Custom Resource through the illustration below

- User performs the Create/Delete/Update action against CloudFormation stack.
- CloudFormation trigger the Lambda function with event that corresponds to action user have performed.
- Based on the event, Lambda function makes a corresponding call to the third-party service provider.
- Lambda function signals the results to CloudFormation by uploading them to a presigned S3 bucket.
CloudFormation event types
- Create: this event is invoked whenever the resource is being provisioned for the first time; either because a new stack is being deployed or the resource is added to an existing stack.
- Update: this event is invoked whenever the resource gets updated.
- Delete: this event is invoked when the entire stack is deleted, leading to the deletion of the resource; or when you remove your resource from the template and then update the stack.
Here is the anatomy of a CREATE event. The ResourceProperties field contains your custom parameters and the ResponseURL field contains the presigned URL that you use to upload the results.
{
   "RequestType" : "Create",
   "ResponseURL" : "http://pre-signed-S3-url-for-response",
   "StackId" : "arn:aws:cloudformation:us-west-2:123456789012:stack/mystack/5b918d10-cd98-11ea-90d5-0a9cd3354c10",
   "RequestId" : "unique id for this create request",
   "ResourceType" : "Custom::TestResource",
   "LogicalResourceId" : "MyTestResource",
   "ResourceProperties" : {
      "Name" : "Value",
      "List" : [ "1", "2", "3" ]
   }
}
Response object sample
Here is an example JSON response that you can upload to S3. But in the production environment, we usually use some built-in libraries provided to Lambda for handling the response phase, instead of manually writing the response object. For example, in NodeJS we have the cfn-response library, and in Python we have the cfnresponse package.
{
   "Status" : "SUCCESS",
   "PhysicalResourceId" : "TestResource1",
   "StackId" : "arn:aws:cloudformation:us-west-2:123456789012:stack/mystack/5b918d10-cd98-11ea-90d5-0a9cd3354c10",
   "RequestId" : "unique id for this create request",
   "LogicalResourceId" : "MyTestResource",
   "Data" : {
      "OutputName1" : "Value1",
      "OutputName2" : "Value2",
   }
}
Hands-on Lab
Prerequisites
In order to interact with Github API, we must generate a Personal Access Token, or PAT, and grant it sufficient permissions. Please follow those steps below to create one.
1. Access Github and create a new account if you are not having it.
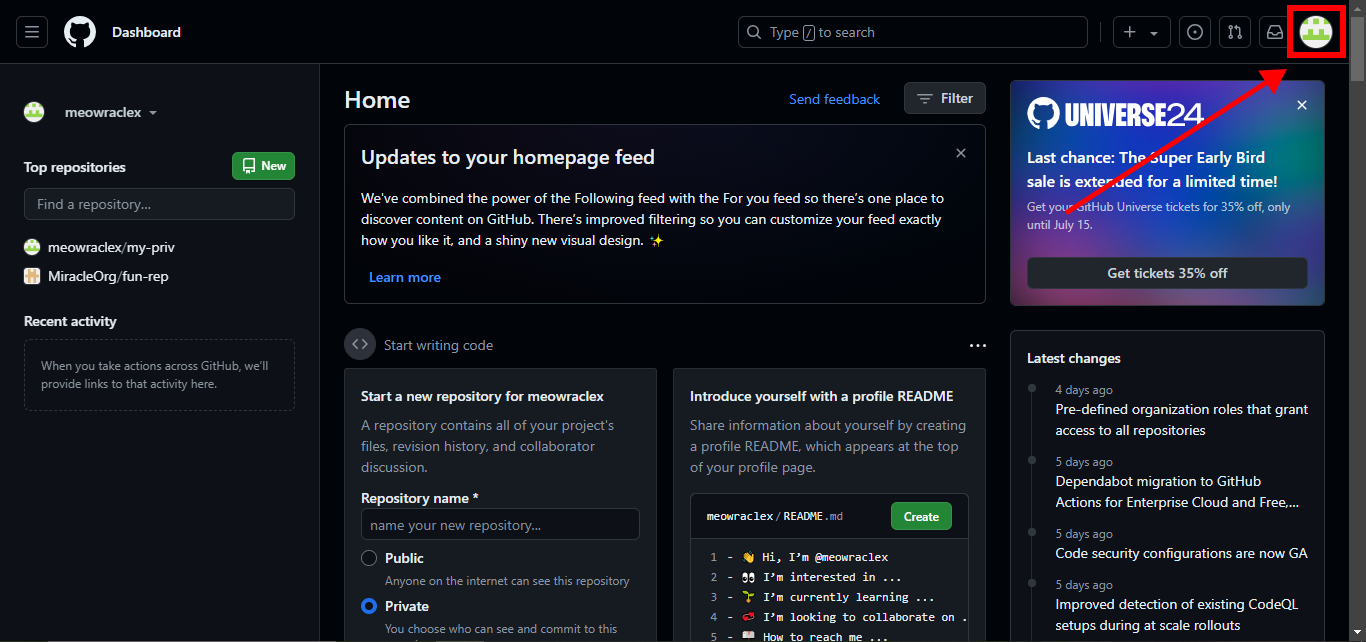
2. Click on your Github avatar.
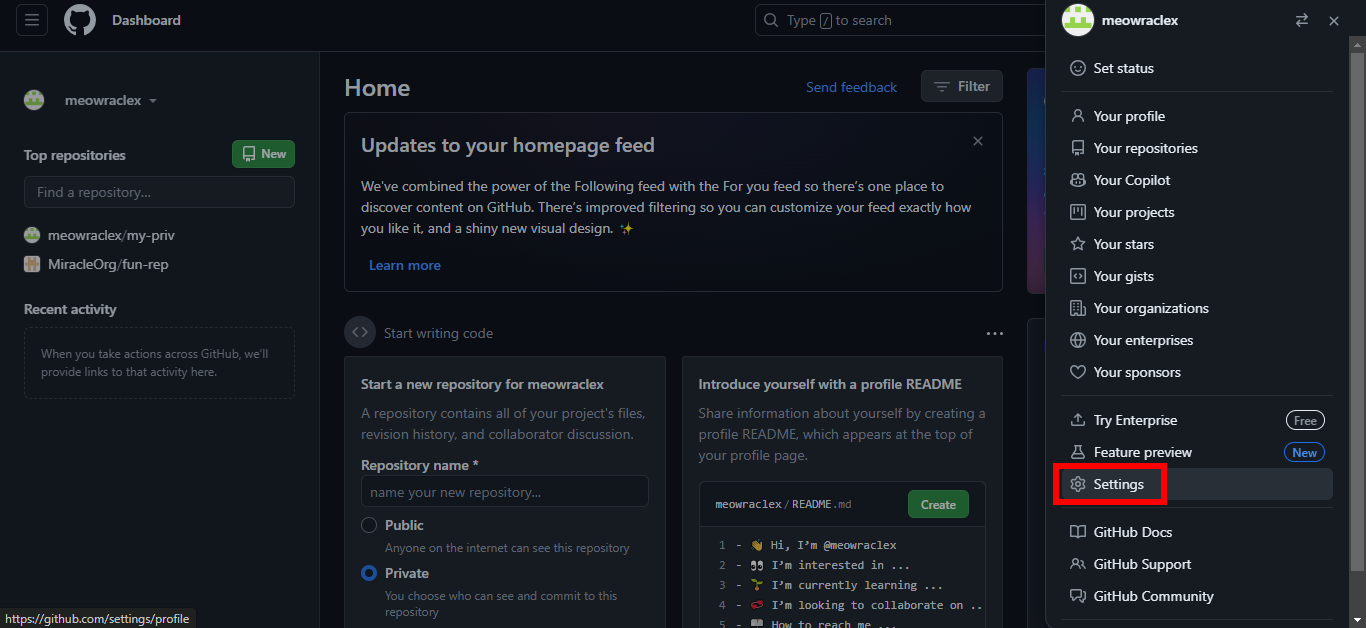
3. Click on Settings.
4. Scroll down and click on Developer settings.
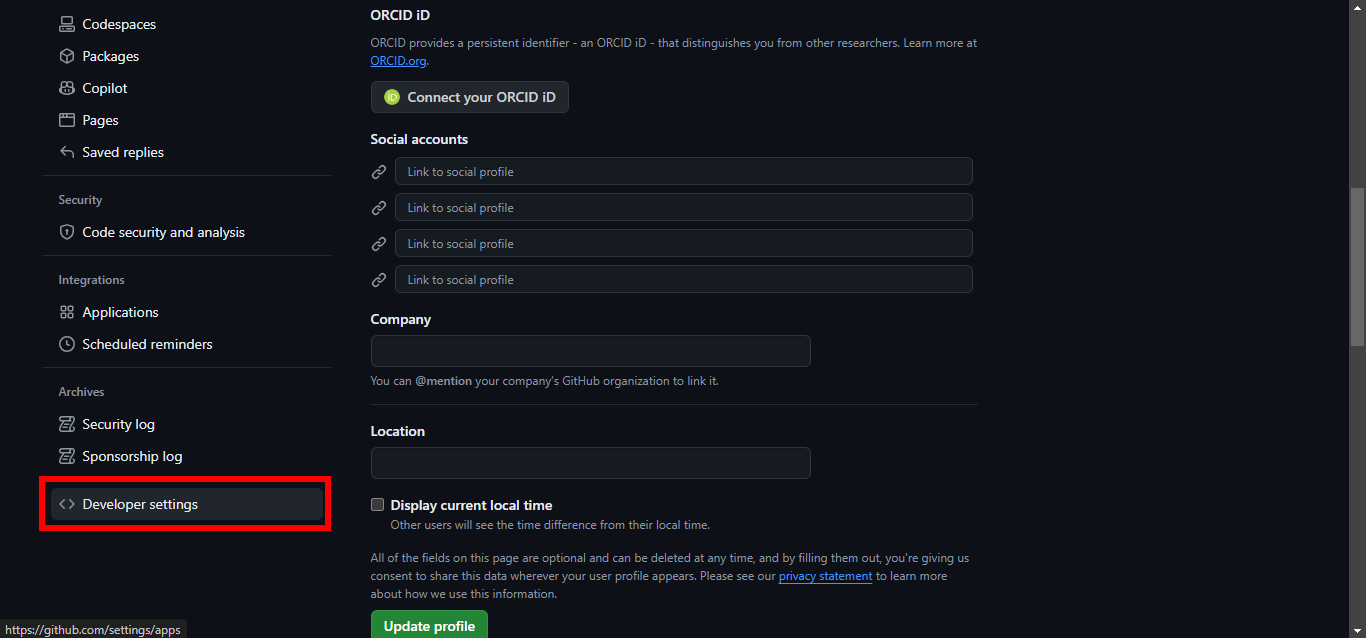
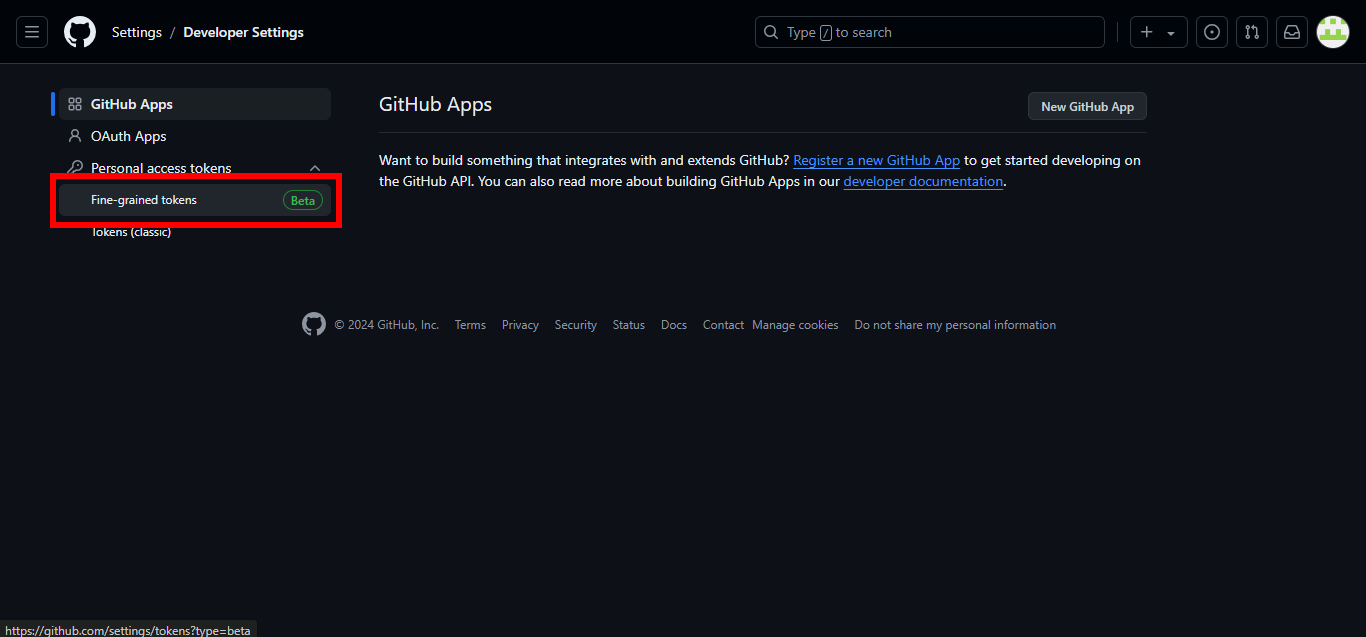
5. Under Personal access tokens, choose Fine-grained tokens.
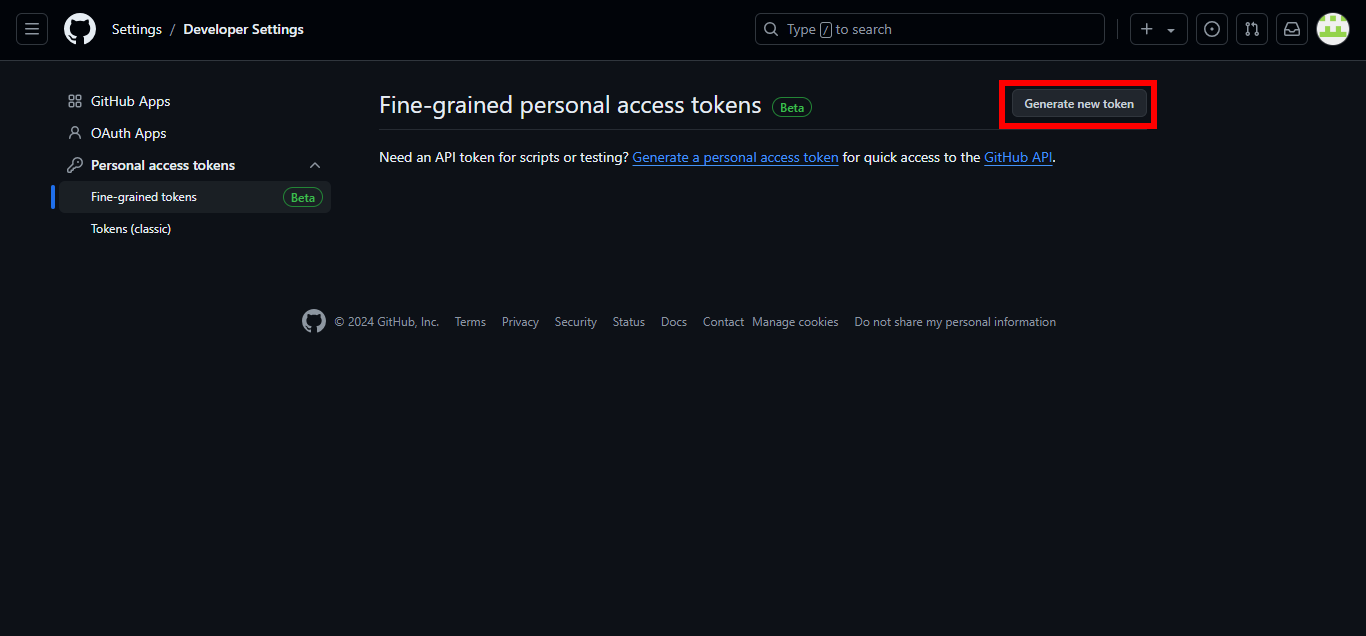
6. Click on Generate new token.
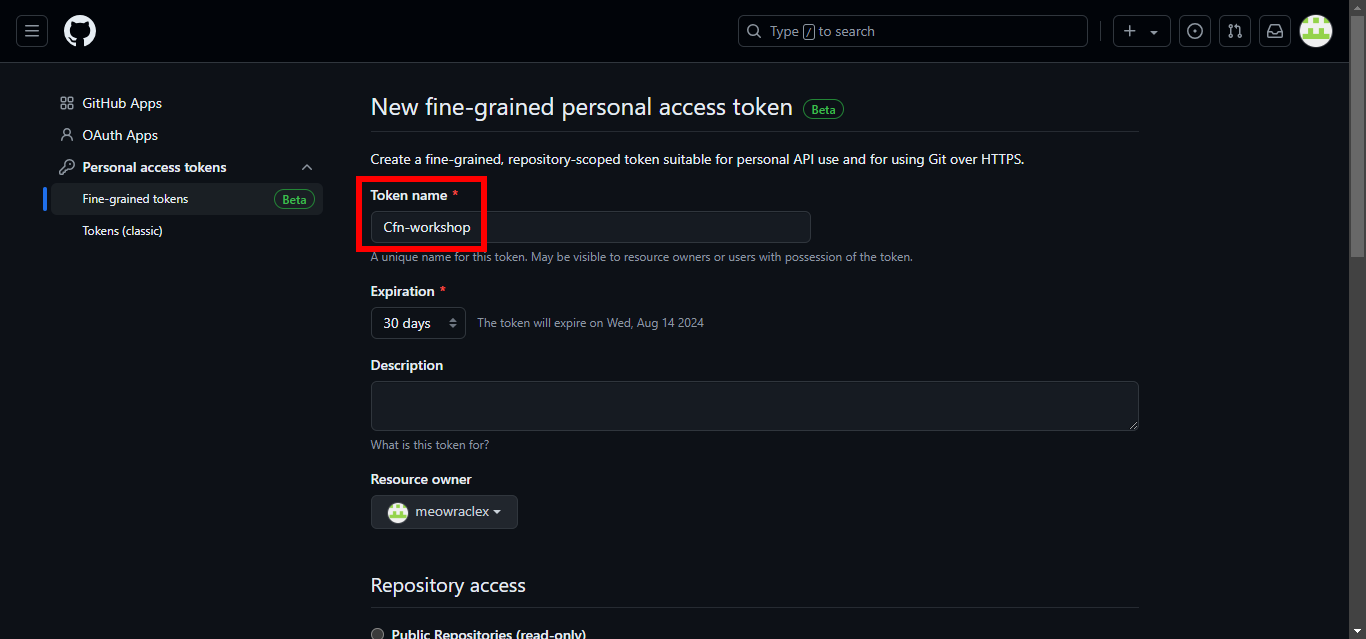
7. For Token name, enter Cfn-workshop.
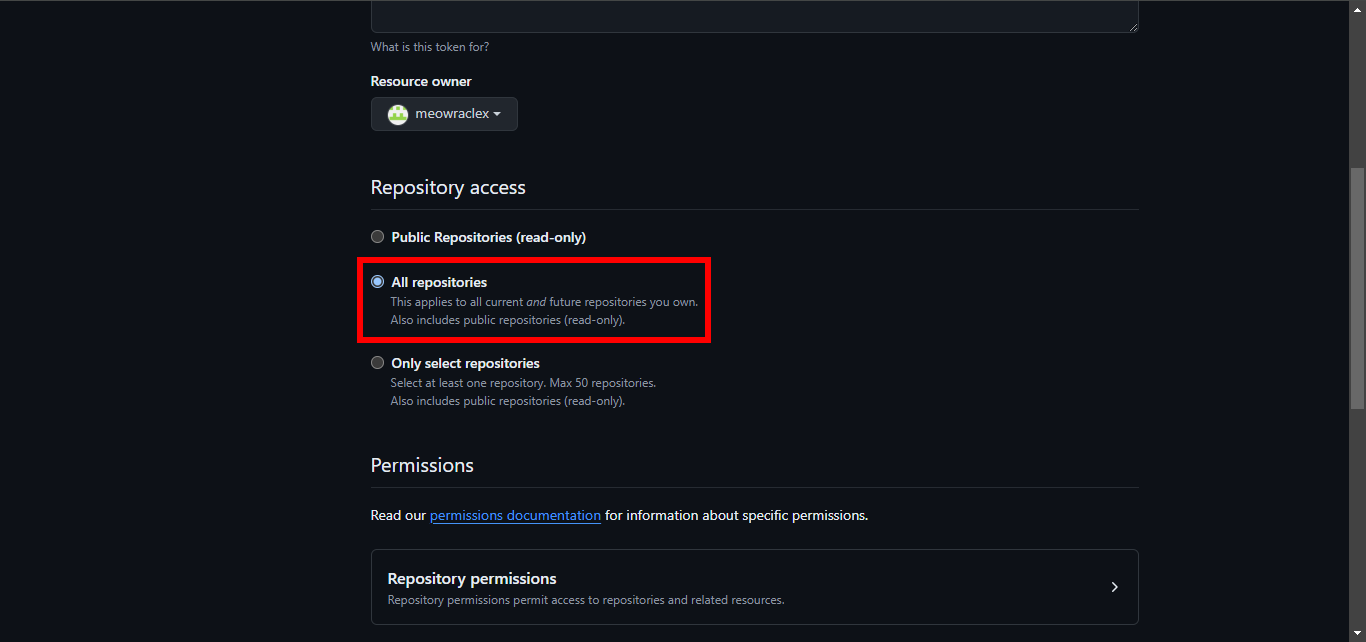
8. For Repository access, select All repositories.
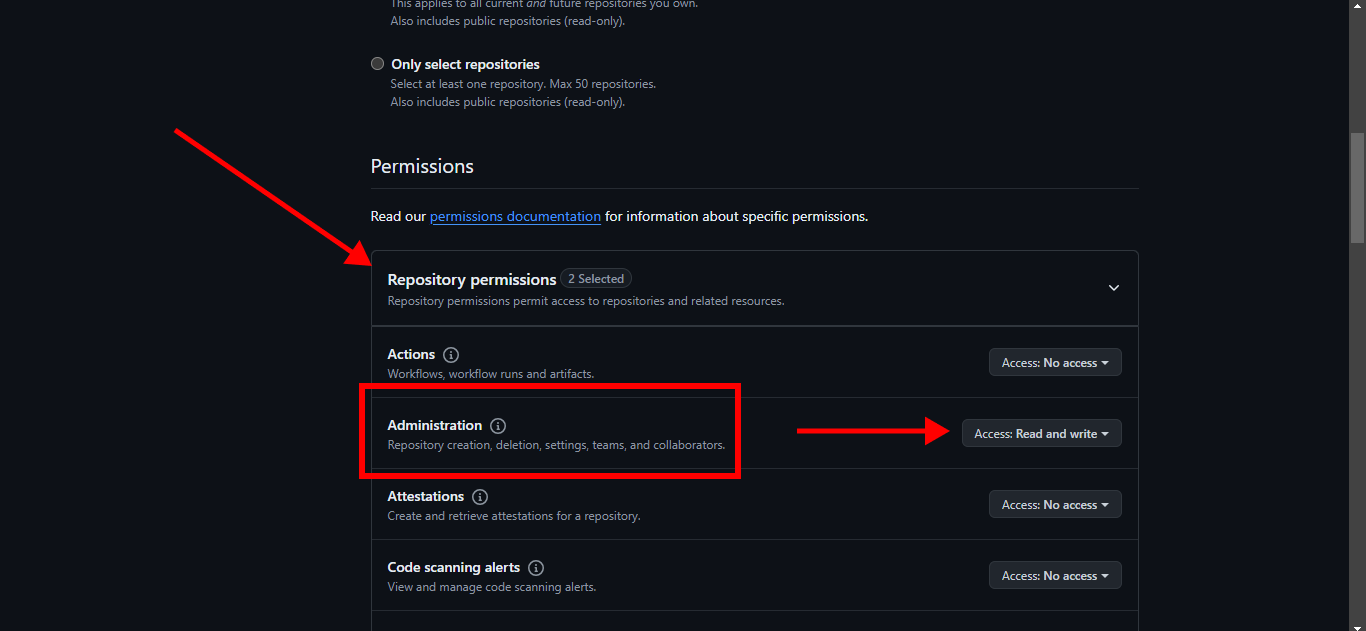
9. Expand Repository permissions, select Read and write for Administration.
10. Scroll down and click on Generate token.
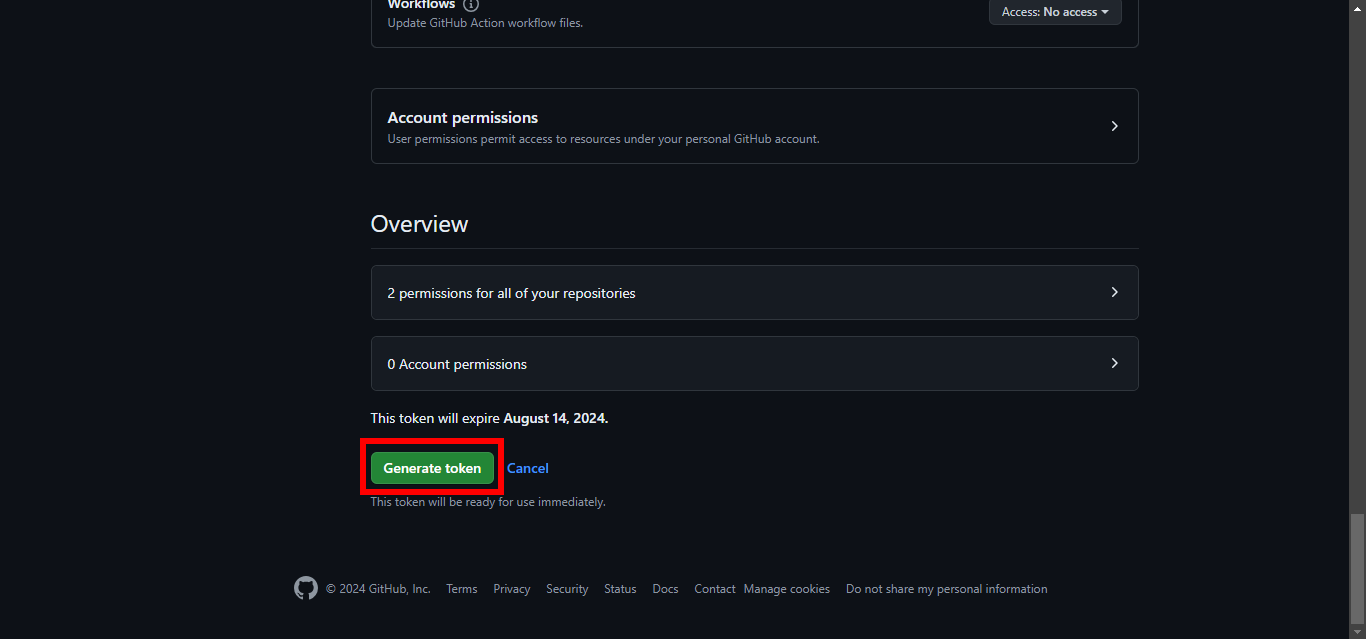
11. Save the token for use later.
Create the template
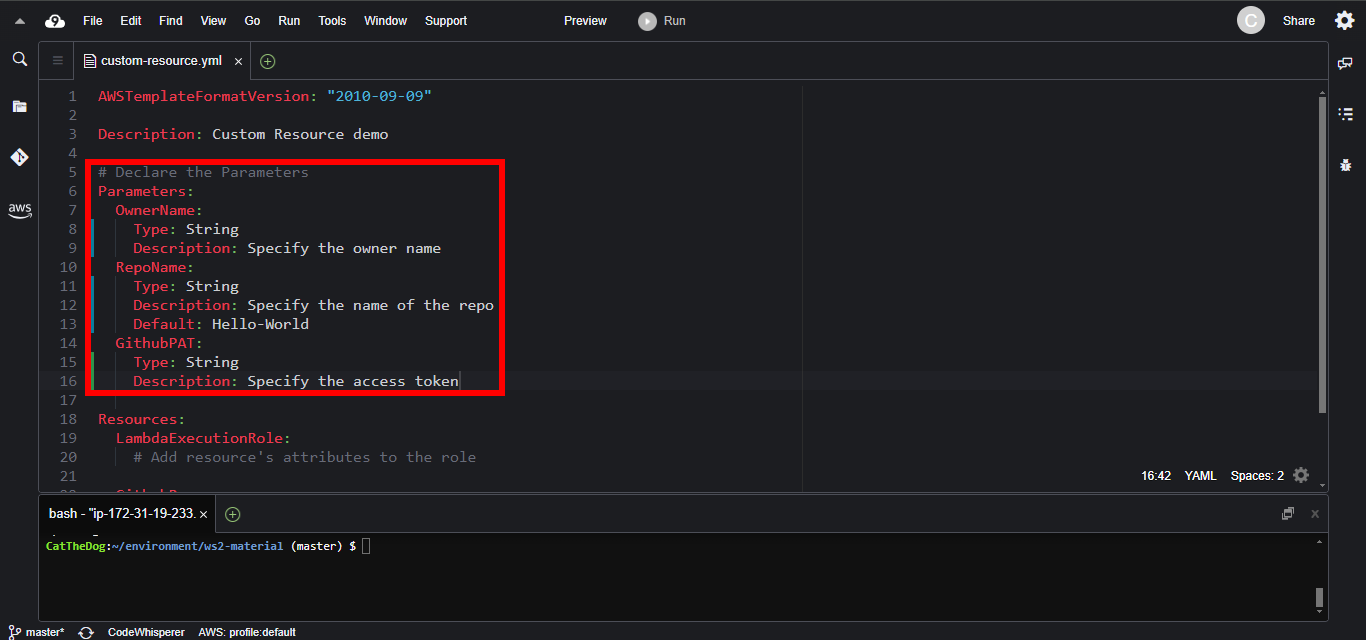
1. Declare the parameters holding the Github Username, the Github Repository Name and the Personal Access Token.
Parameters:
  OwnerName:
    Type: String
    Description: Specify the owner name
  RepoName:
    Type: String
    Description: Specify the name of the repo
    Default: Hello-World
  GithubPAT:
    Type: String
    Description: Specify the access token
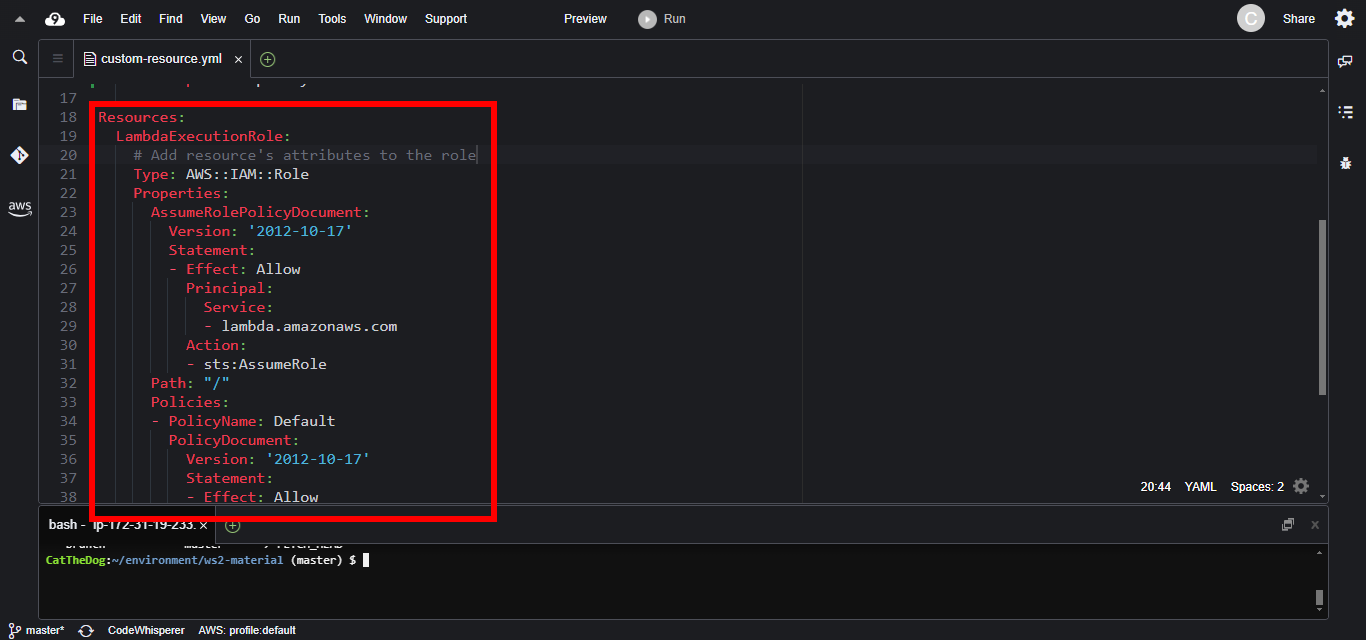
2. Declare the Lambda execution role which allows Lambda Function to store logs to CloudWatch.
  LambdaExecutionRole:
    Type: AWS::IAM::Role
    Properties:
      AssumeRolePolicyDocument:
        Version: '2012-10-17'
        Statement:
        - Effect: Allow
          Principal:
            Service:
            - lambda.amazonaws.com
          Action:
          - sts:AssumeRole
      Path: "/"
      Policies:
      - PolicyName: Default
        PolicyDocument:
          Version: '2012-10-17'
          Statement:
          - Effect: Allow
            Action:
            - logs:CreateLogGroup
            - logs:CreateLogStream
            - logs:PutLogEvents
            Resource: arn:aws:logs:*:*:*
3. Create the lambda function in which we put the Repo creation logic.
Here is the code explanation for the CREATE event. It is also the same as other events.
if(event.RequestType == "Create") {
  // make an API call to GitHub to create new repo.
  const result = await fetch(`https://api.github.com/user/repos`, {
    method: "POST",
    body: JSON.stringify({
      name: repoName
    }),
    headers
  });

  // Log results to CloudWatch
  console.log(result);

  // Then signal the success message to CloudFormation
  const responseData = {success: "Create repo successfully"};
  await response.send(event, context, response.SUCCESS, responseData);
}
Copy and paste the full Lambda function to your template.
  CreateRepoFunction:
    Type: AWS::Lambda::Function
    Properties:
      Runtime: nodejs20.x
      Handler: index.handler
      Role: !GetAtt LambdaExecutionRole.Arn
      MemorySize: 256
      Timeout: '600'
      Code:
        ZipFile: |
          const response = require('cfn-response');

          exports.handler = async function(event, context) {
            const pat = event.ResourceProperties.GithubPAT;
            const ownerName = event.ResourceProperties.OwnerName;
            const repoName = event.ResourceProperties.RepoName;

            let headers = {
              "Accept": "application/vnd.github+json",
              "Authorization": `Bearer ${pat}`,
              "X-GitHub-Api-Version": "2022-11-28"
            };
            try {
              if(event.RequestType == "Delete") {
                const result = await fetch(`https://api.github.com/repos/${ownerName}/${repoName}`, {
                  method: "DELETE",
                  headers
                });
                console.log(result);
                const responseData = {success: "Delete repo successfully"};
                await response.send(event, context, response.SUCCESS, responseData);
                return;
              }

              // Do nothing for Update phase
              if(event.RequestType == "Update") {
                const responseData = {success: "Update repo successfully"};
                await response.send(event, context, response.SUCCESS, responseData);
                return;
              }

              if(event.RequestType == "Create") {
                const result = await fetch(`https://api.github.com/user/repos`, {
                  method: "POST",
                  body: JSON.stringify({
                    name: repoName
                  }),
                  headers
                });
                console.log(result);
                const responseData = {success: "Create repo successfully"};
                await response.send(event, context, response.SUCCESS, responseData);
              }
            } catch(error) {
              const responseData = {error: JSON.stringify(error)};
              await response.send(event, context, response.FAILED, responseData);
            }
          };

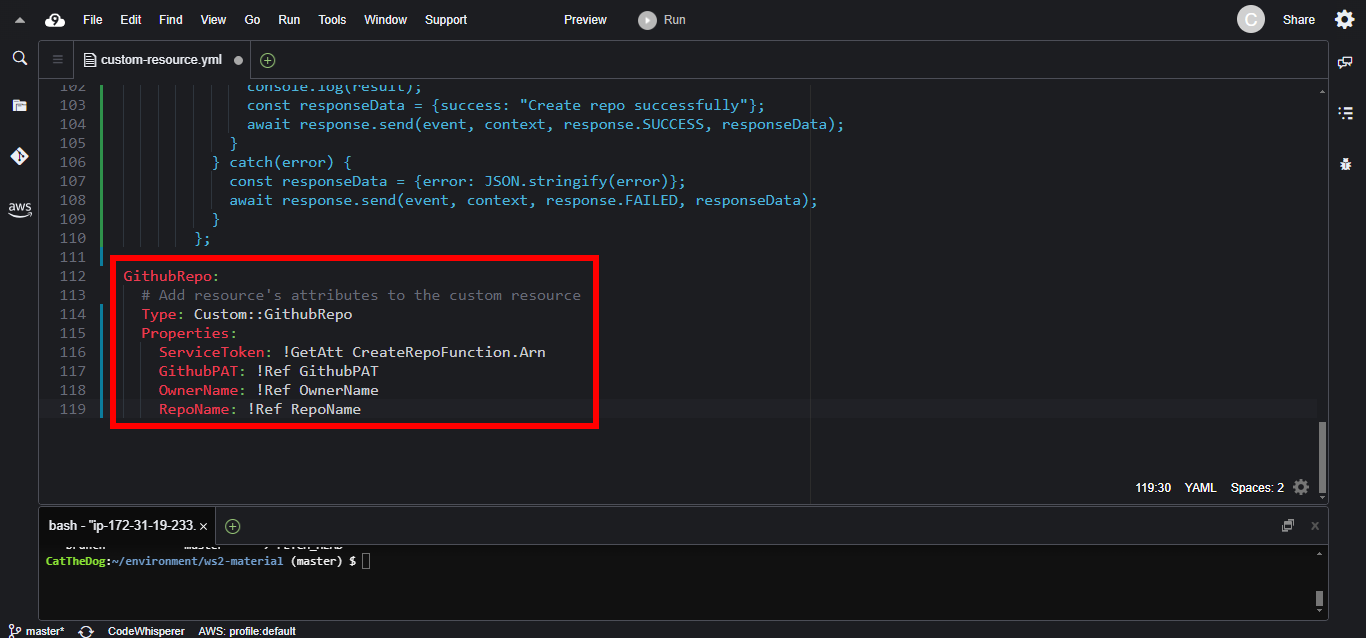
4. Create the Github Repo Custom Resource. GithubPAT, OwnerName and RepoName are custom parameters we pass to the Lambda function.
  GithubRepo:
    Type: Custom::GithubRepo
    Properties:
      ServiceToken: !GetAtt CreateRepoFunction.Arn
      GithubPAT: !Ref GithubPAT
      OwnerName: !Ref OwnerName
      RepoName: !Ref RepoName
Create stack
1. Execute the command below to create a new stack. Make sure to replace <your-github-username> and <your-personal-access-token> with your own values.
export OwnerName=<your-github-username>
export GithubPAT=<your-personal-access-token>
cd ~/environment/ws2-material/workshop/fundamental

aws cloudformation create-stack --stack-name custom-resource --template-body file://custom-resource.yml --capabilities CAPABILITY_IAM --parameters ParameterKey=OwnerName,ParameterValue=$OwnerName ParameterKey=GithubPAT,ParameterValue=$GithubPAT
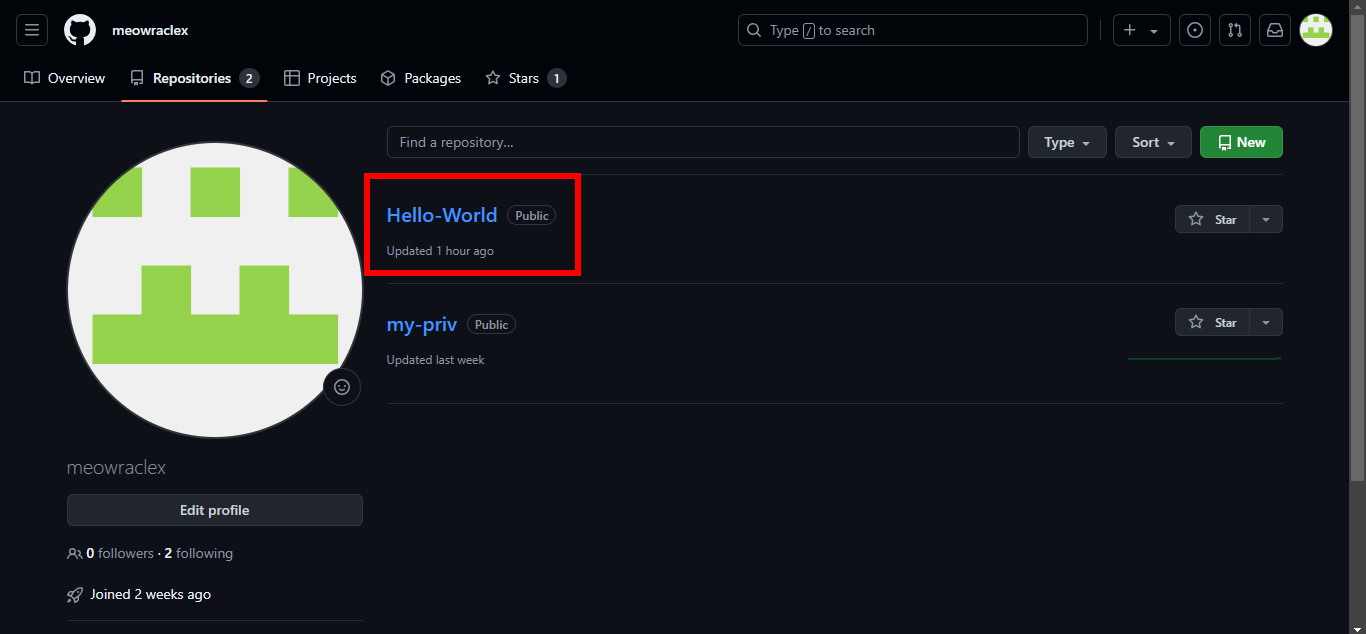
2. Wait for the stack creation to be succeeded. Then navigate to Github to see the Repository provisioned.
Cleaning up
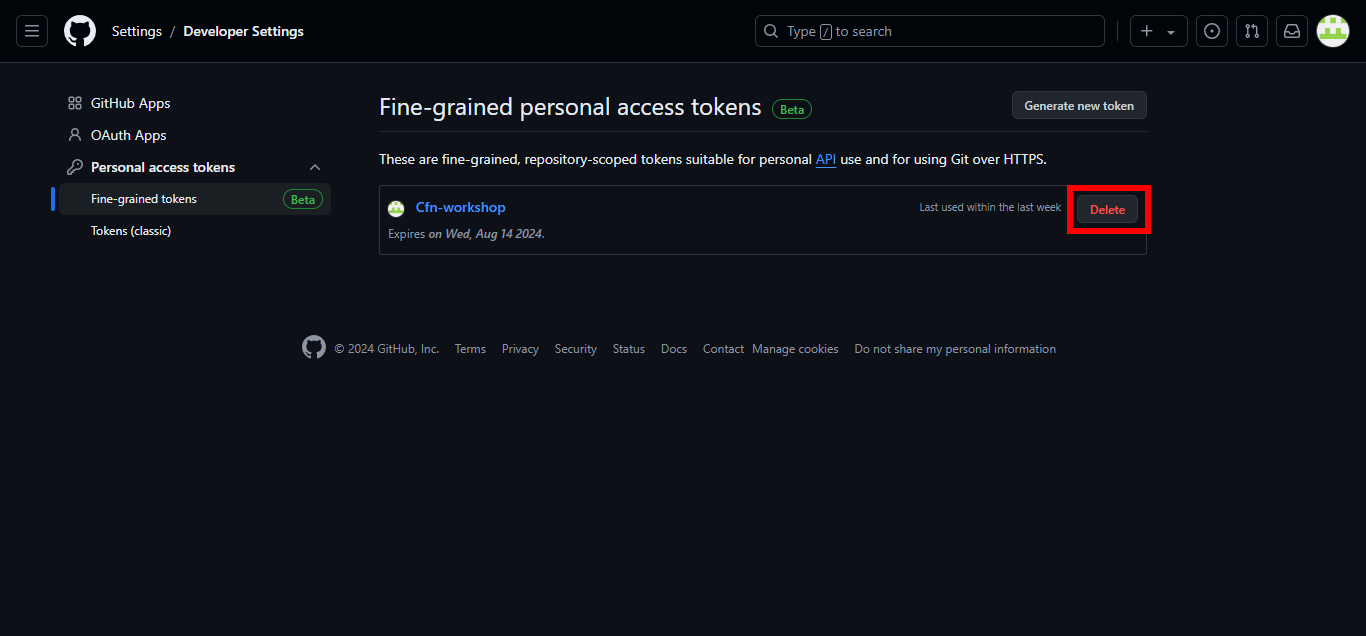
1. Run the delete command to delete your stack, you will see that your repo will be automatically removed.
aws cloudformation delete-stack --stack-name custom-resource
2. Delete the Personal Access Token on GitHub.