Metadata, Parameters and Resources
Metadata
The Metadata section allows you to define additional information about your template through the arbitrary JSON or YAML object. Let’s take a look at the example below. In this example, we define two custom fields, Instances and Databases, which provide information about EC2 instances and databases in our stack.
Metadata:
  Instances:
    Description: "Information about the instances"
  Databases:
    Description: "Information about the databases"
Moreover, in the Metadata section, we can improve the user experience(UX) of deployment by grouping, sorting and providing informative description for parameters in the template. All of those can be done using the AWS::CloudFormation::Interface key in Metadata.
Metadata:
  AWS::CloudFormation::Interface:
    ParameterGroups:
      - Label:
          default: 'Amazon EC2 Configuration'
        Parameters:
          - InstanceType
    ParameterLabels:
      InstanceType:
        default: 'Type of EC2 Instance'
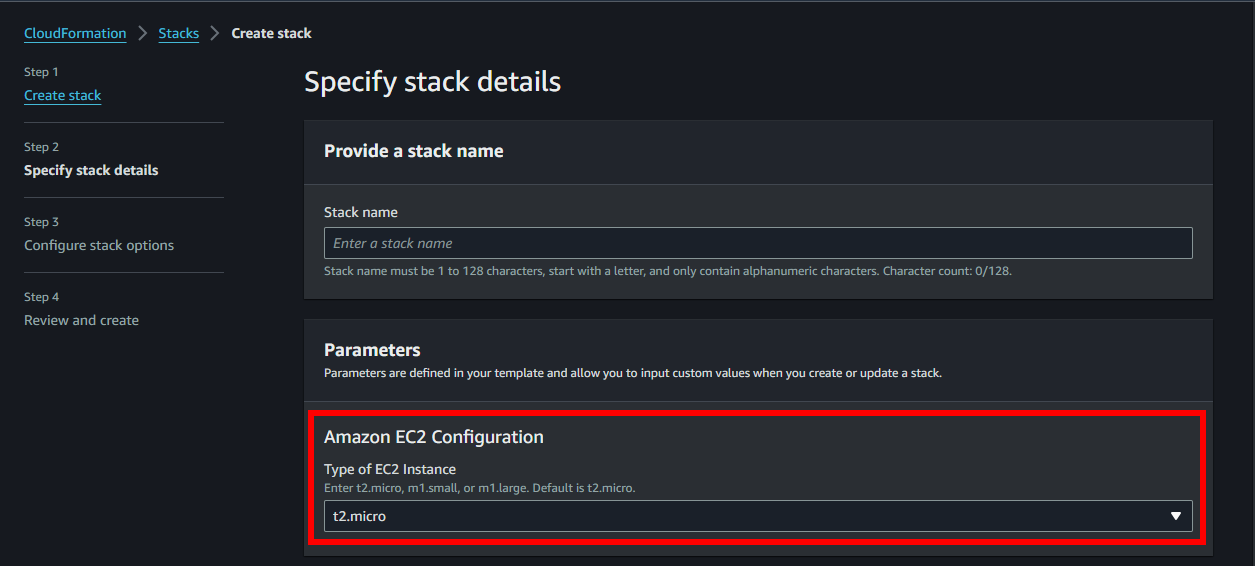
The illustration above gives you a group with one parameter. When viewing the template on the AWS Console, you will see that the InstanceType parameter is located in the ParameterGroups group and has a label designated as Type of EC2 Instance.
Parameters
Parameters enable you to input custom values to your template each time you create or update a stack. Let’s examine the example below:
Parameters:
  InstanceType:
    Type: String
    Default: t2.micro
    AllowedValues:
      - t2.micro
      - m1.small
      - m1.large
    Description: Enter t2.micro, m1.small, or m1.large. Default is t2.micro.
In that example, the InstanceType parameter accepts a string and is limited to three values: t2.micro, m1.small, and m1.large. You can use this parameter to build customized instances when creating or updating your stack.
AWS CloudFormation provides you with several parameter types.
| Name | Description | Example |
|---|---|---|
| String | A literal string. | “MyInstance”,“t2.micro” |
| Number | An integer or float. | “123” |
| List | An array of integers or floats. | “10,20,30” |
| CommaDelimitedList | An array of literal strings. | “test,dev,prod” |
| AWS-specific parameter types | AWS values such as Amazon VPC IDs. | AWS::EC2::Image::Id |
| SSM parameter types | Parameters that correspond to existing parameters in Systems Manager Parameter Store. | AWS::SSM::Parameter::Value<AWS::EC2::Image::Id> |
You can read more at: Parameters.
Resources
The required Resources section declares the AWS resources that you want to include in the stack, such as an Amazon EC2 instance or an Amazon S3 bucket.
Let’s see how we can define an EC2 instance with a few lines of code.
Resources:
  WebServerInstance:
    Type: 'AWS::EC2::Instance'
    Properties:
      InstanceType: t2.micro
      ImageId: ami-0ff8a91507f77f867
The latest ImageId(or AMI) of some OSes is changed over time. Later on in this workshop, you will learn how to get the latest ImageId via the AWS Console.
Reinforce your understanding
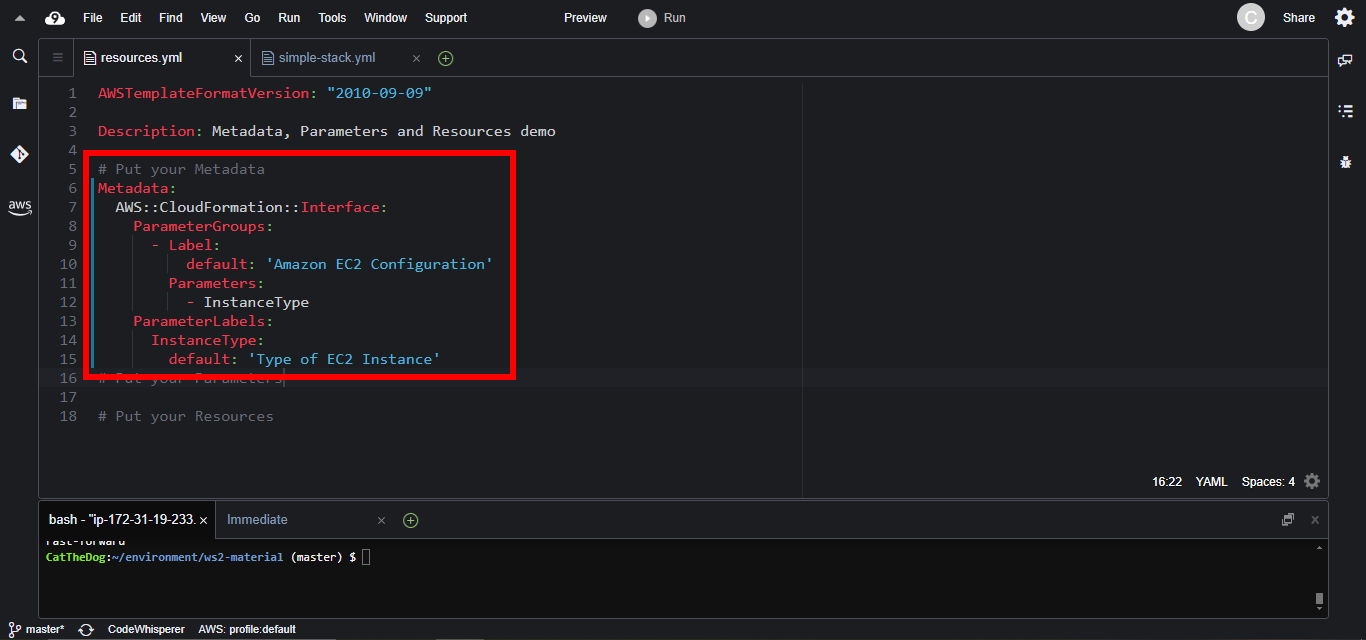
1. Open Cloud9 then find ~/environment/ws2-material/workshop/fundamental/resources.yml.
2. Copy the Metadata and paste into the template file.
Metadata:
  AWS::CloudFormation::Interface:
    ParameterGroups:
      - Label:
          default: 'Amazon EC2 Configuration'
        Parameters:
          - InstanceType
    ParameterLabels:
      InstanceType:
        default: 'Type of EC2 Instance'
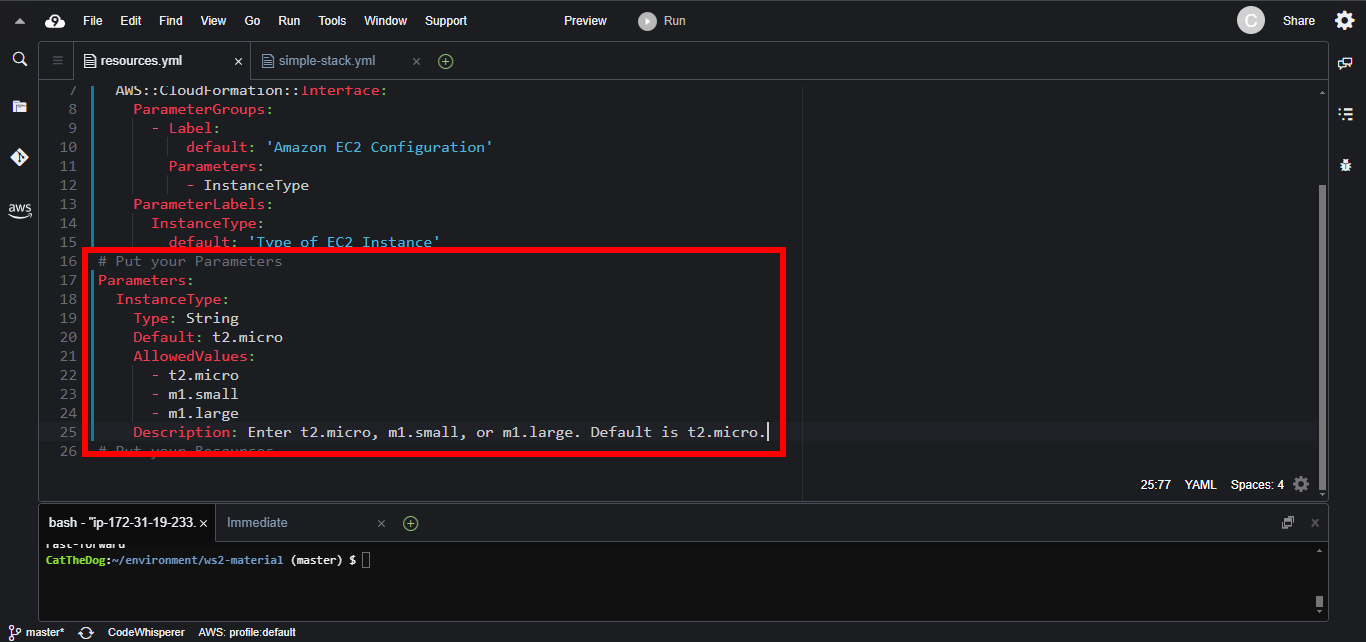
3. Copy the Parameters and paste into your template.
Parameters:
  InstanceType:
    Type: String
    Default: t2.micro
    AllowedValues:
      - t2.micro
      - m1.small
      - m1.large
    Description: Enter t2.micro, m1.small, or m1.large. Default is t2.micro.
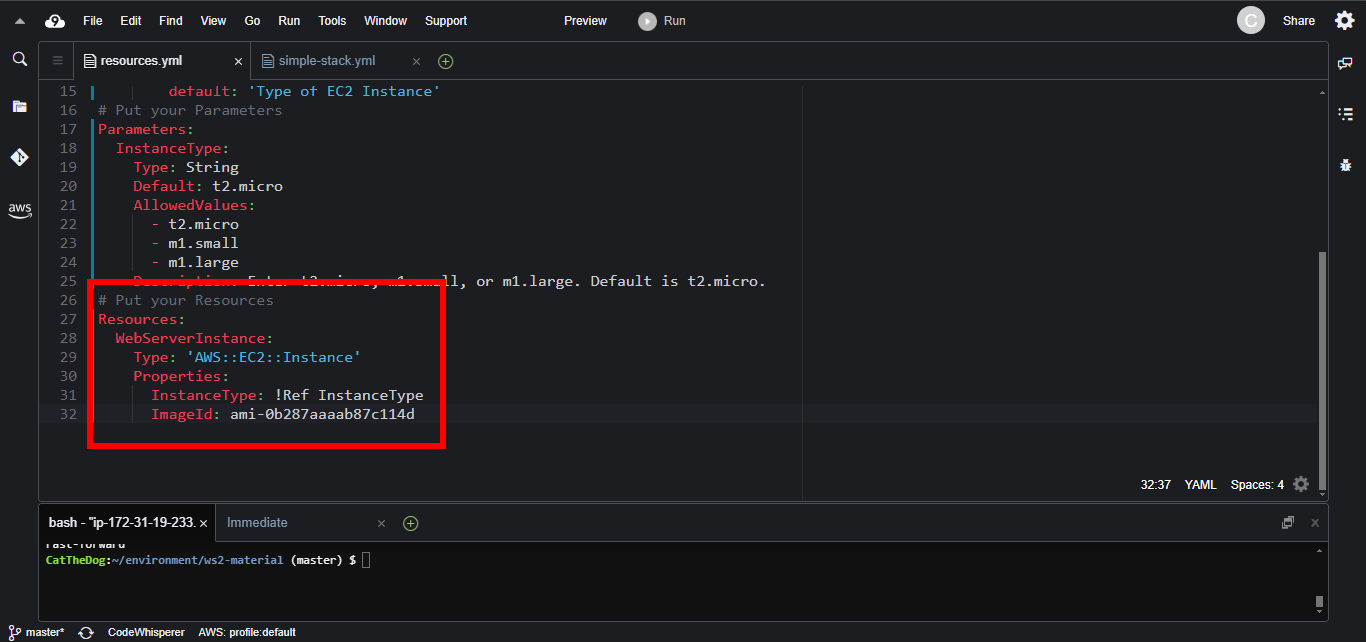
4. Copy and paste the Resources.
Resources:
  WebServerInstance:
    Type: 'AWS::EC2::Instance'
    Properties:
      InstanceType: !Ref InstanceType
      ImageId: <replace with your ami>
You will notice that we use !Ref InstanceType to fill out the the property InstanceType. The Ref function allows you to reference parameters in your resources. In this case, we reference the InstanceType parameter we have defined early in this workshop. You will learn about Ref and other Intrinsic Functions in the next chapter.
5. Open the AWS Console, go to EC2.
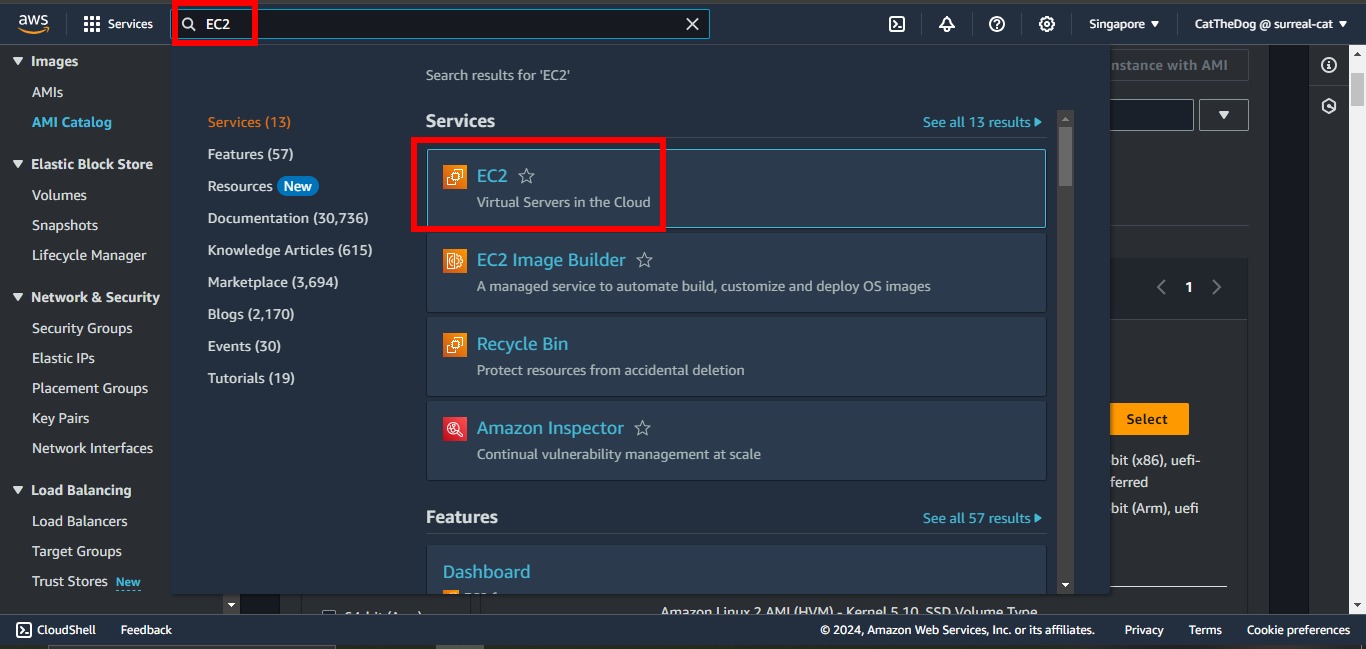
Click on AMI Catalog then copy the ImageId of the latest Amazon Linux.

6. Paste the ImageId you have copied into your template, you will get:
7. Run the command to create your stack.
cd ~/environment/ws2-material/workshop/fundamental
aws cloudformation create-stack --stack-name resources --template-body file://resources.yml
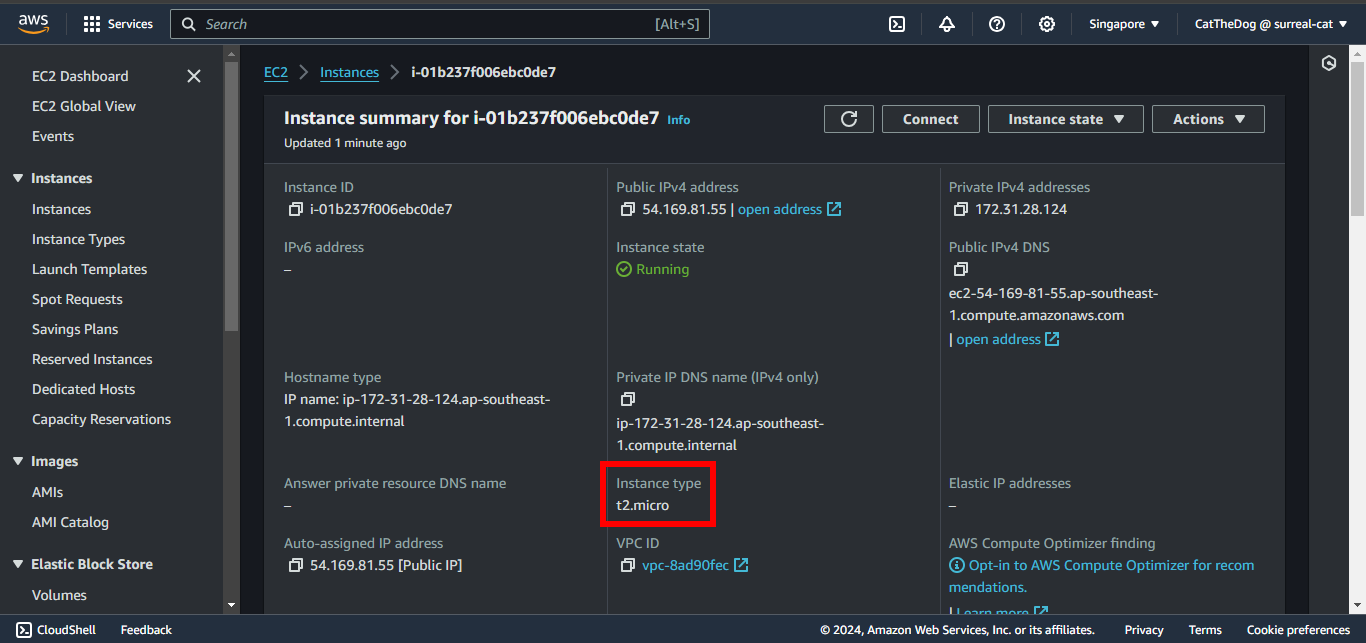
8. Wait for the stack is successfully created, open EC2 and check your instance.
The instance type will be set to t2.micro, the default value of our parameter, since we don’t specify any value when creating the stack.
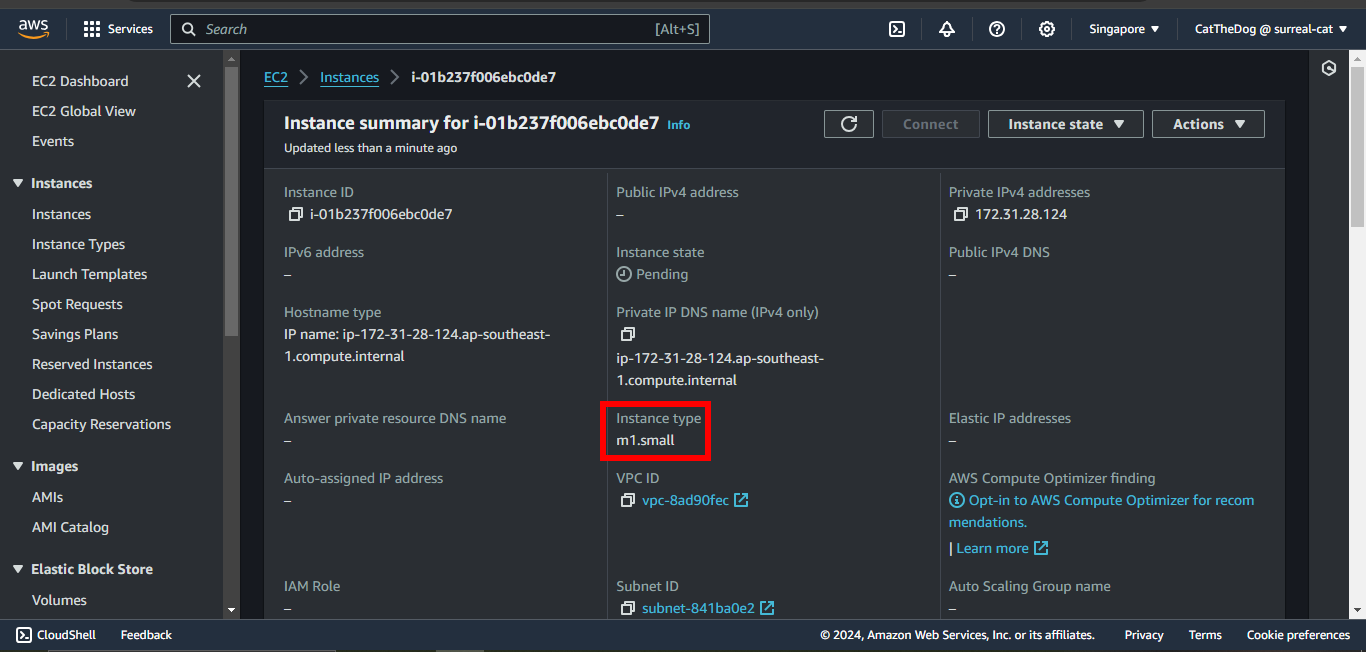
9. Run the update command to change the instance type to m1.small.
aws cloudformation update-stack --stack-name resources --template-body file://resources.yml --parameters ParameterKey=InstanceType,ParameterValue=m1.small
You will see that the instance type is changed.
Cleaning up
Run the delete command to delete your stack:
aws cloudformation delete-stack --stack-name resources