Launch the Core Application
Create the Core Application Task Definition
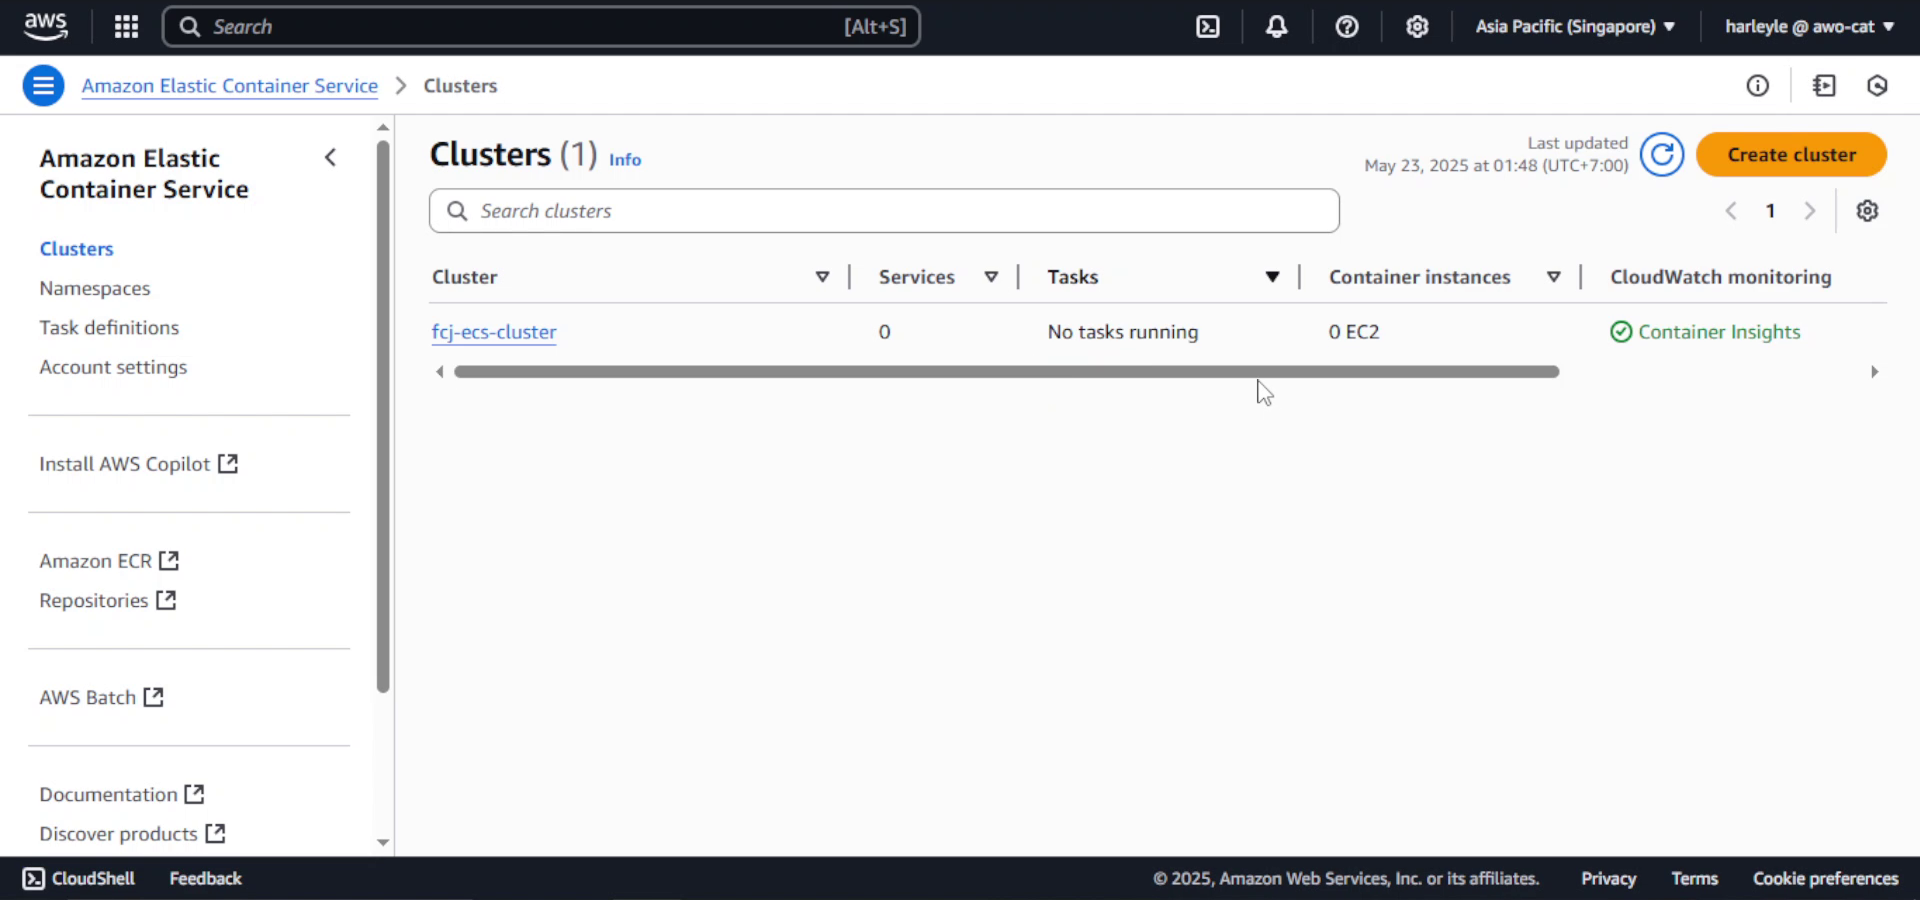
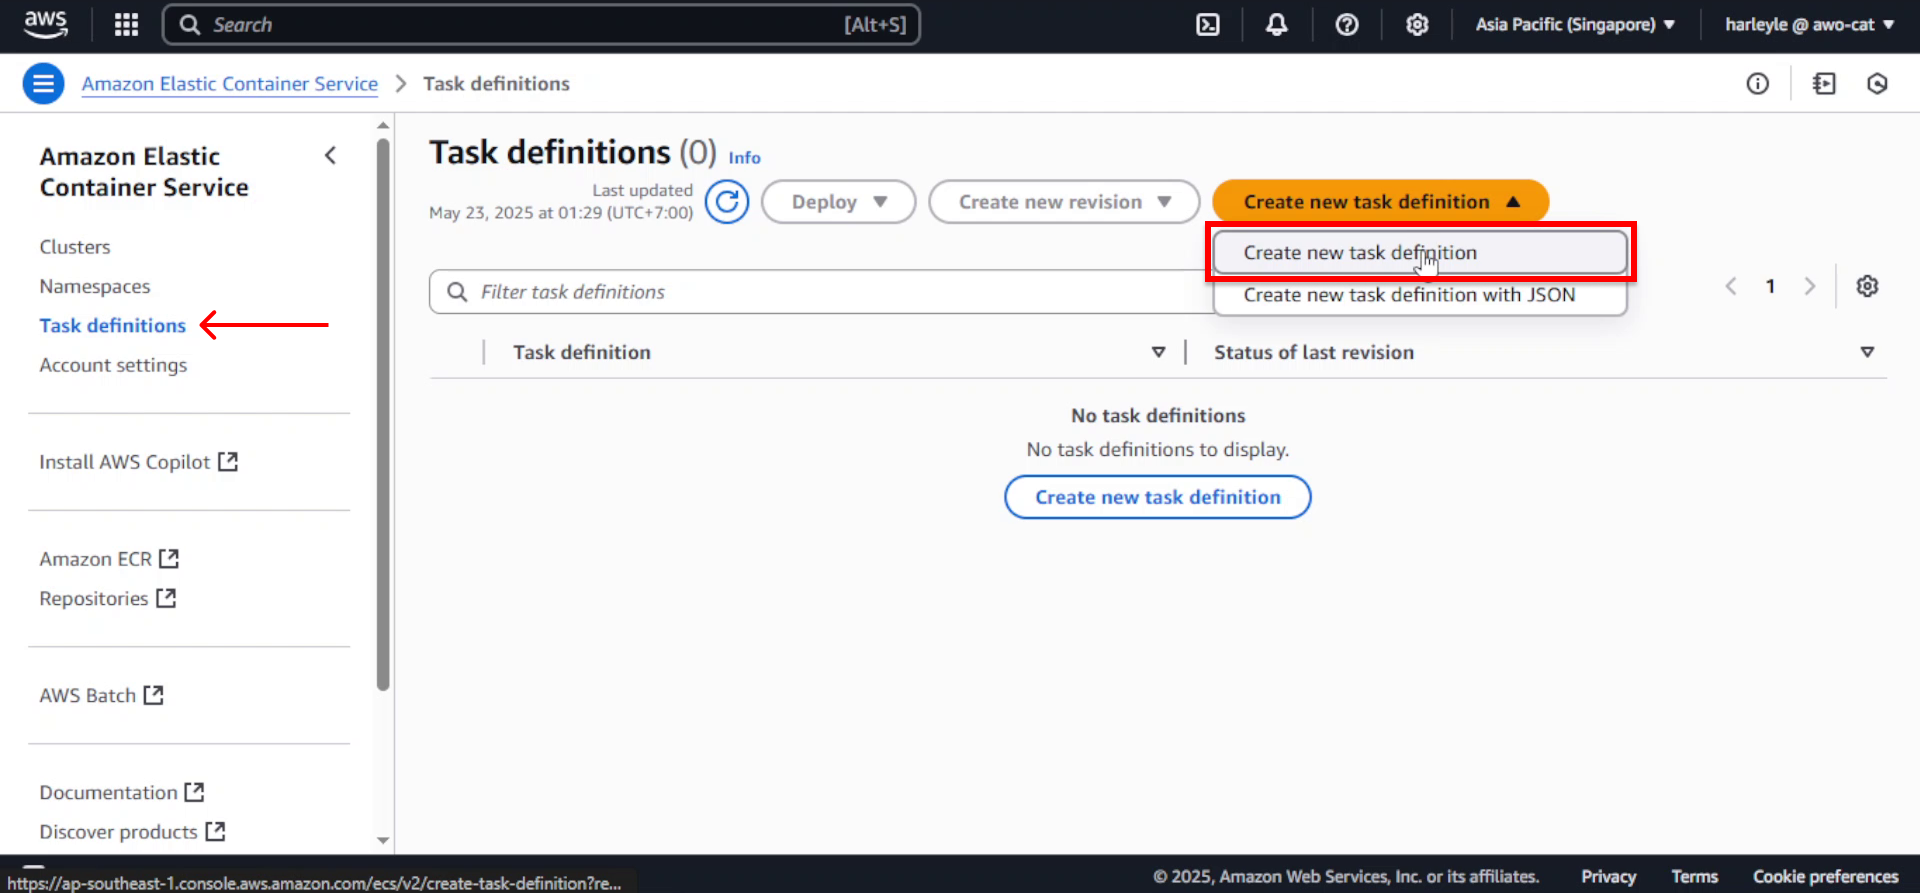
1. Navigate to Amazon Elastic Container Service (ECS) in the AWS Console.
2. In the left navigation pane, select Task definitions, then click Create new task definition.
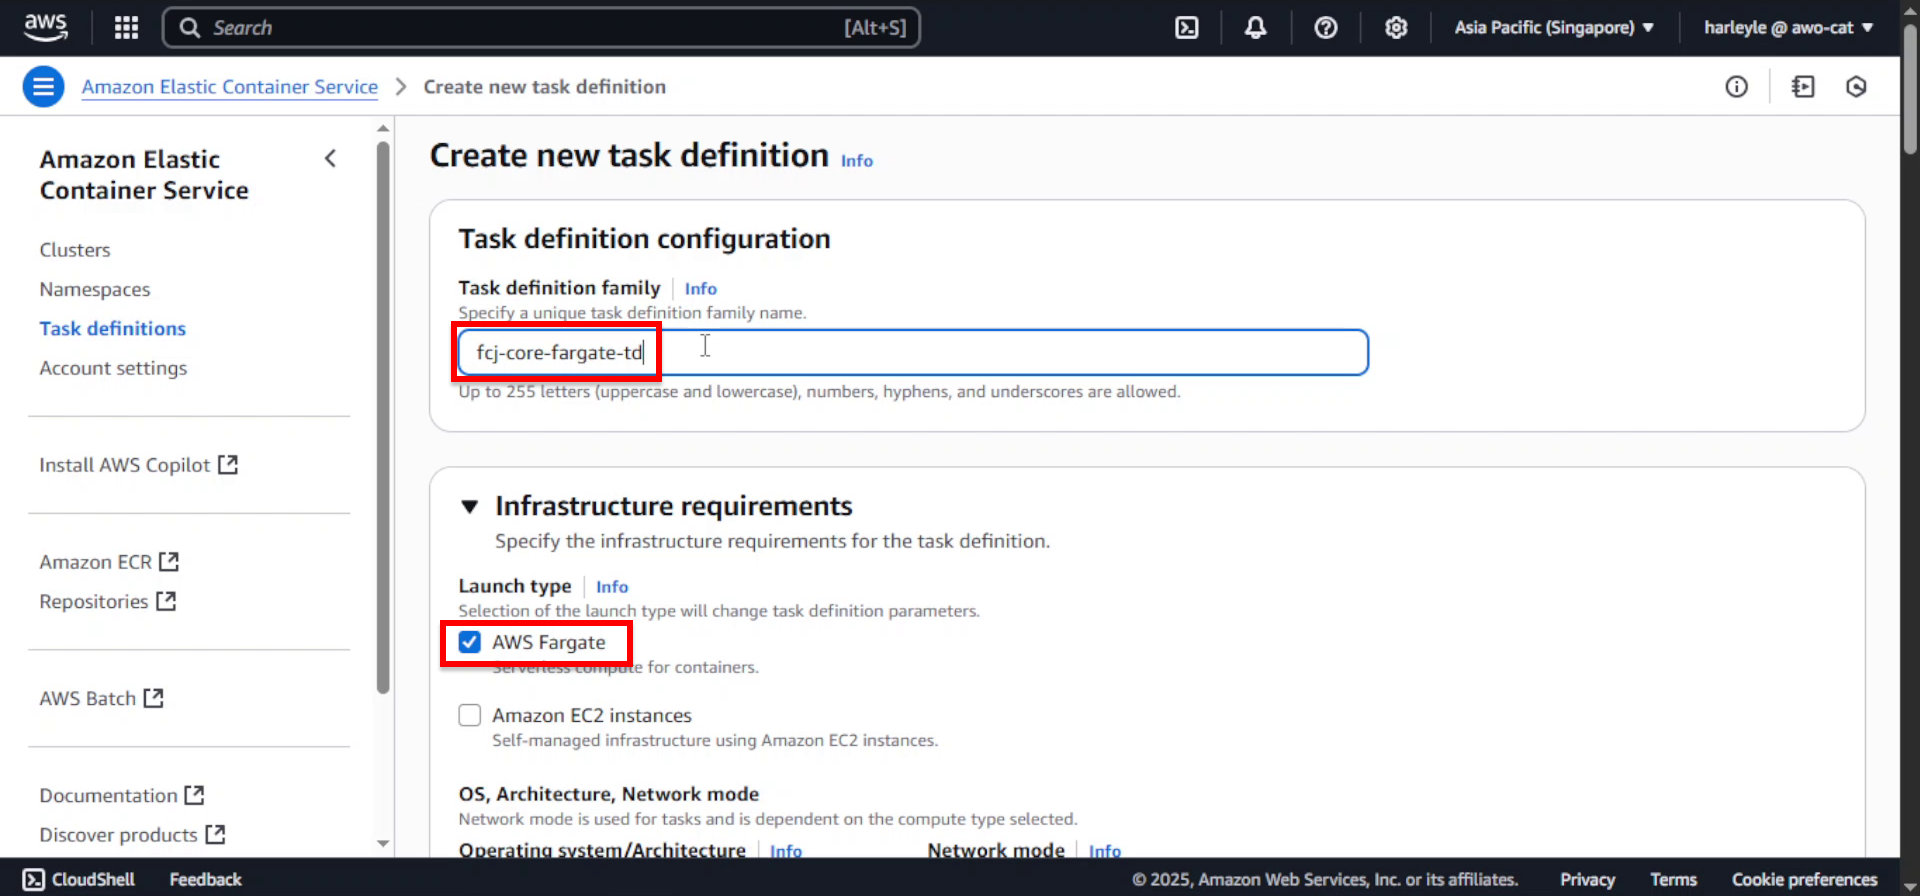
3. Configure the basic settings:
- Task definition family:
fcj-core-fargate-td - Launch type: AWS Fargate
4. Set the resource allocation:
- CPU: .25 vCPU
- Memory: .5 GB
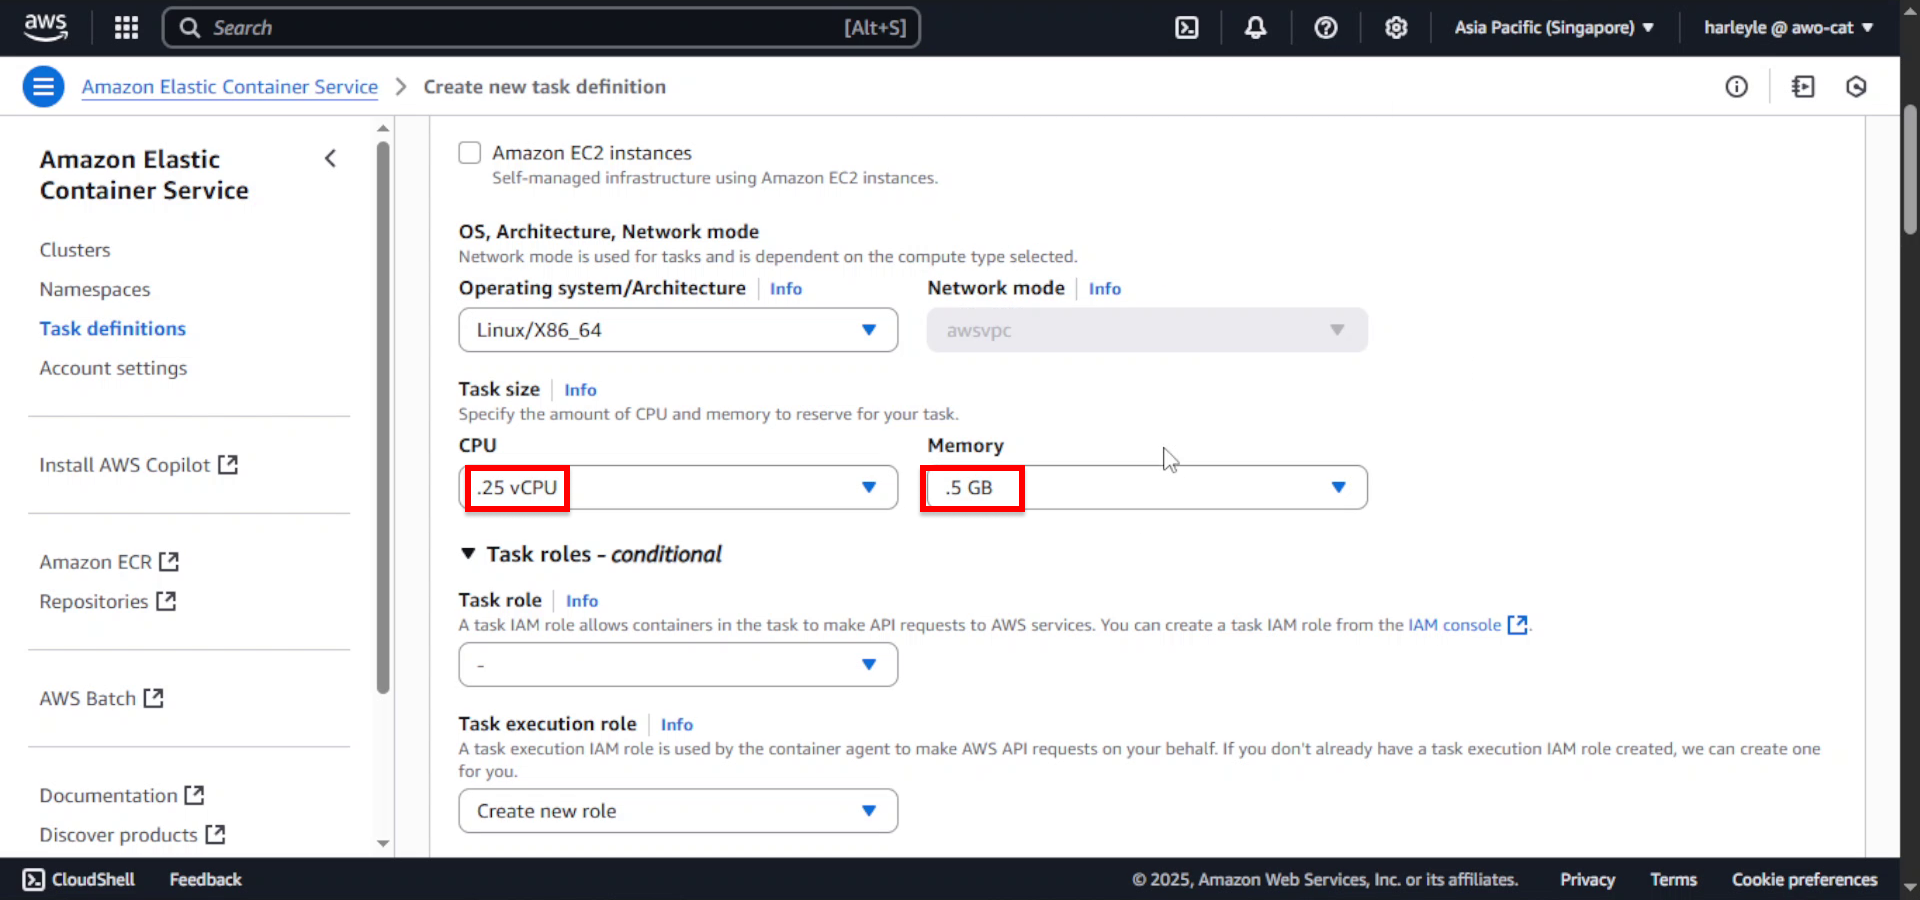
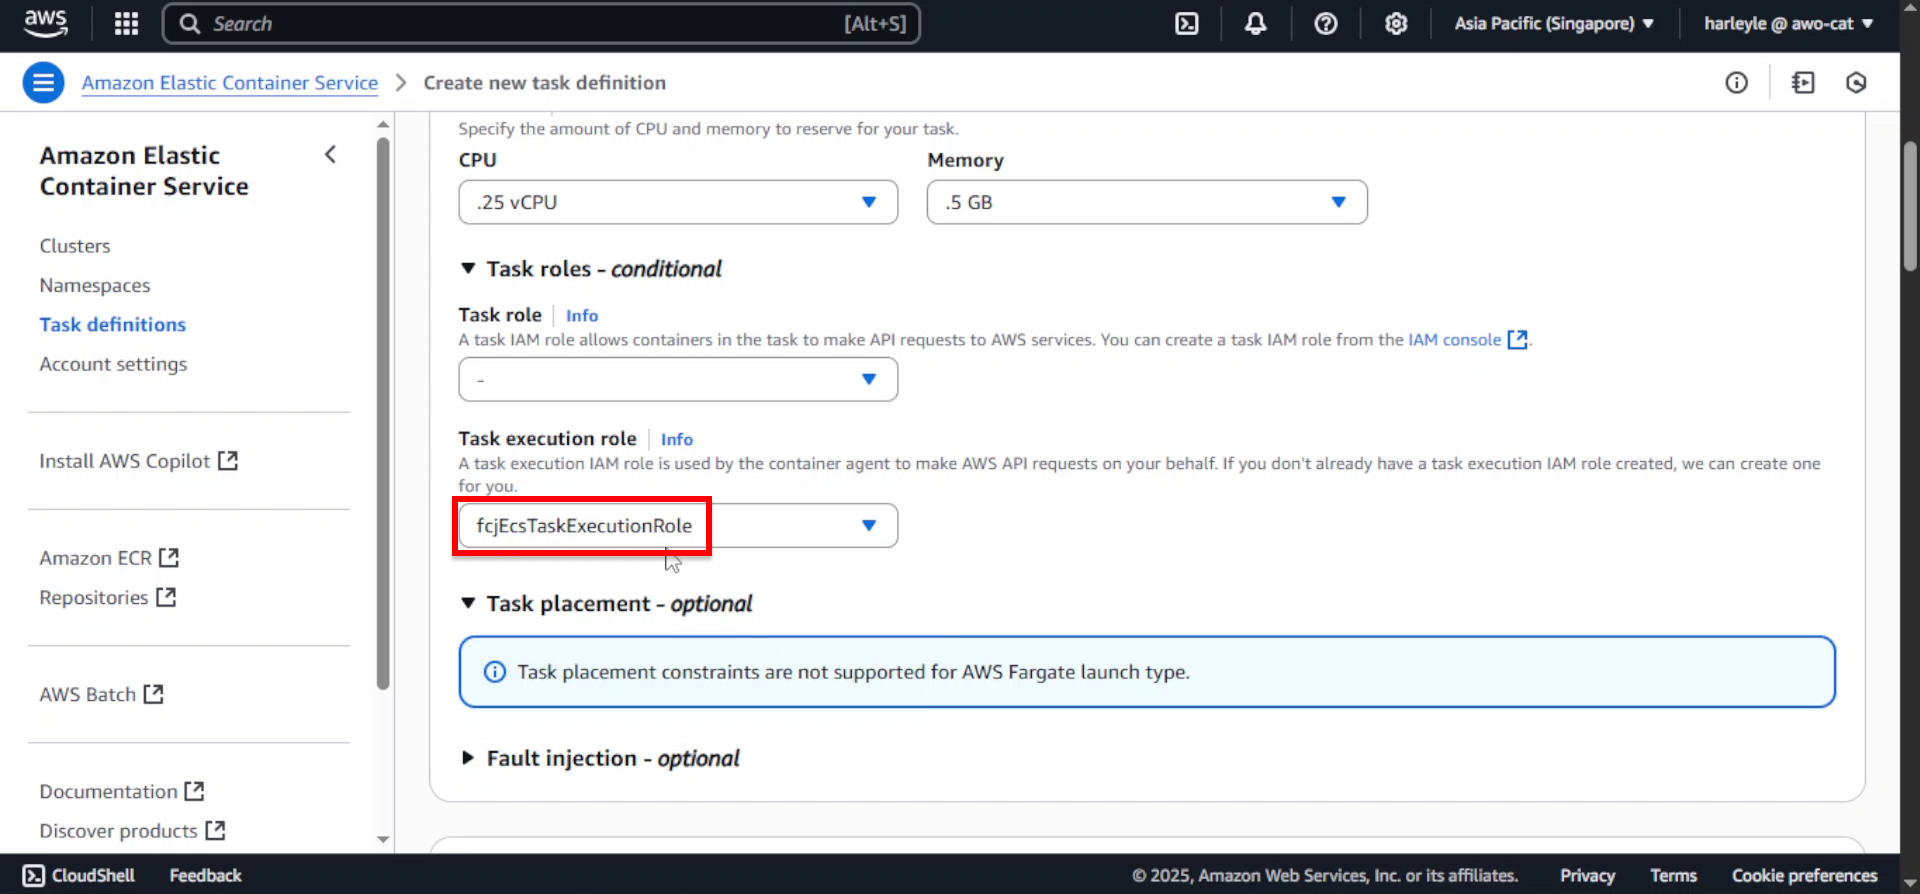
5. For Task execution role, select fcjEcsTaskExecutionRole.
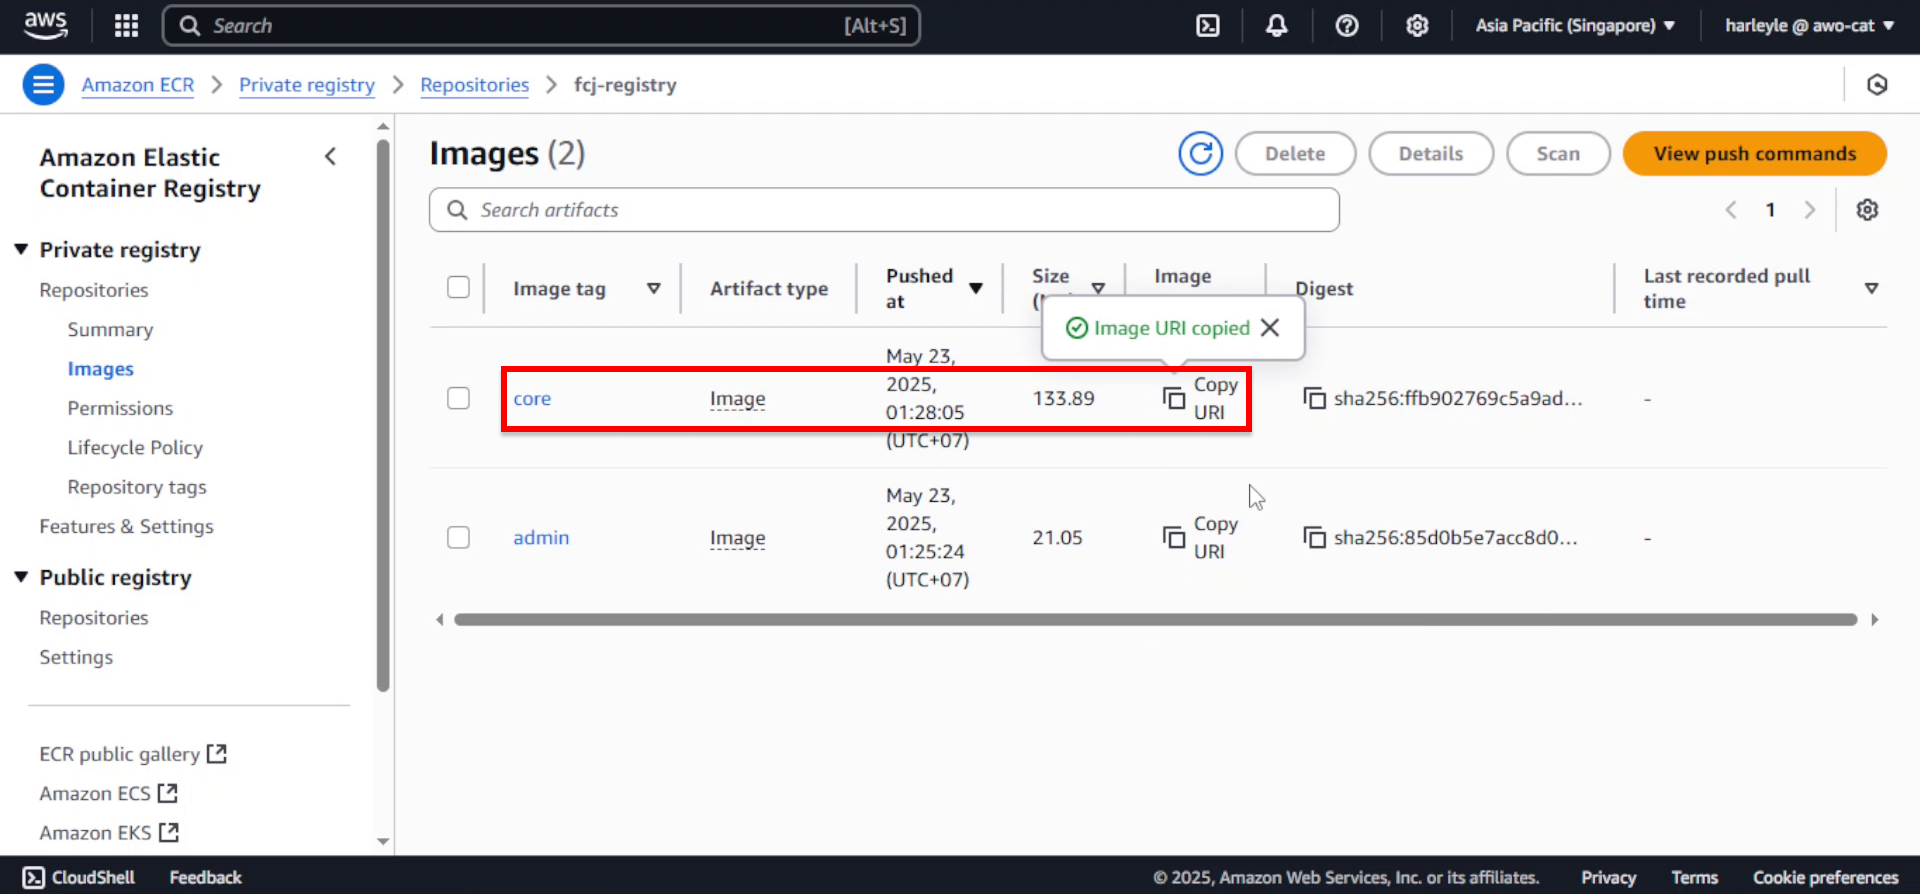
6. Open a new browser tab and navigate to Amazon ECR. Locate your fcj-registry repository and copy the core image URI.
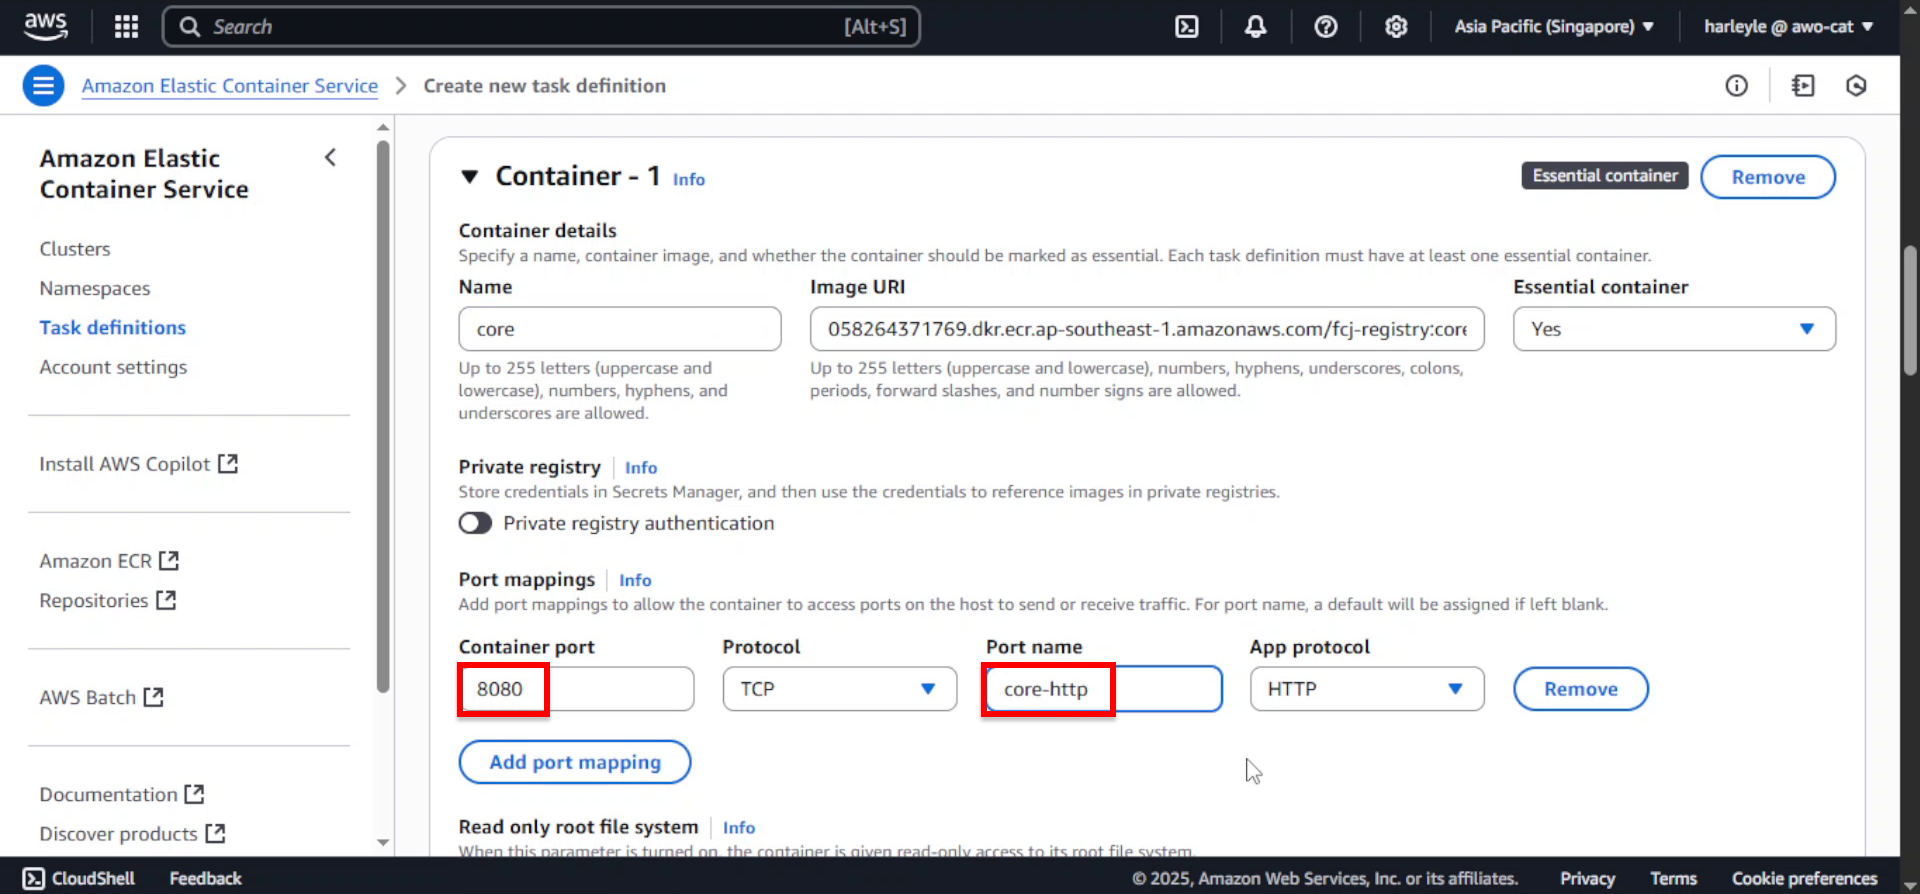
7. Return to the Create new task definition tab. In the Container details section, configure:
- Name:
core - Image URI: Paste the core image URI you copied from ECR
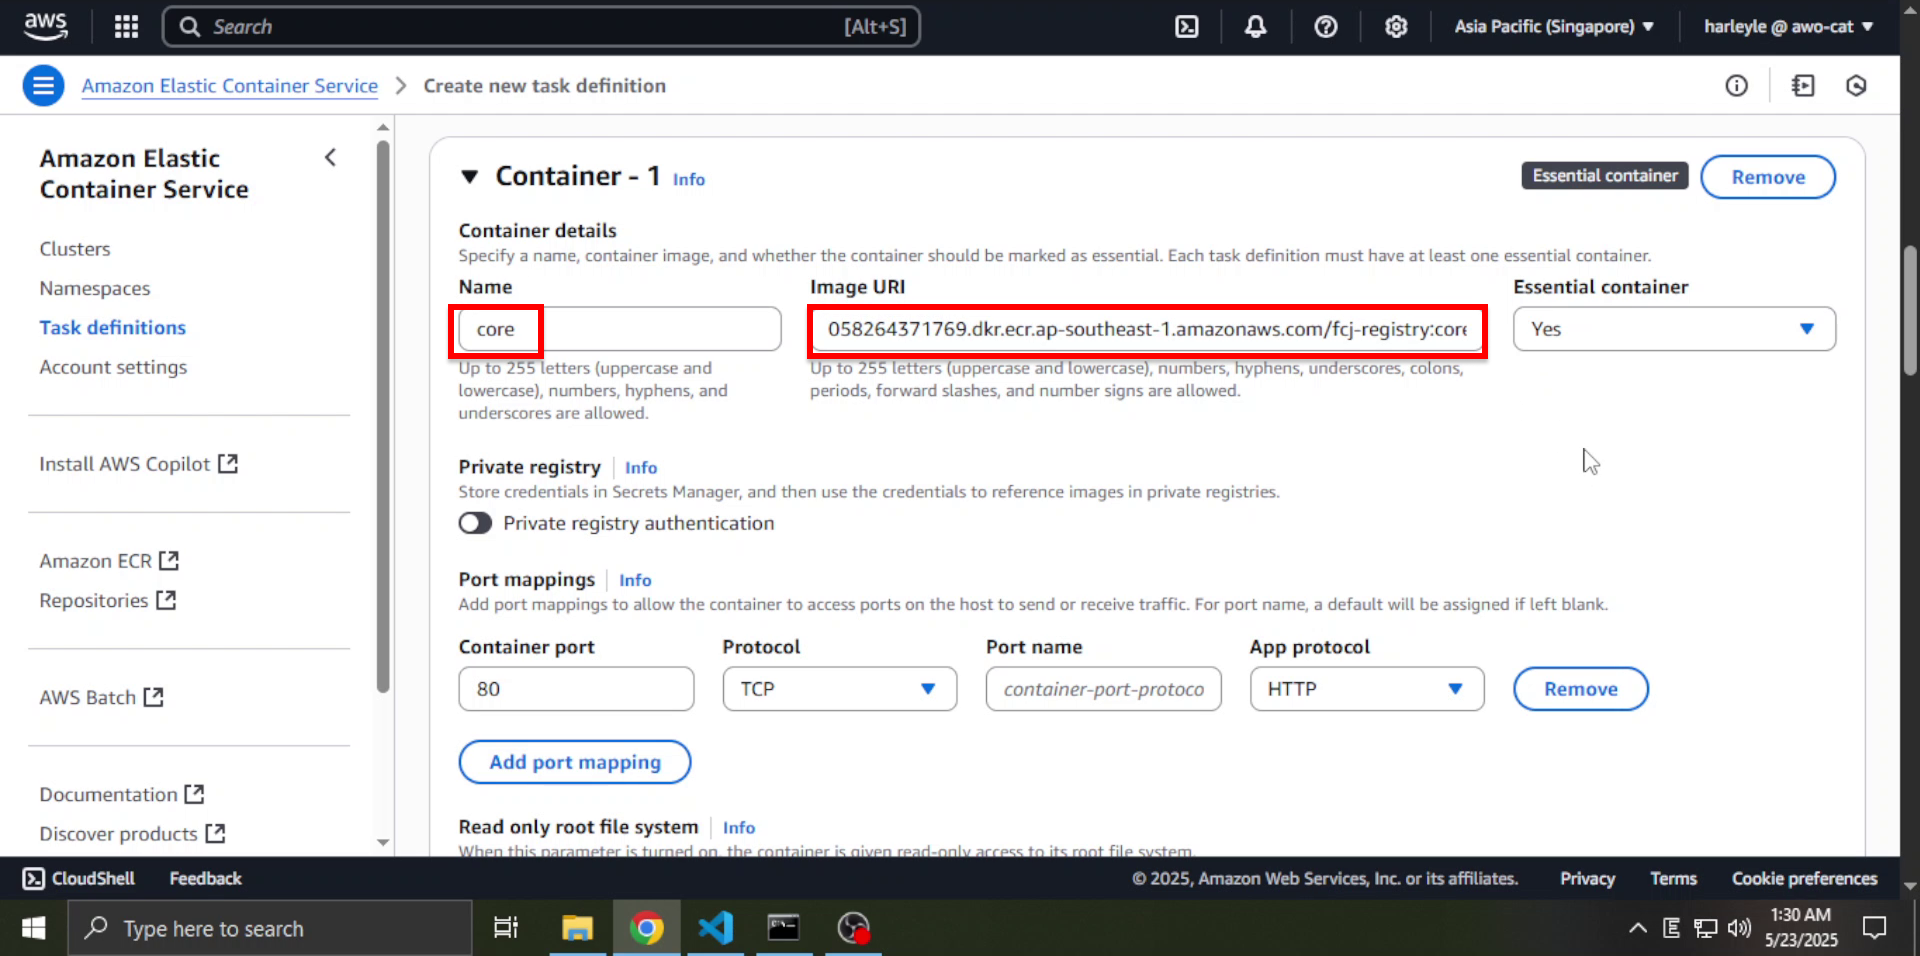
8. Configure the container networking:
- Container port:
8080 - Port name:
core-http
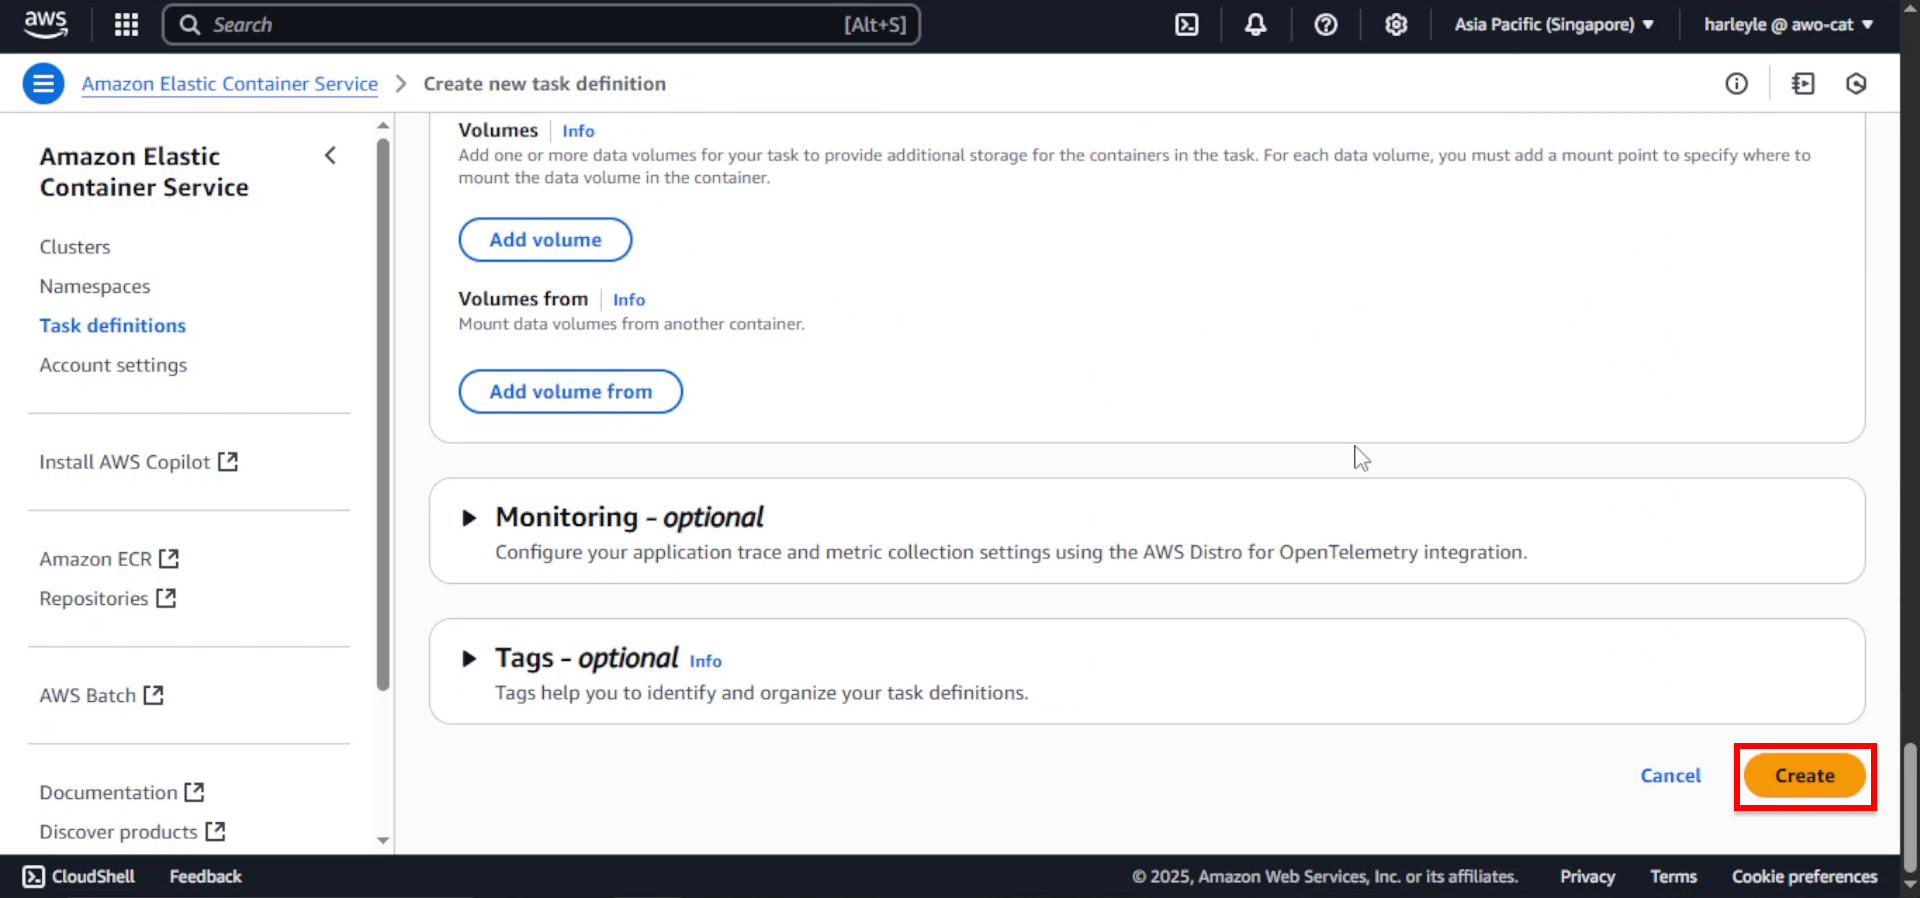
9. Review your configuration and click Create to finalize the task definition.
Inject Secrets from AWS Secrets Manager
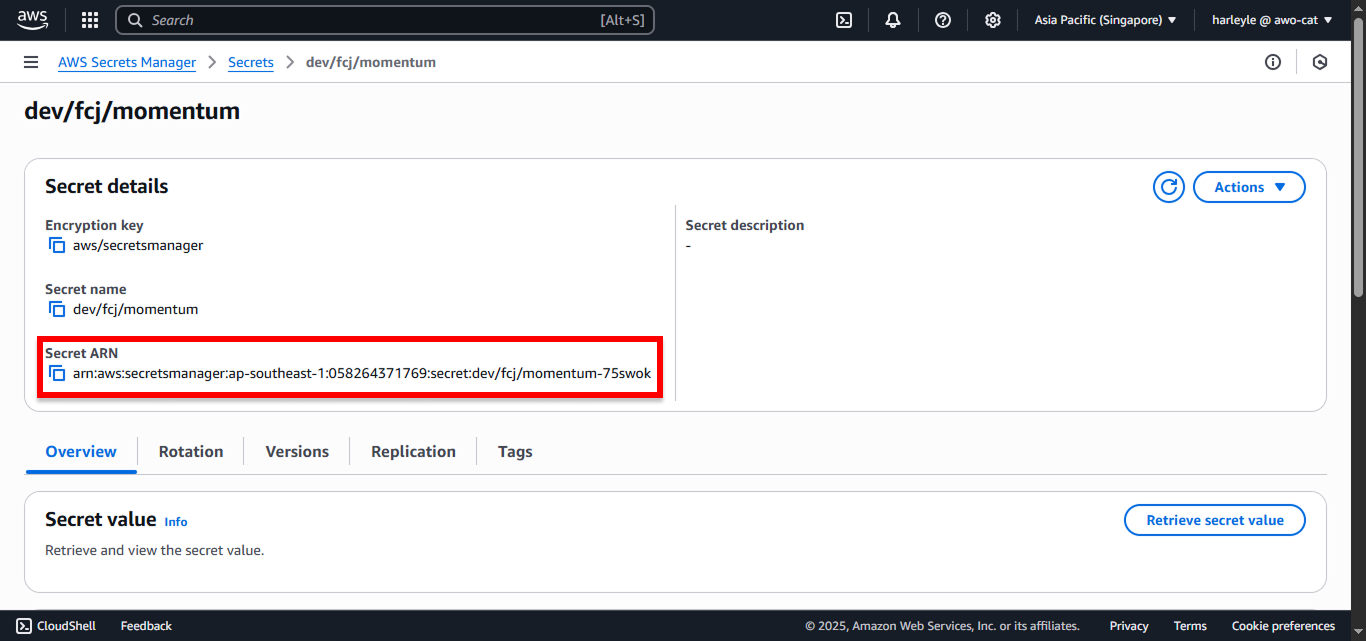
1. Open a new browser tab and navigate to the AWS Secrets Manager console. Locate your secret and copy its ARN.
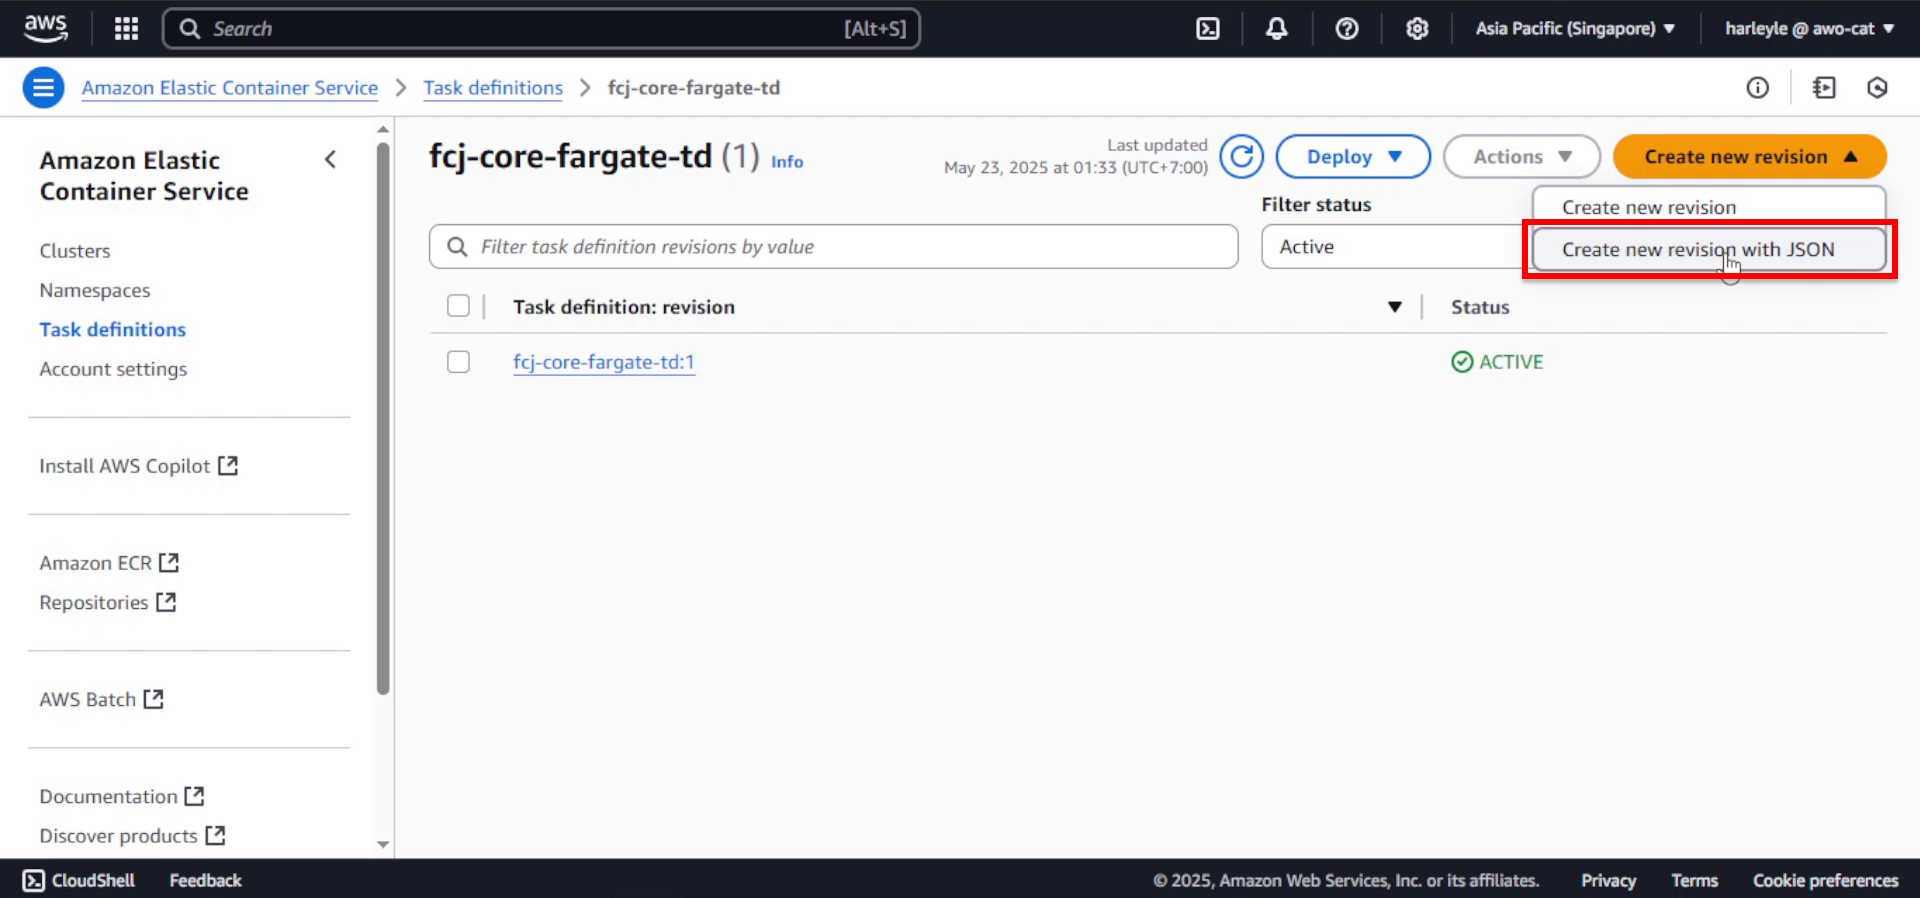
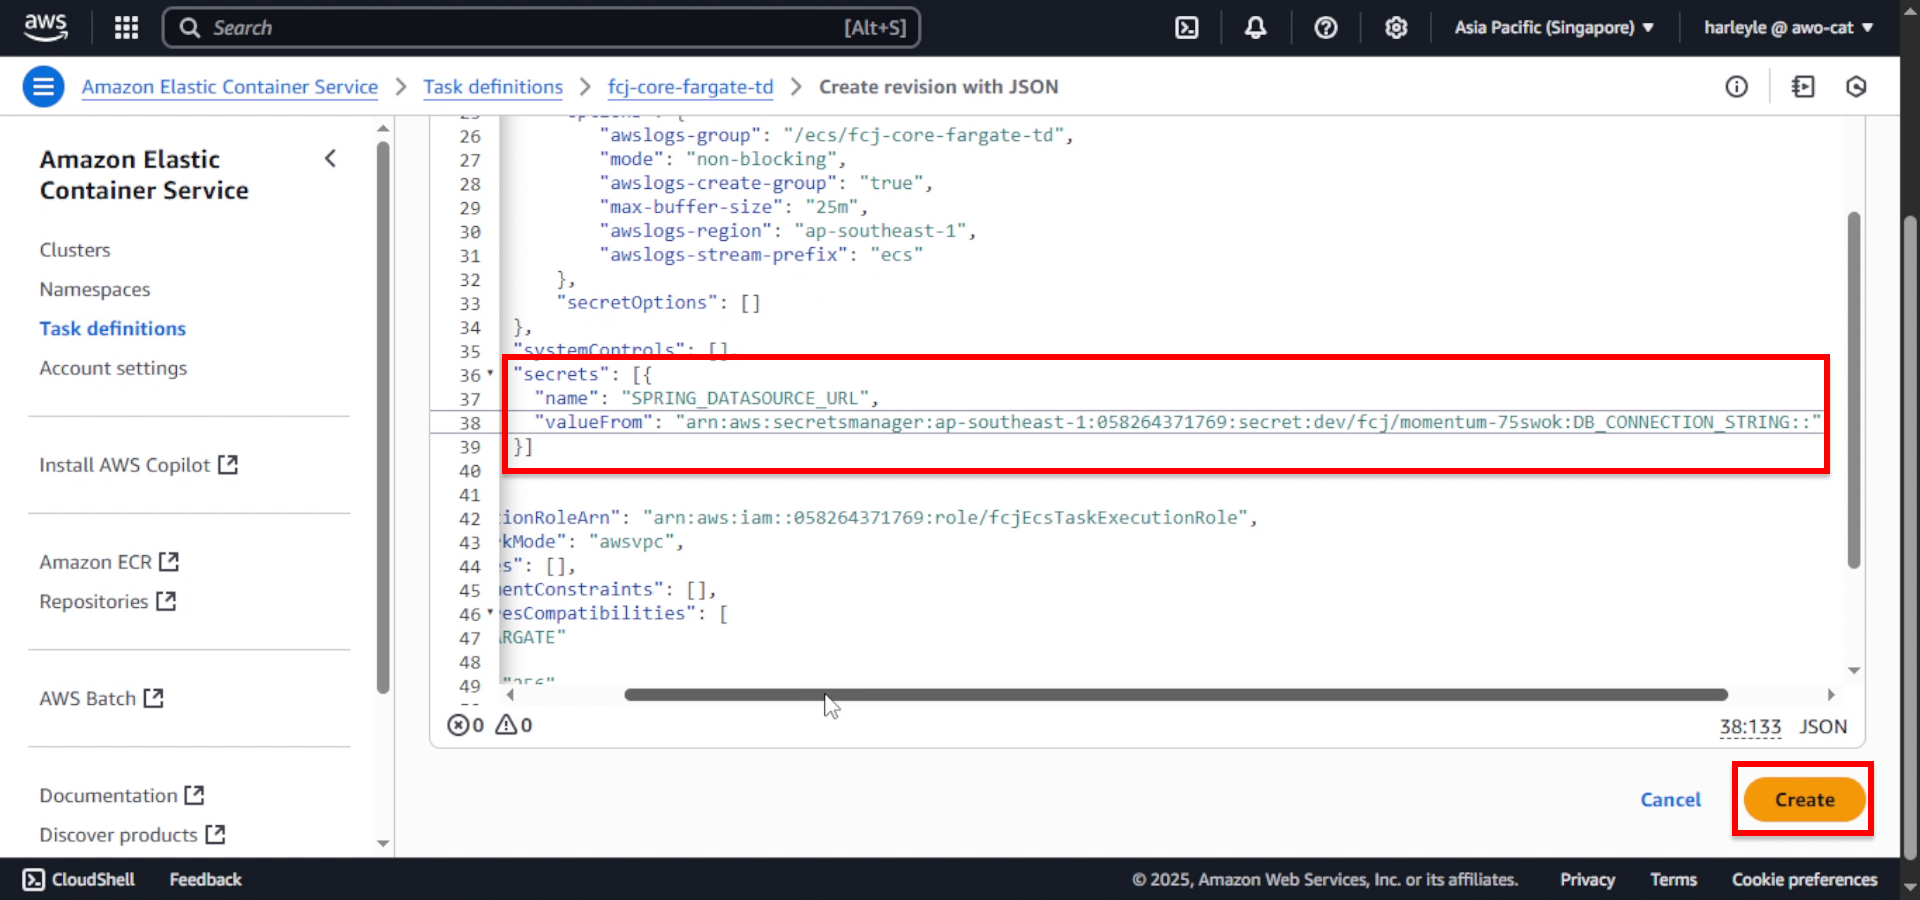
2. Return to the ECS console. Navigate to Task definitions, select fcj-core-fargate-td, then click Create new revision with JSON.
3. In the JSON editor, locate the containerDefinitions array. Find the container definition with “name”: “core” and add the following secrets block:
Important: Replace <secret-arn> with the ARN you copied in step 1.
"secrets": [
    {
        "name": "SPRING_DATASOURCE_URL",
        "valueFrom": "<secret-arn>:DB_CONNECTION_STRING::"
    }
]
4. Your complete containerDefinitions should look like this:
"containerDefinitions": [
    {
        "name": "core",
        "image": "058264371769.dkr.ecr.ap-southeast-1.amazonaws.com/fcj-registry:core",
        "cpu": 0,
        "portMappings": [
            {
                "name": "core-http",
                "containerPort": 8080,
                "hostPort": 8080,
                "protocol": "tcp",
                "appProtocol": "http"
            }
        ],
        "essential": true,
        "environment": [],
        "mountPoints": [],
        "volumesFrom": [],
        "logConfiguration": {
            "logDriver": "awslogs",
            "options": {
                "awslogs-group": "/ecs/fcj-core-fargate-td",
                "mode": "non-blocking",
                "awslogs-create-group": "true",
                "max-buffer-size": "25m",
                "awslogs-region": "ap-southeast-1",
                "awslogs-stream-prefix": "ecs"
            }
        },
        "systemControls": [],
        "secrets": [
            {
                "name": "SPRING_DATASOURCE_URL",
                "valueFrom": "arn:aws:secretsmanager:ap-southeast-1:0123456789:secret:dev/fcj/momentum-75swok:DB_CONNECTION_STRING::"
            }
        ]
    }
]
5. Click Create to save the new revision.
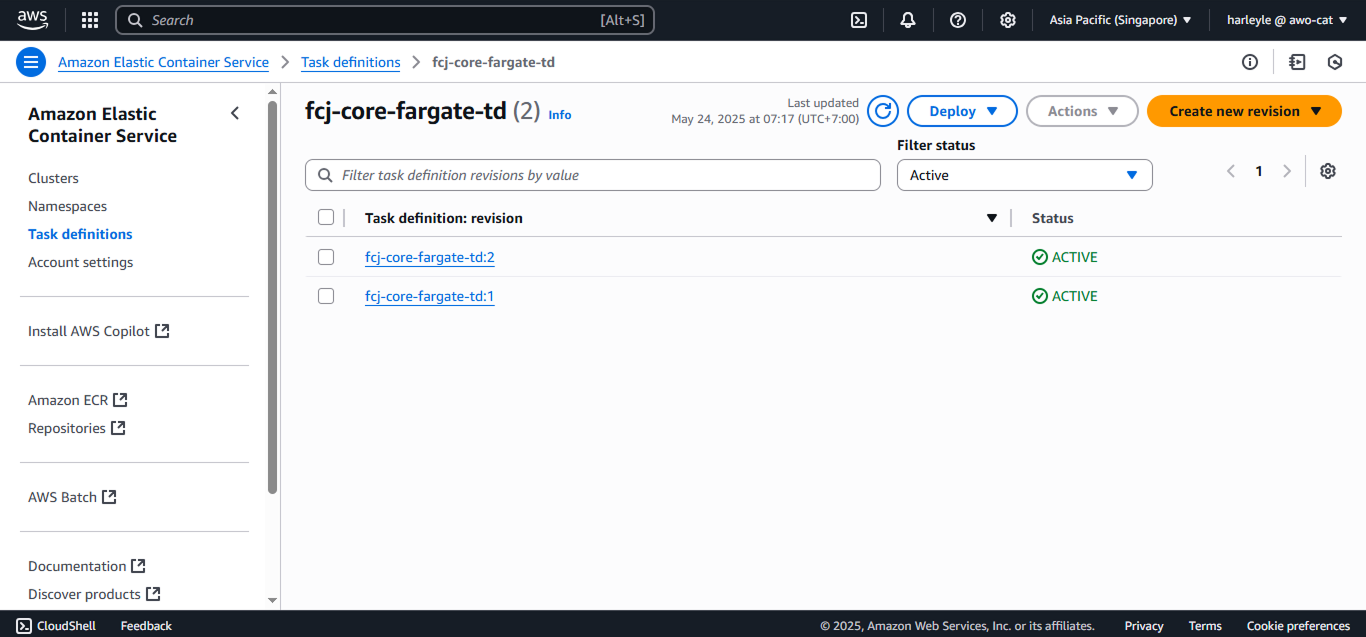
6. Verify that the latest revision is now 2.
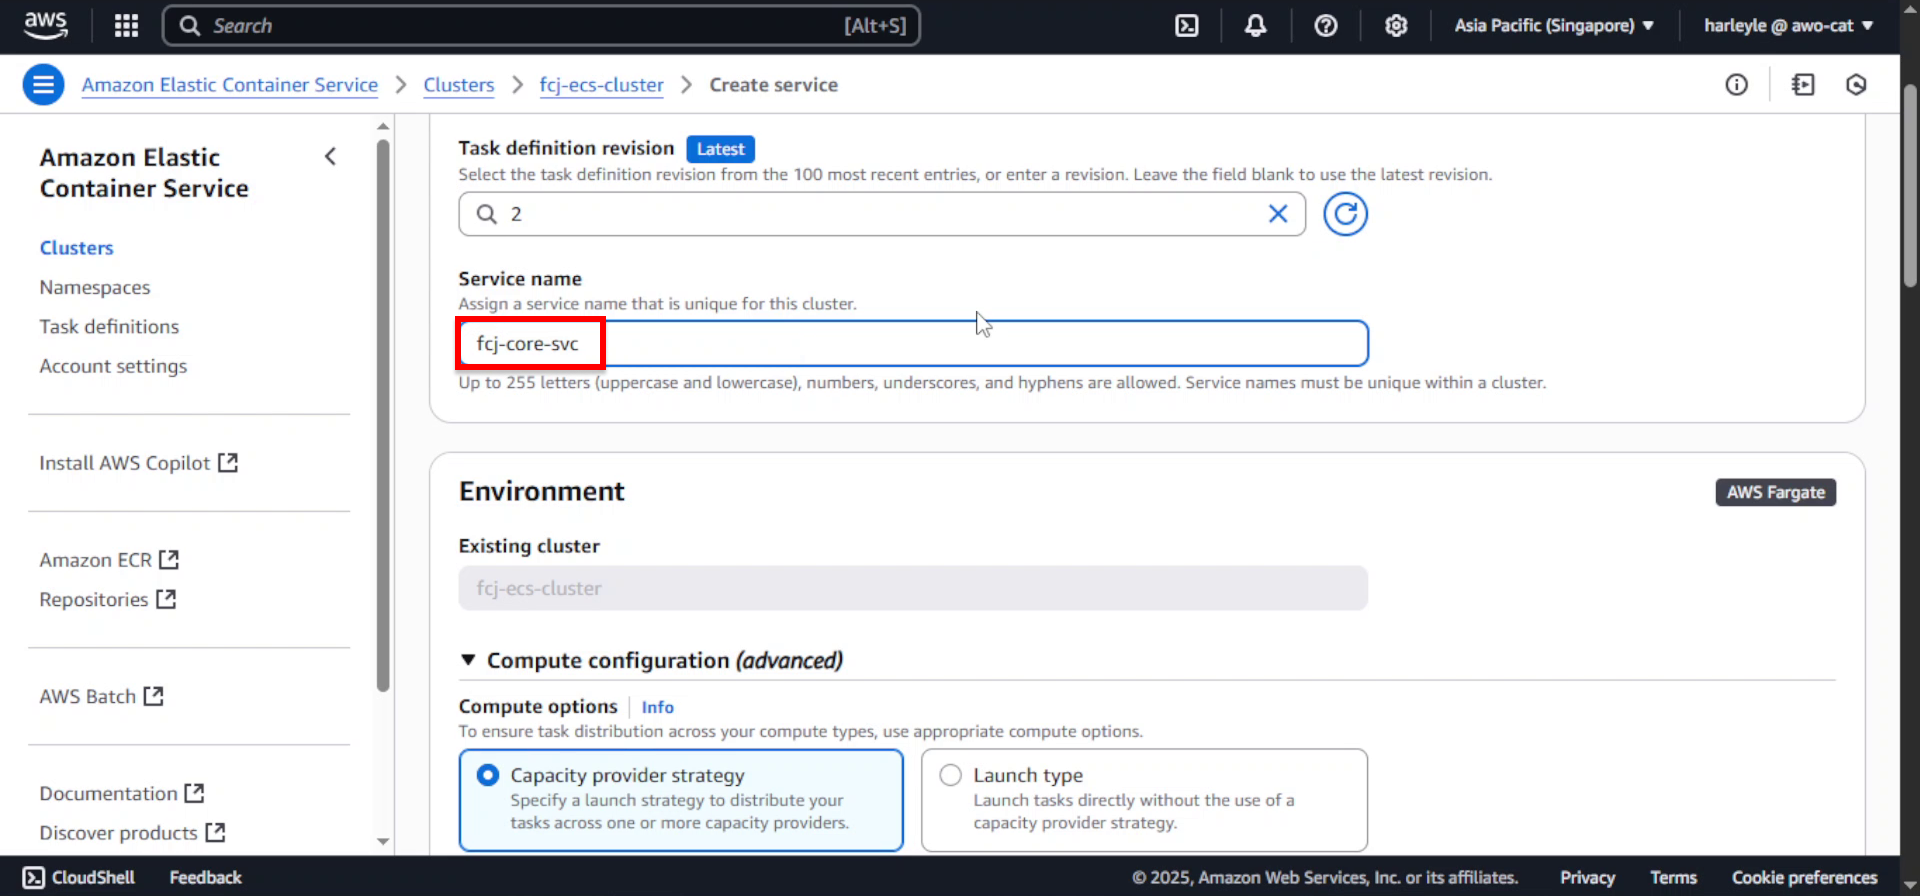
Launch the Core Application Service
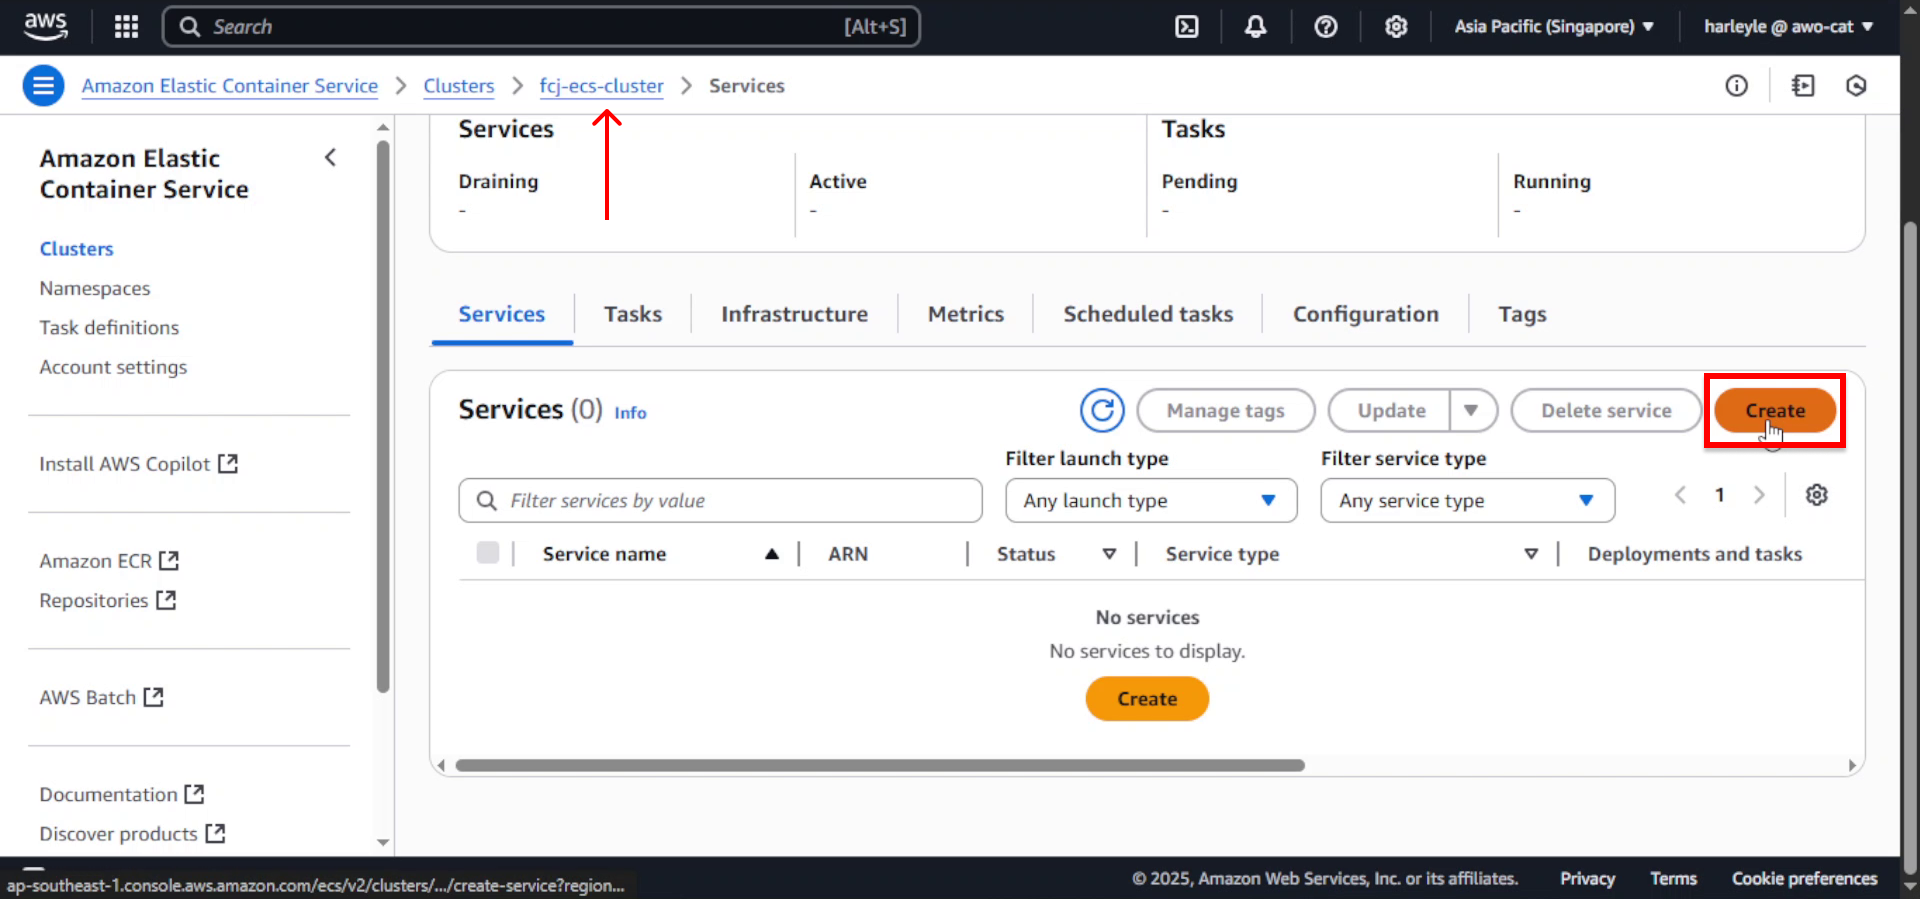
1. Navigate to your ECS cluster, scroll down to Services, and click Create.
2. Configure the task definition:
- Task definition family: Select fcj-core-fargate-td
- Task definition revision: Select the LATEST version (2)
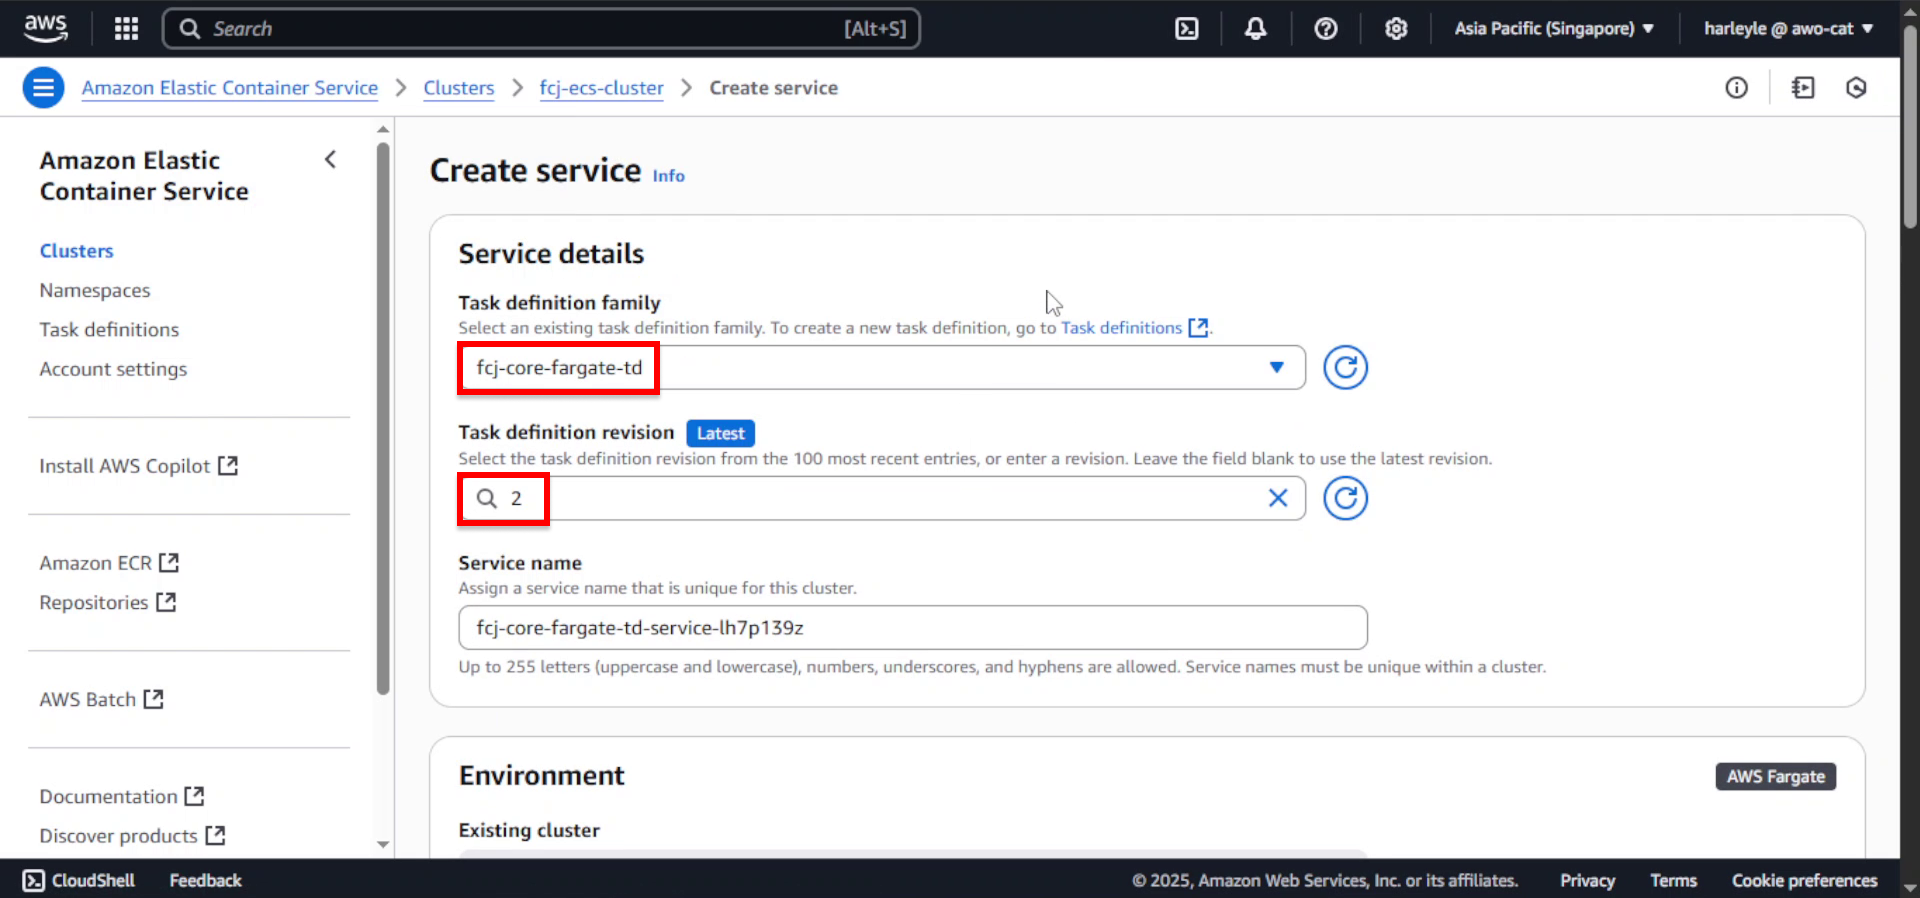
3. For Service name, enter fcj-core-svc.
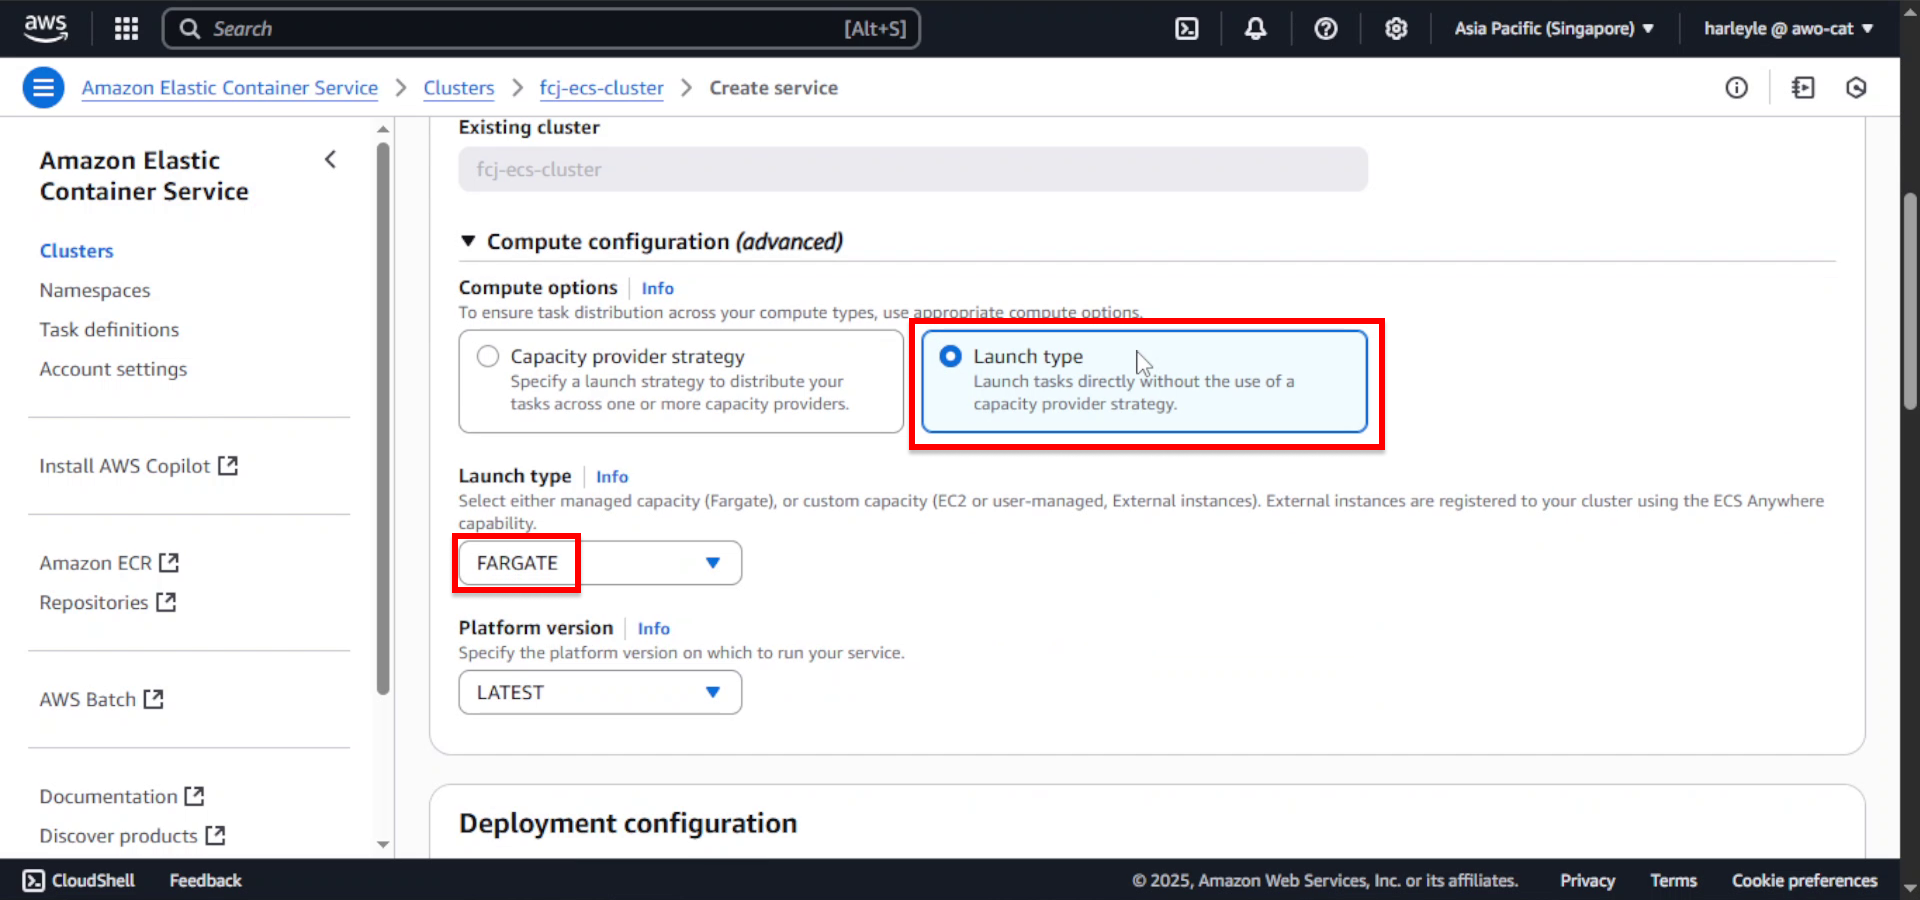
4. Configure compute options:
- Compute options: Select Launch type
- Launch type: Select FARGATE
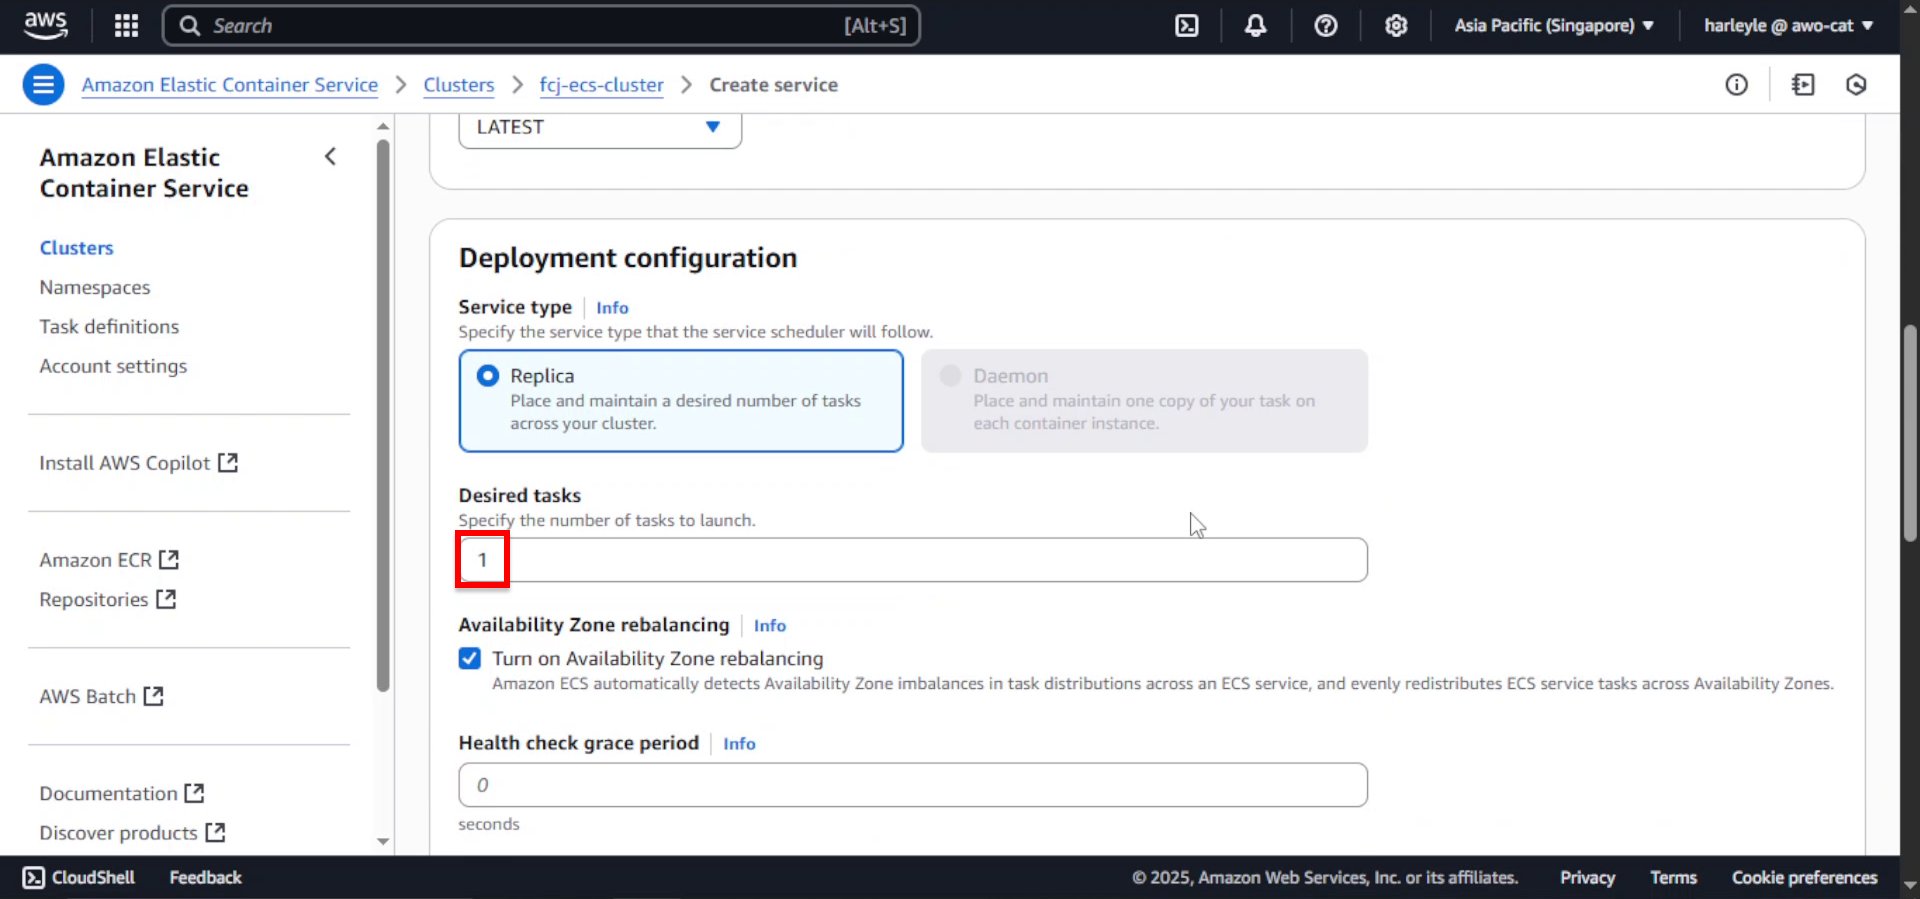
5. For Desired tasks, enter 1.
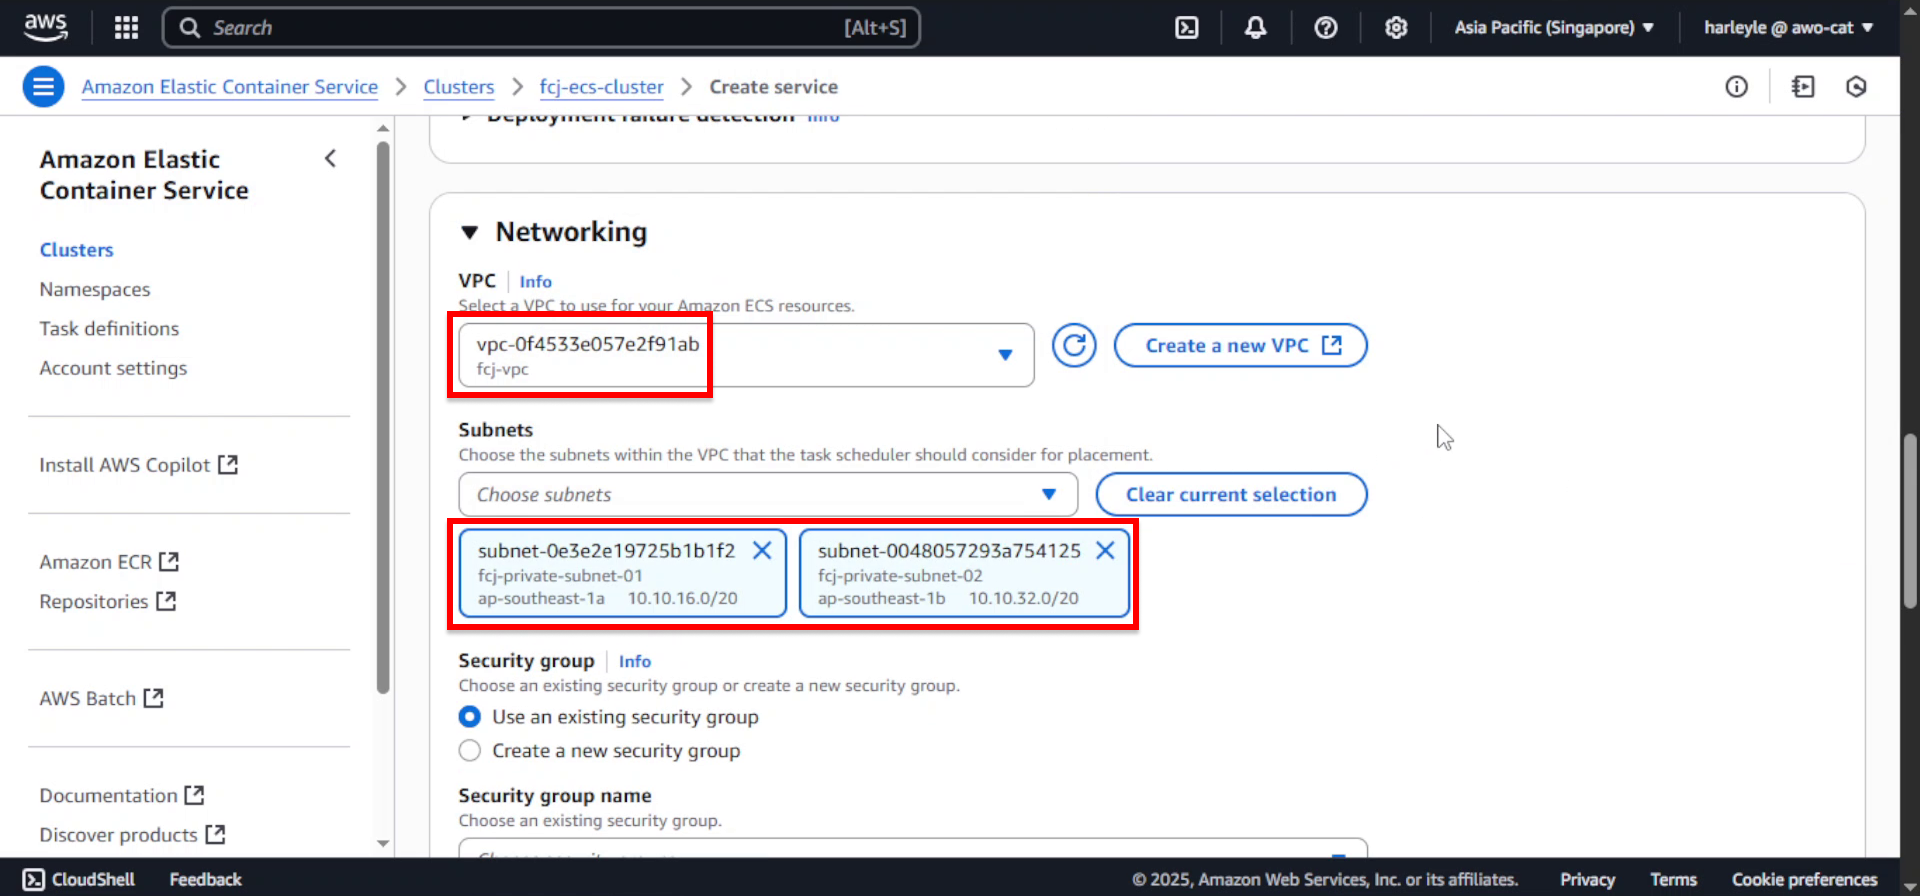
6. Scroll to Networking and expand the section.
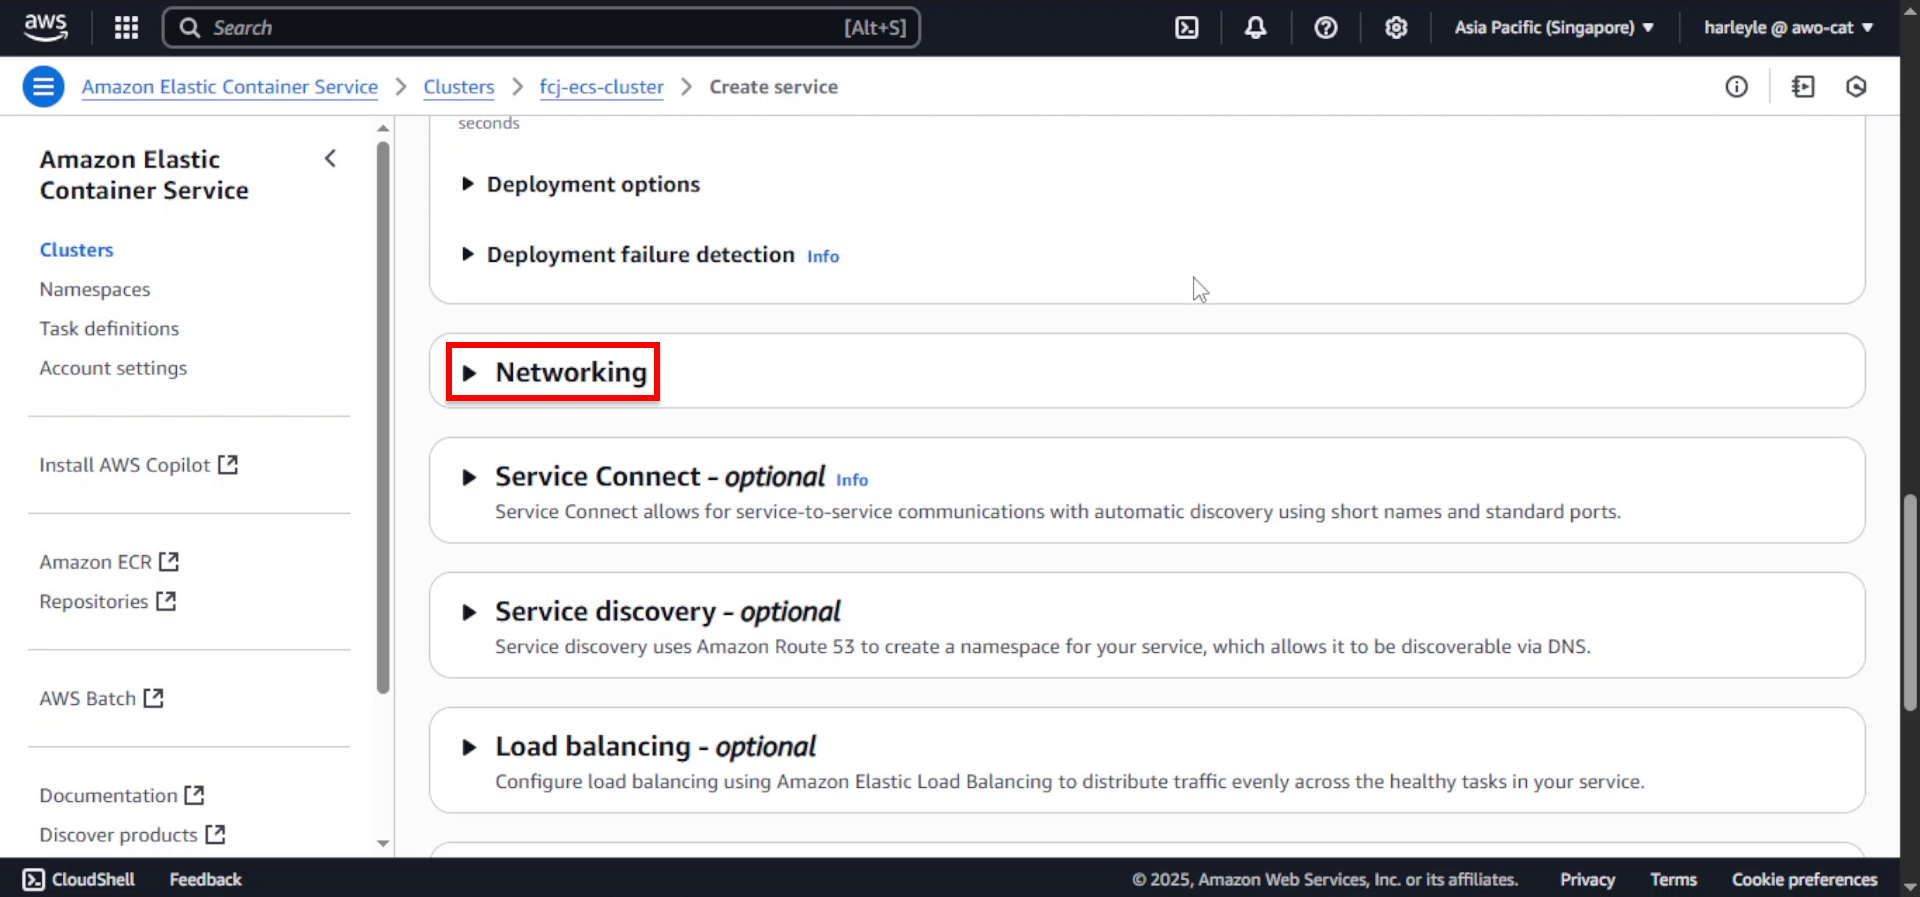
7. Configure networking:
- VPC: Select fcj-vpc
- Subnets: Select the two private subnets
8. Configure security group:
- Security group: Select Use an existing security group
- Select fcj-private-sg
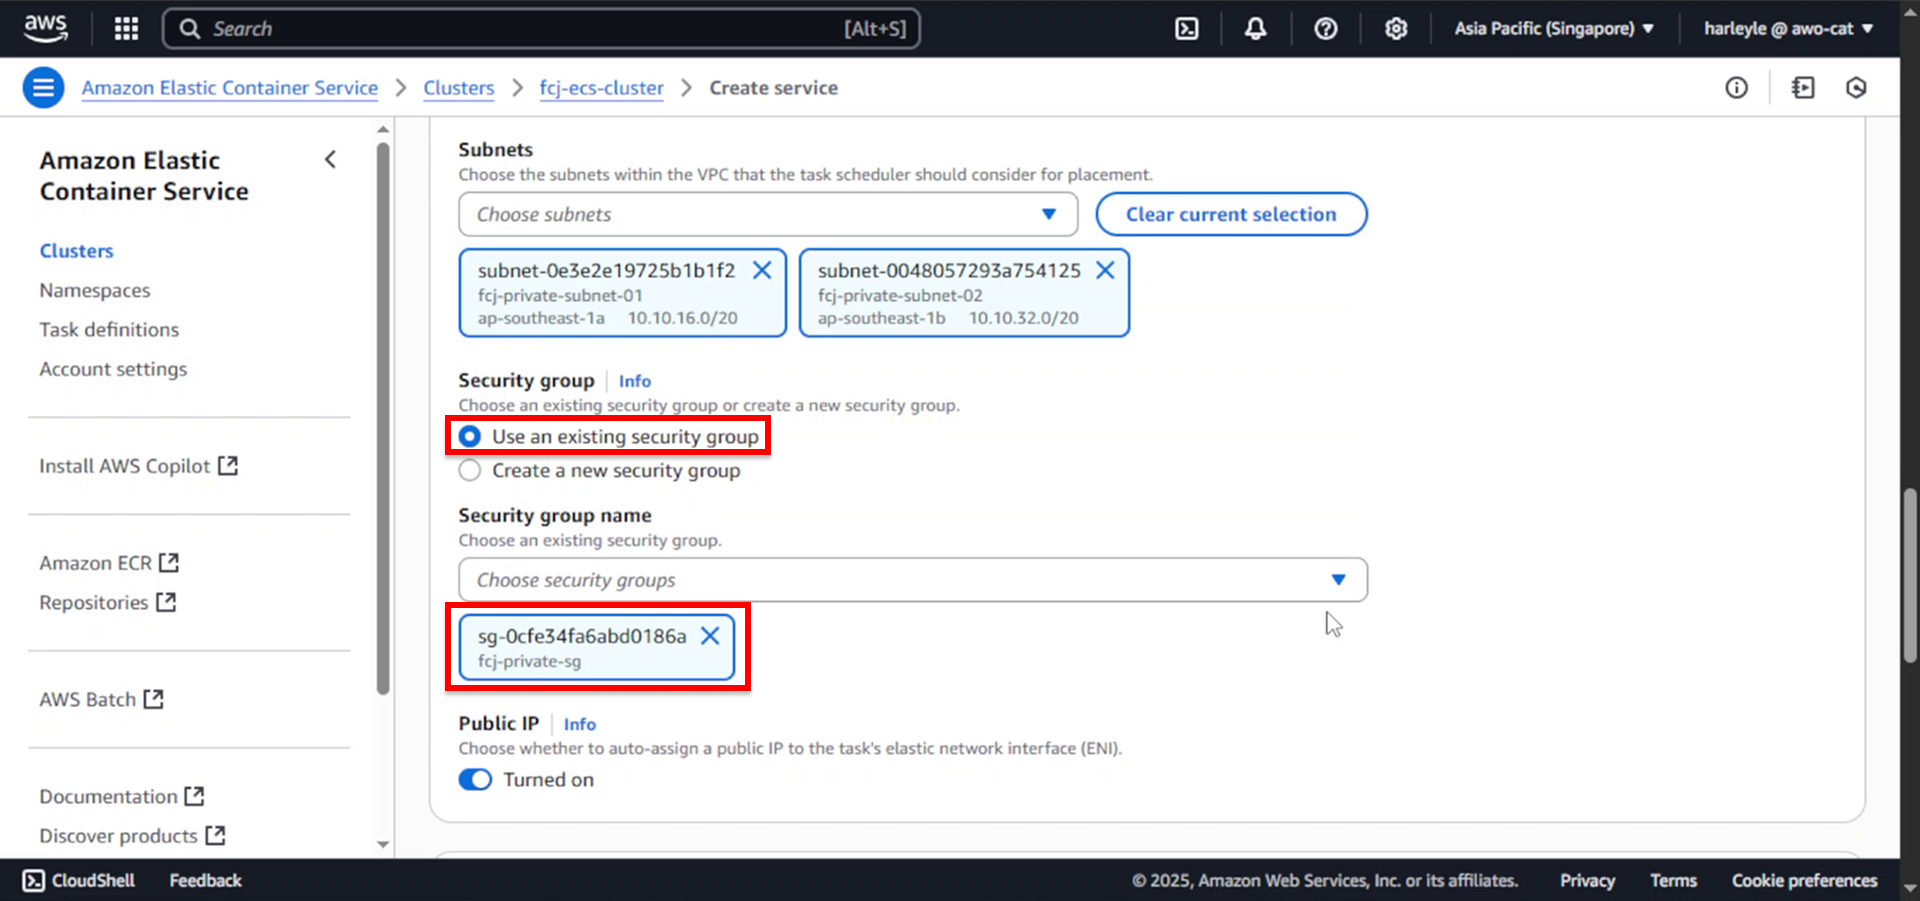
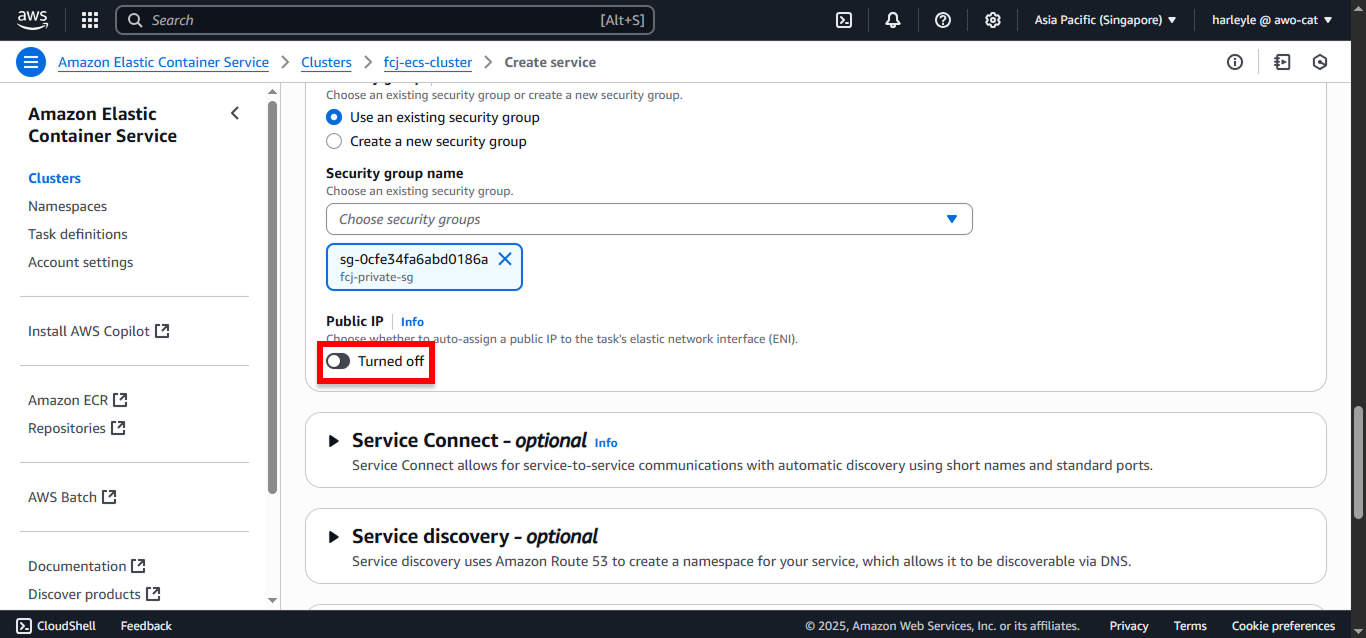
9. Disable Public IP assignment.
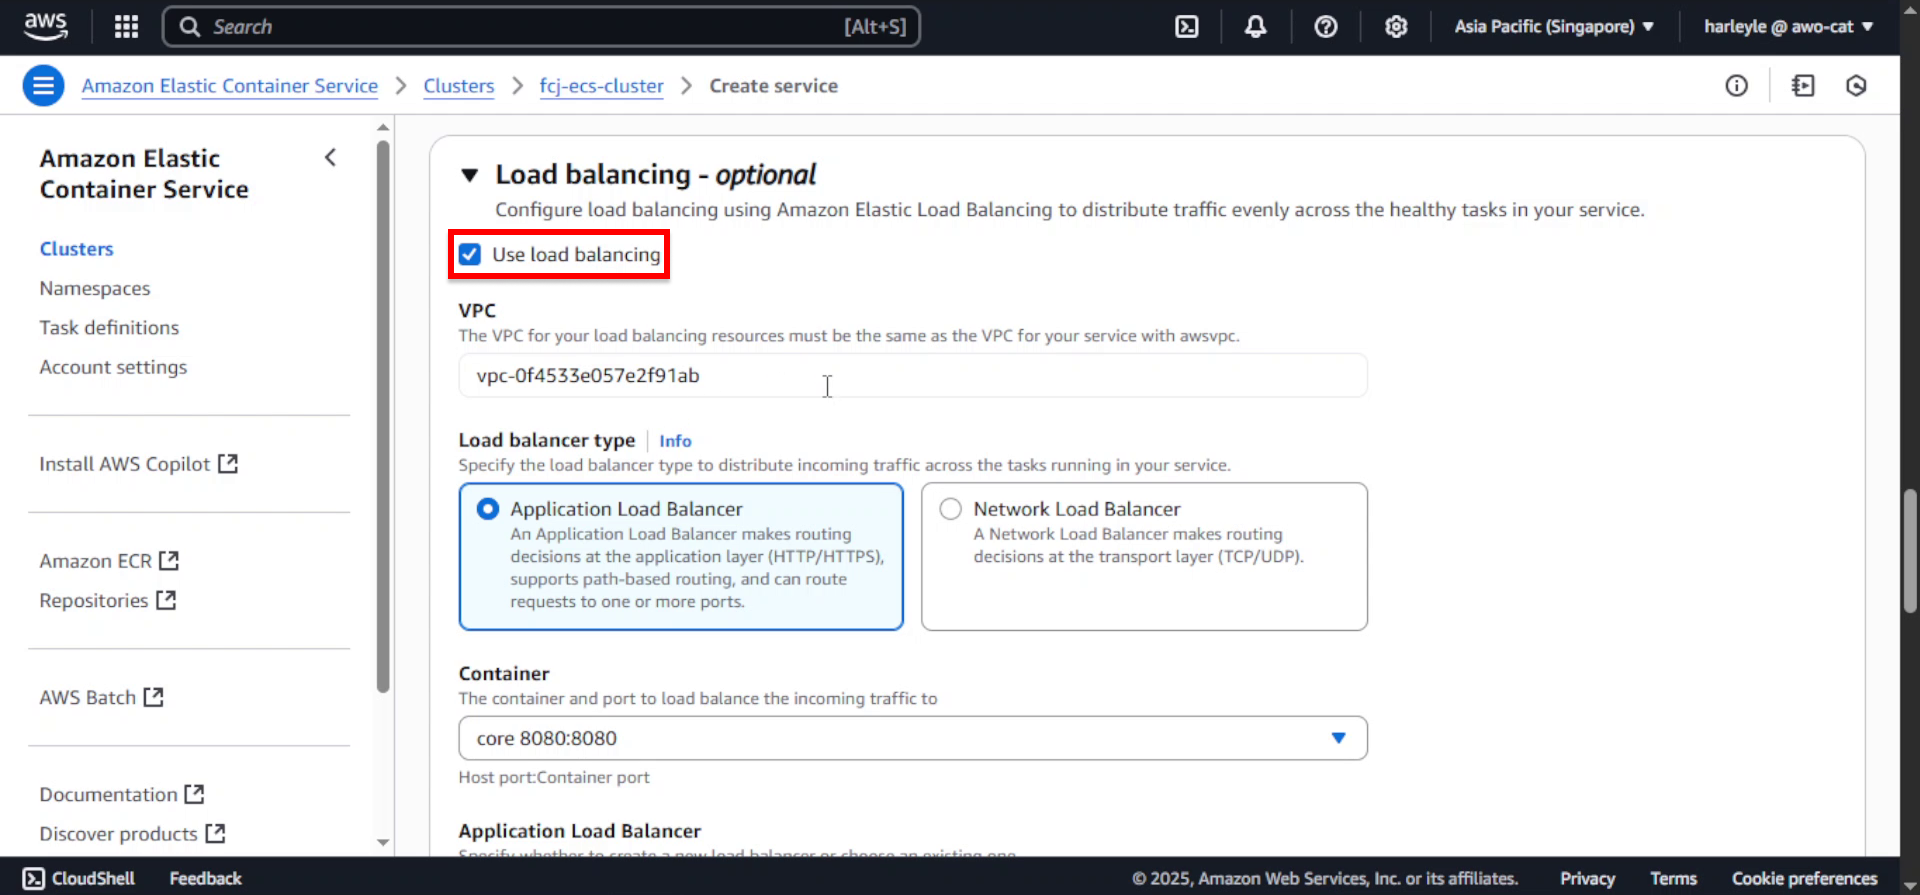
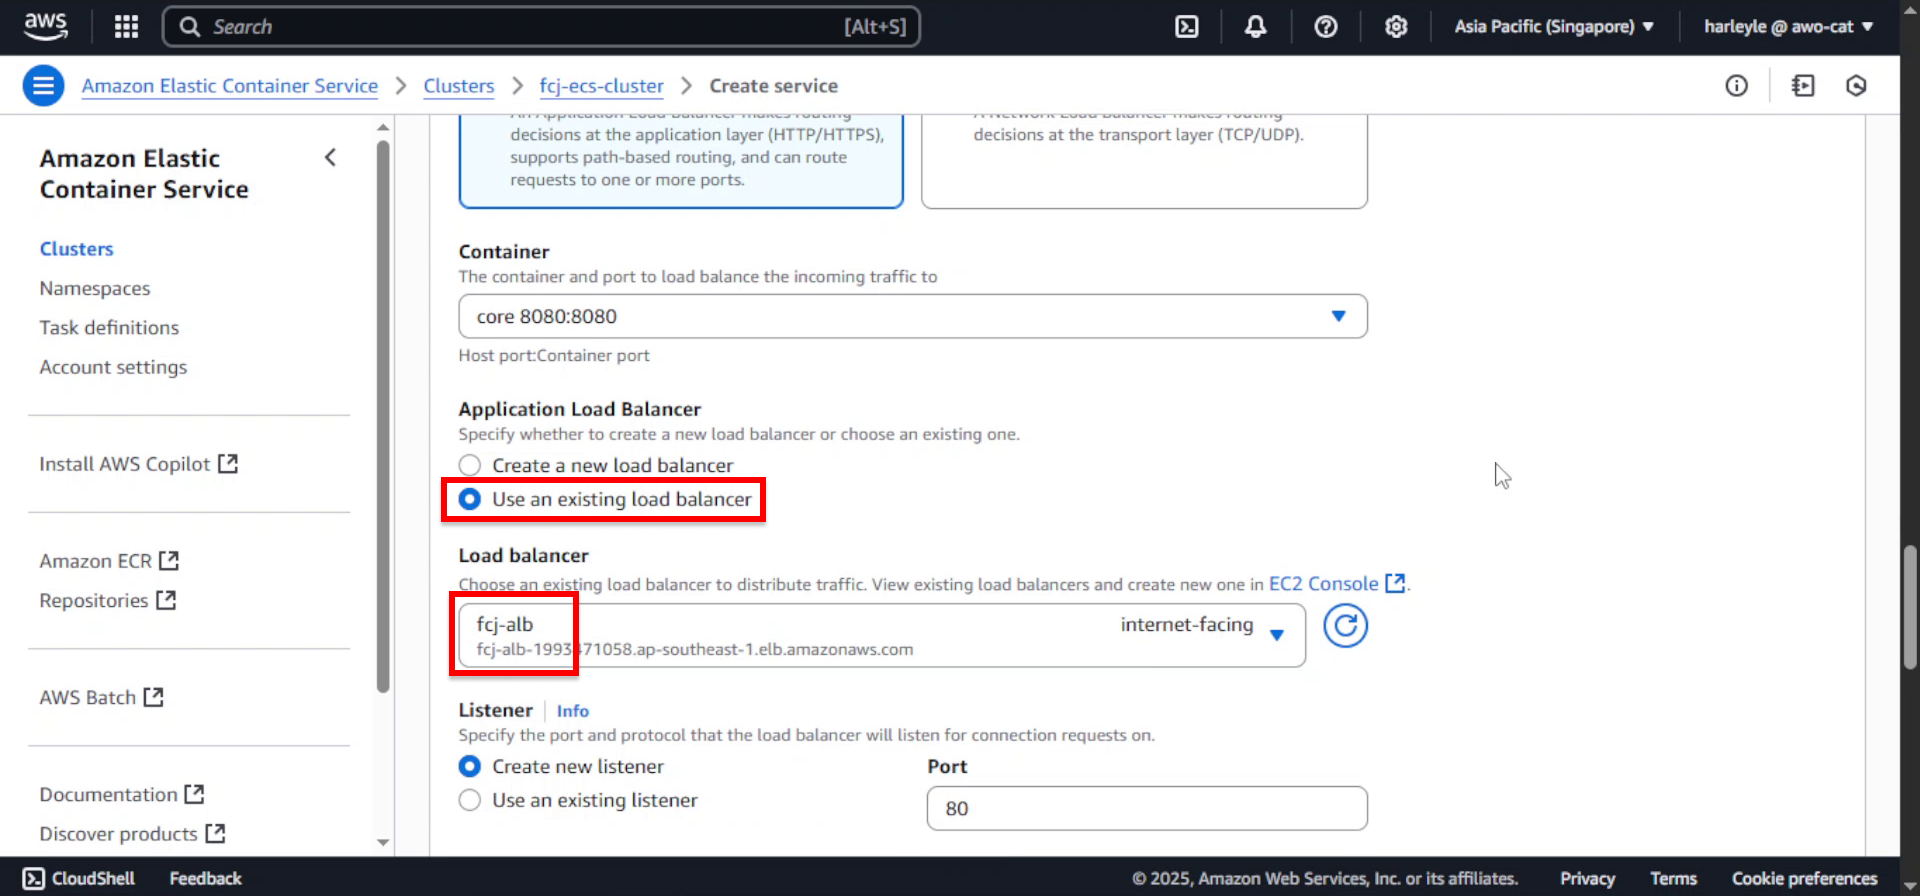
10. Configure load balancing:
- Scroll down to Load balancing section
- Check Use load balancing
- Load balancer type: Select Application Load Balancer
11. Select Use an existing load balancer and choose fcj-alb.
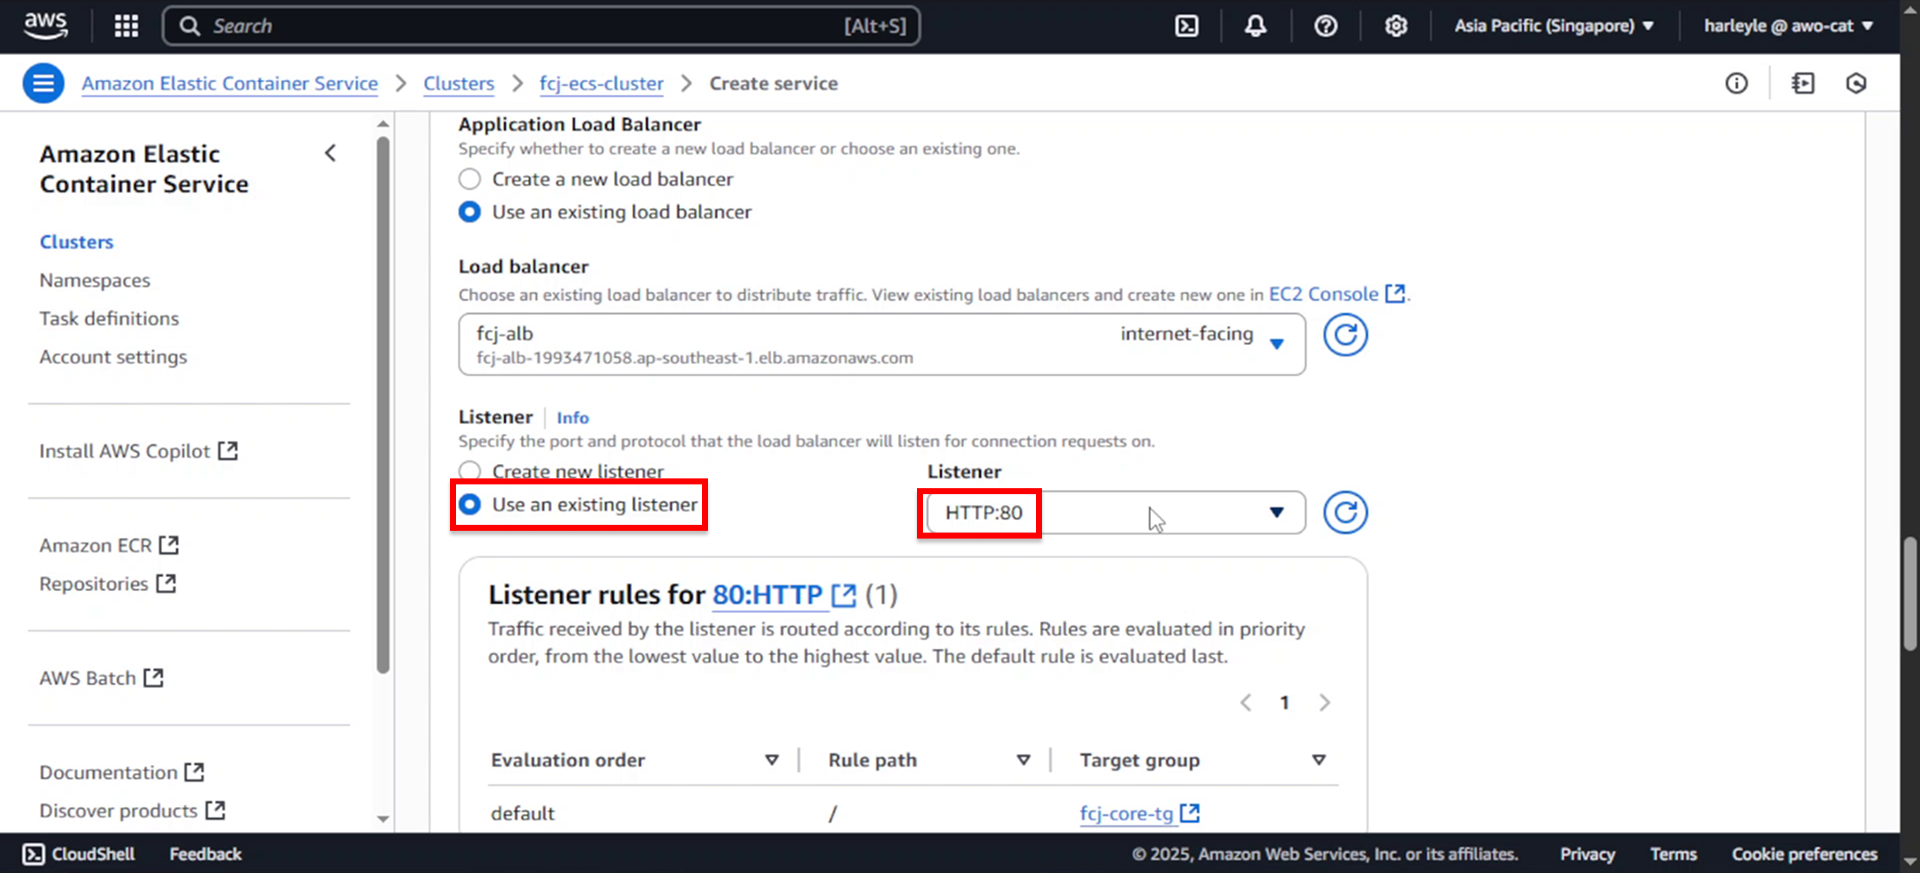
12. Configure listener: - Listener: Select Use an existing listener - Select HTTP:80
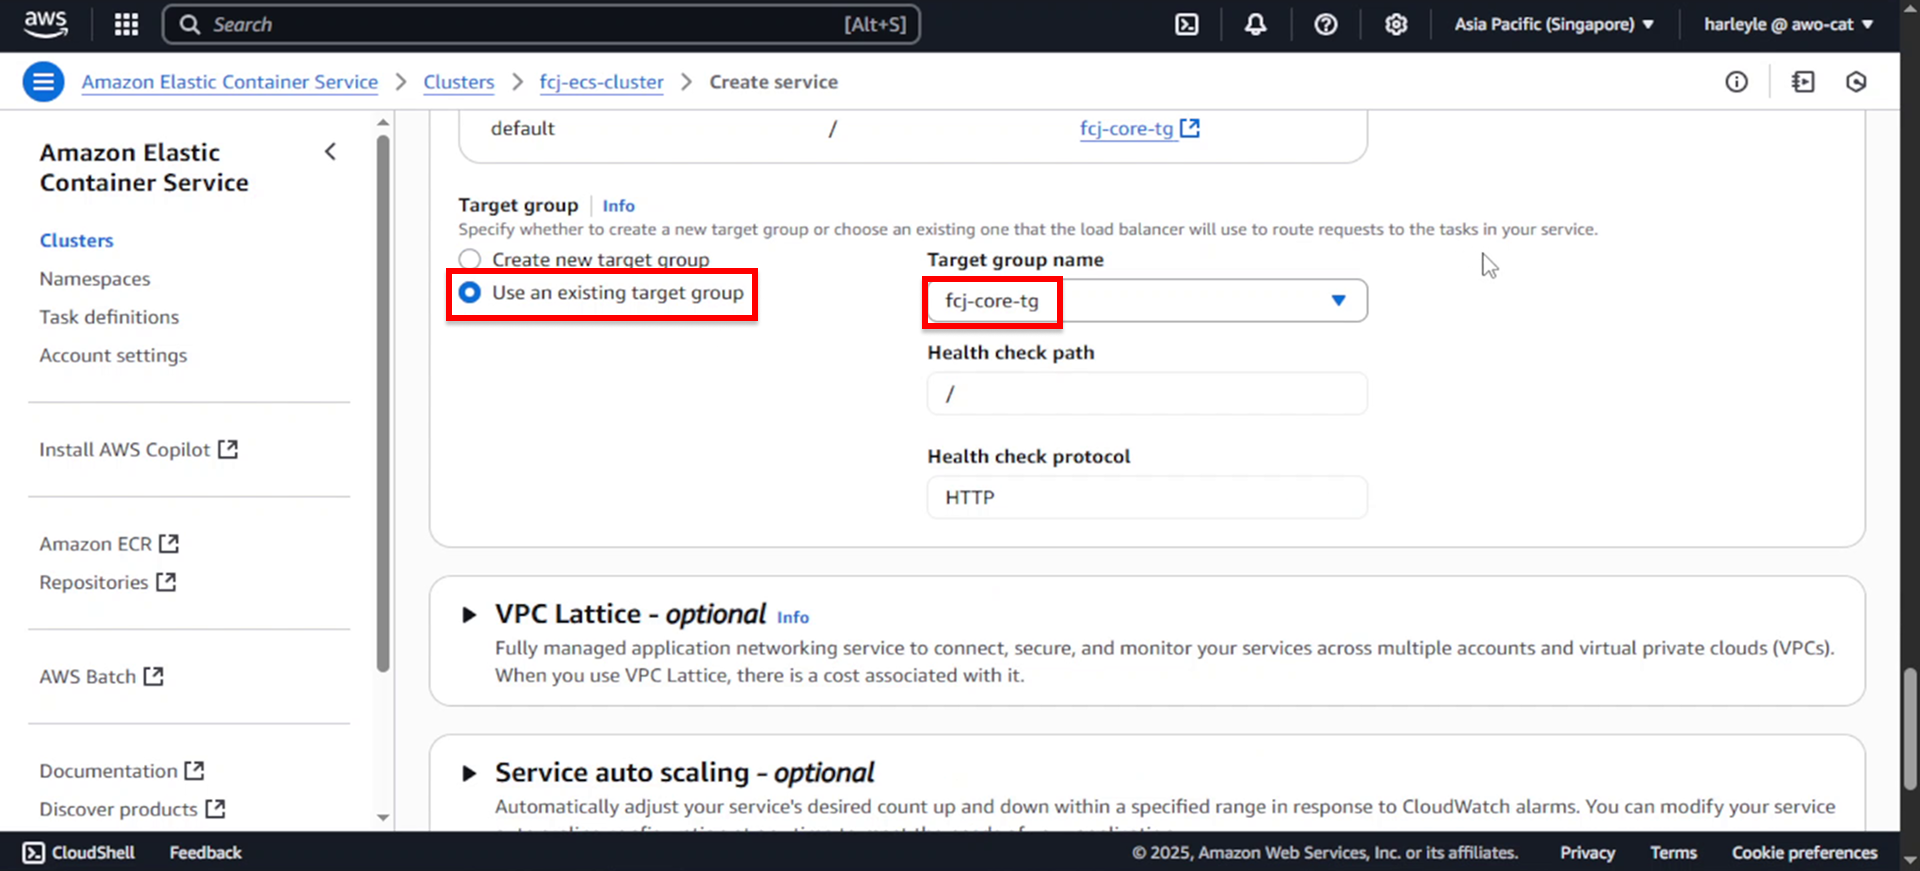
13. Configure target group: - Target group: Select Use an existing target group - Select fcj-core-tg
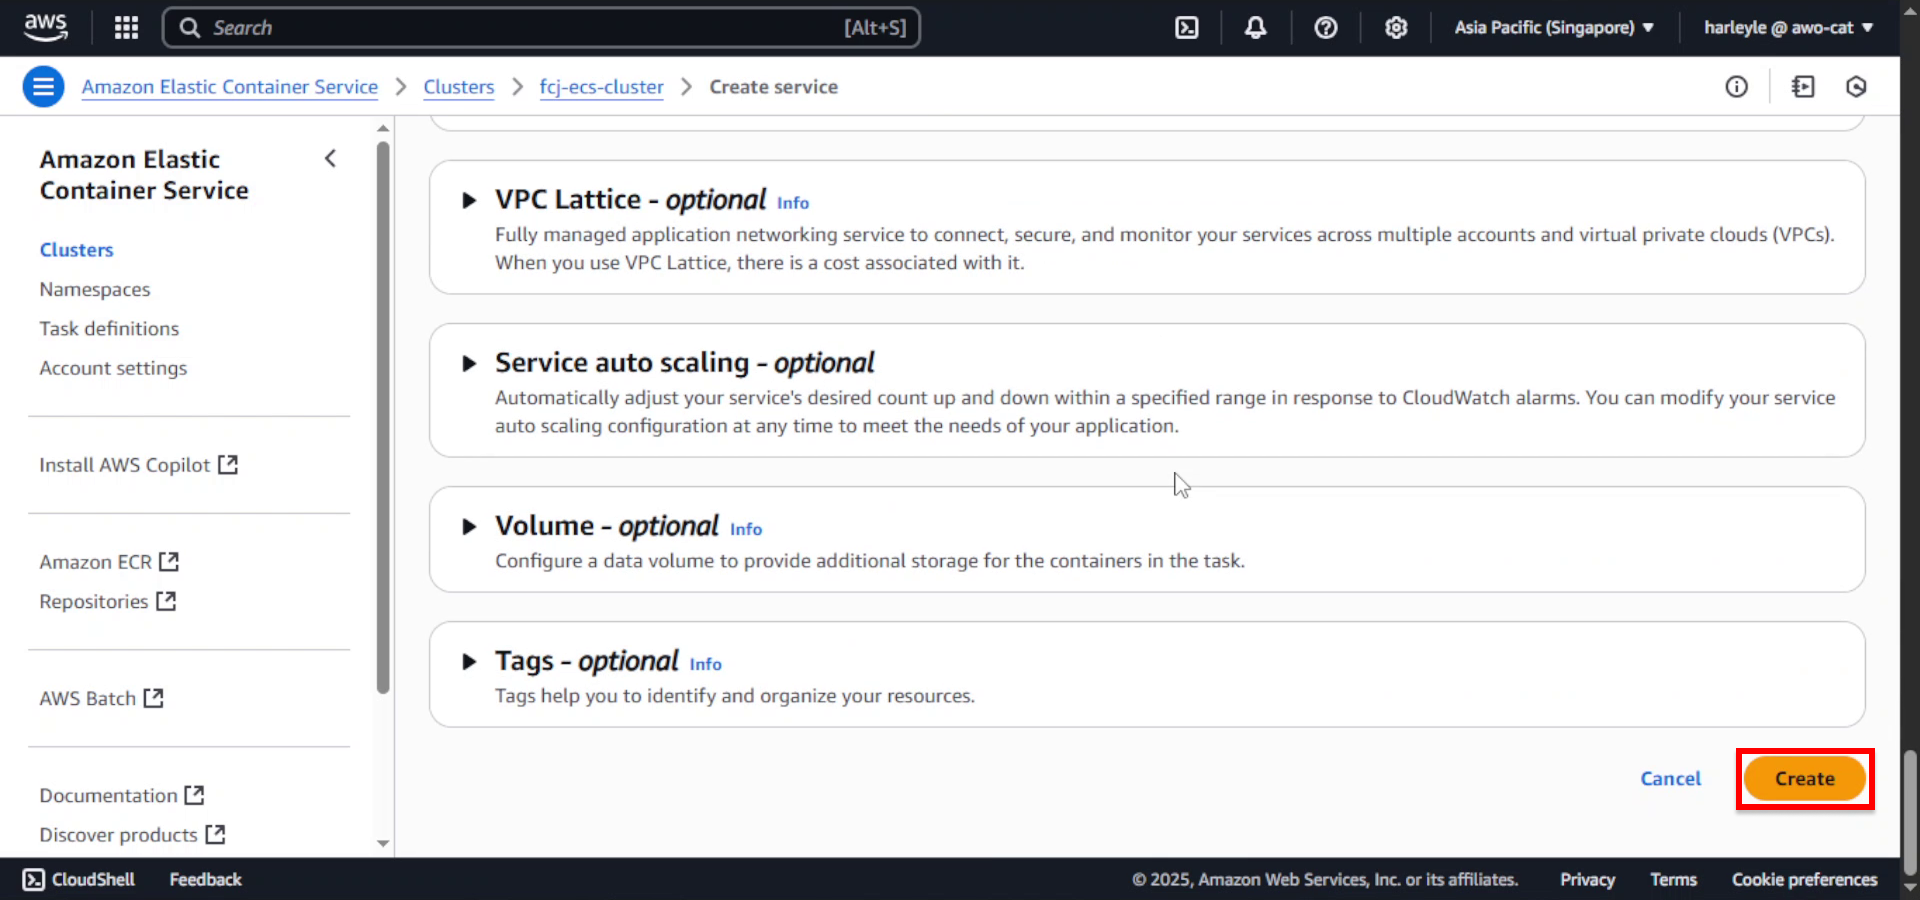
14. Review your configuration and click Create to launch the service.
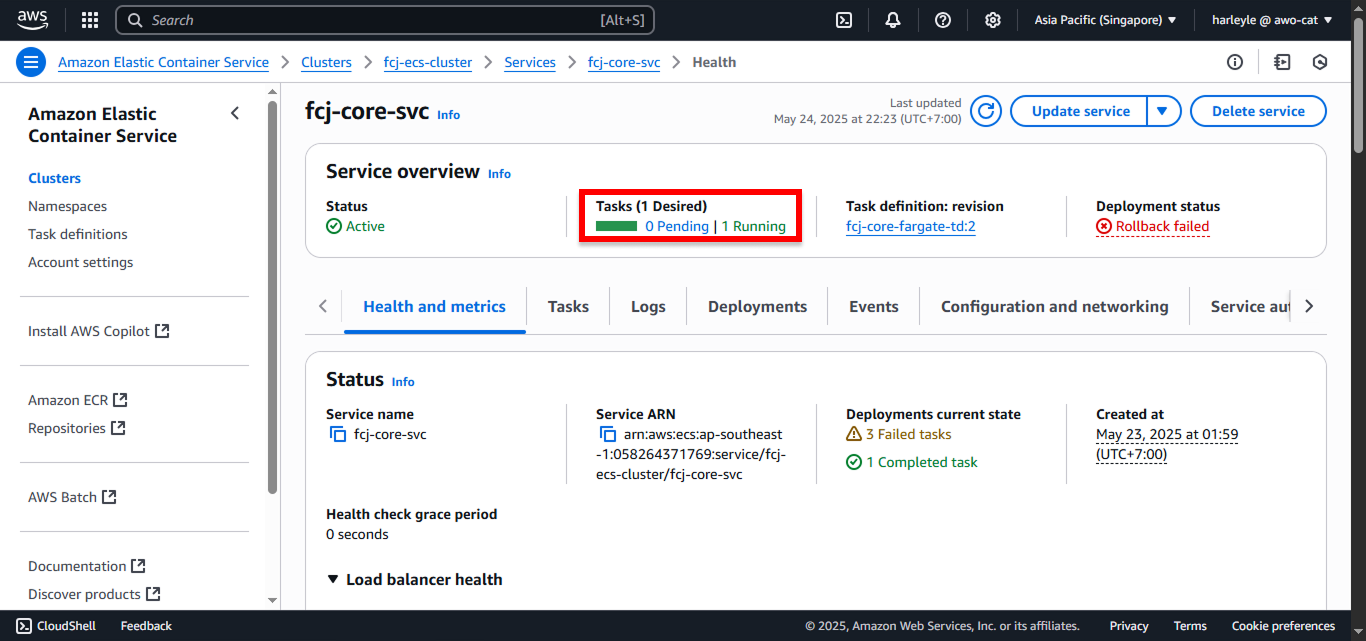
15. Wait for the task status to change to Running.
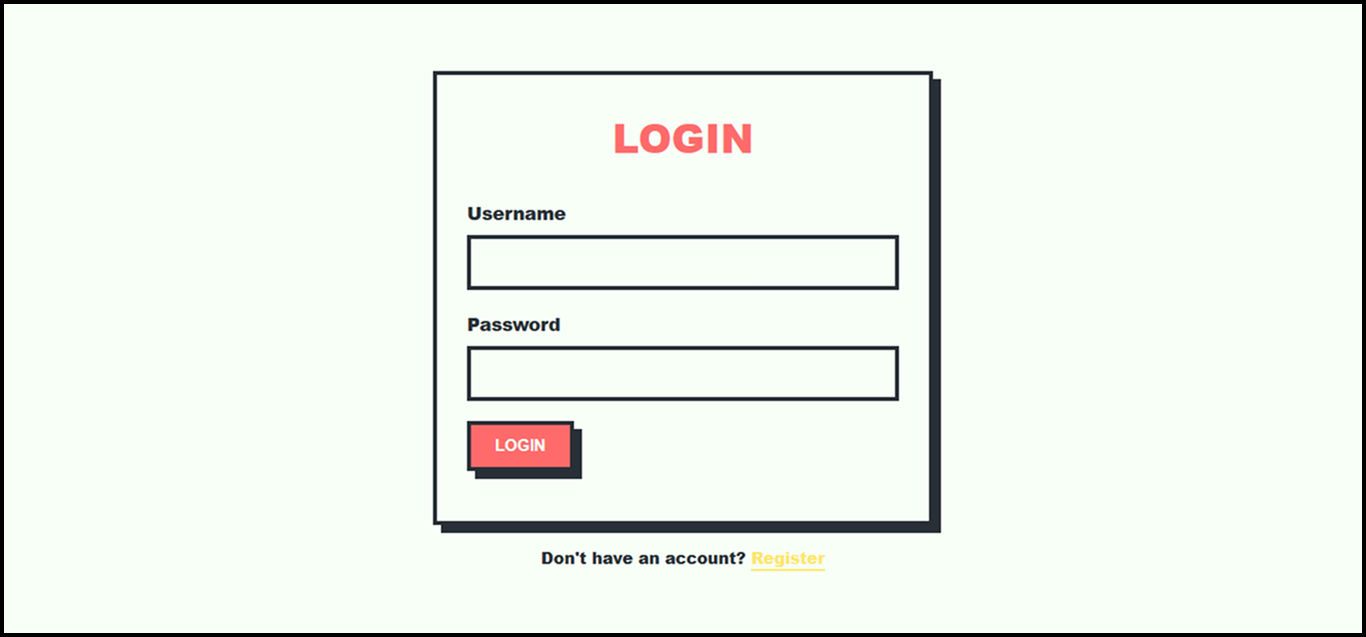
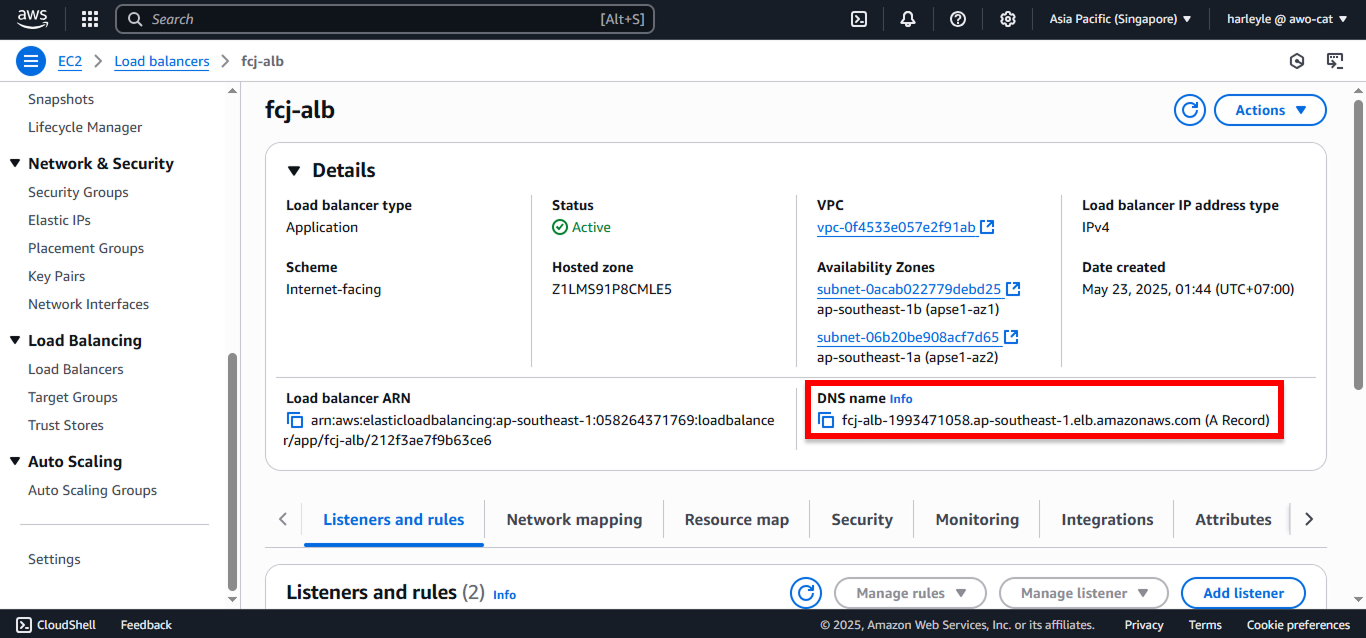
16. Navigate to your Application Load Balancer (ALB), copy the DNS name, and paste it into a new browser tab.
17. You should see the application login page. Use admin for both Username and Password to log in.