Create Security Groups
Within a VPC, we use a component called a security group. A security group acts as a stateful virtual firewall, controlling the inbound and outbound traffic for the resources it’s associated with, such as EC2 instances. When you associate a security group with an EC2 instance, it precisely dictates what traffic can reach and leave that instance. Being stateful means that if you allow inbound traffic, the corresponding outbound (reply) traffic is automatically permitted, regardless of outbound rules.
Every VPC comes with a default security group. You can also create additional security groups, each with its own custom set of inbound and outbound rules.
- For inbound rules, you specify the source (e.g., an IP address, a CIDR block, or another security group), port range, and protocol (like TCP, UDP, or ICMP).
- Similarly, for outbound rules, you define the destination, port range, and protocol.
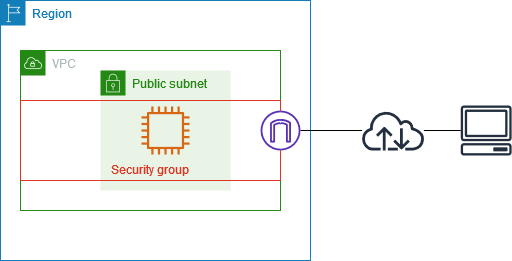
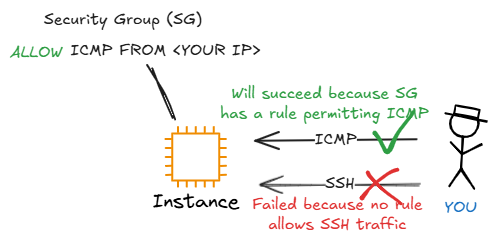
This diagram shows a VPC with a subnet, an Internet Gateway, and a security group. The EC2 instance within the subnet is protected by this security group. As a virtual firewall, it ensures only explicitly allowed traffic reaches the instance. For example, an inbound rule allowing ICMP traffic from your specific IP address would let you ping the instance. 핑! Conversely, without a rule permitting SSH traffic (TCP port 22) from your IP, you wouldn’t be able to connect via SSH.
Our architecture will utilize three distinct security groups to create a layered defense:
- A Public Security Group: For resources in our public subnets (e.g., Application Load Balancer).
- A Private Security Group: For resources in our private subnets (e.g., Amazon ECS Cluster).
- A Database Security Group: For resources in our database subnets (e.g., RDS instances).
The Private Security Group will be configured to permit inbound traffic originating only from resources associated with the Public Security Group. Similarly, the Database Security Group will permit inbound traffic originating only from resources associated with the Private Security Group.
This configuration establishes a secure, tiered architecture, ensuring that each layer’s resources can only be accessed by resources from the preceding, authorized layer. The following illustration shows how these security groups will be configured and interact.

Configure Security Group for Public Subnets
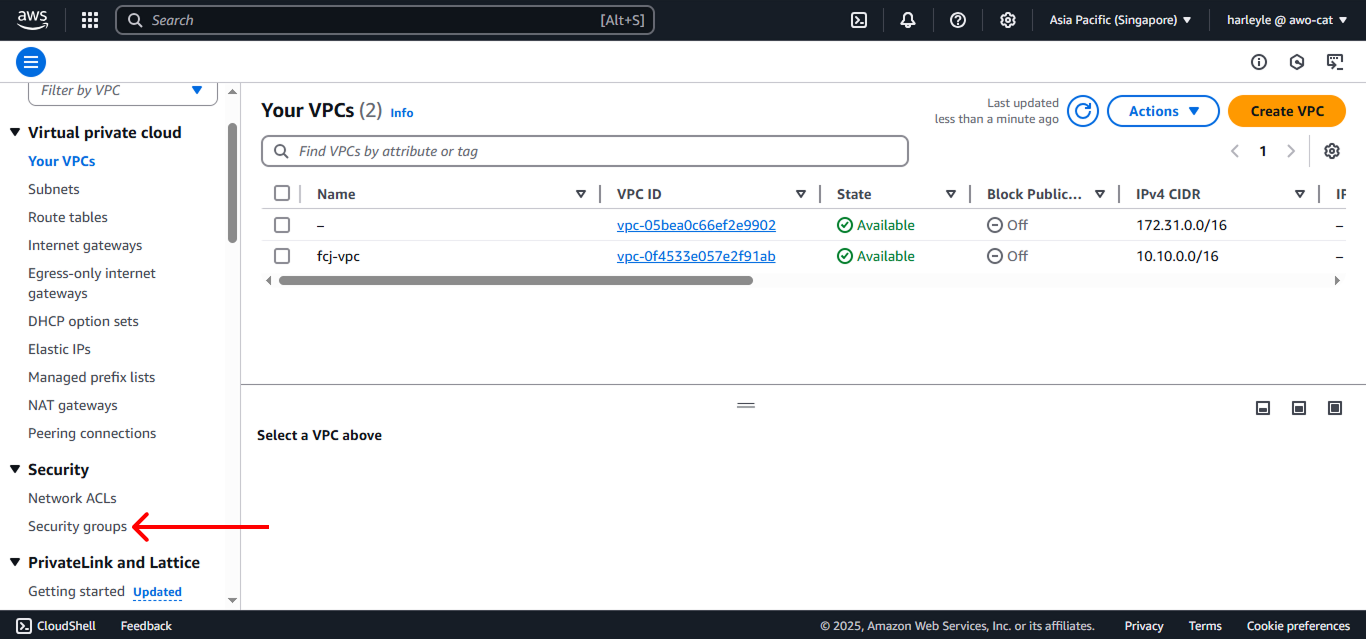
1. In the VPC Dashboard, under Security in the left navigation panel, select Security groups.
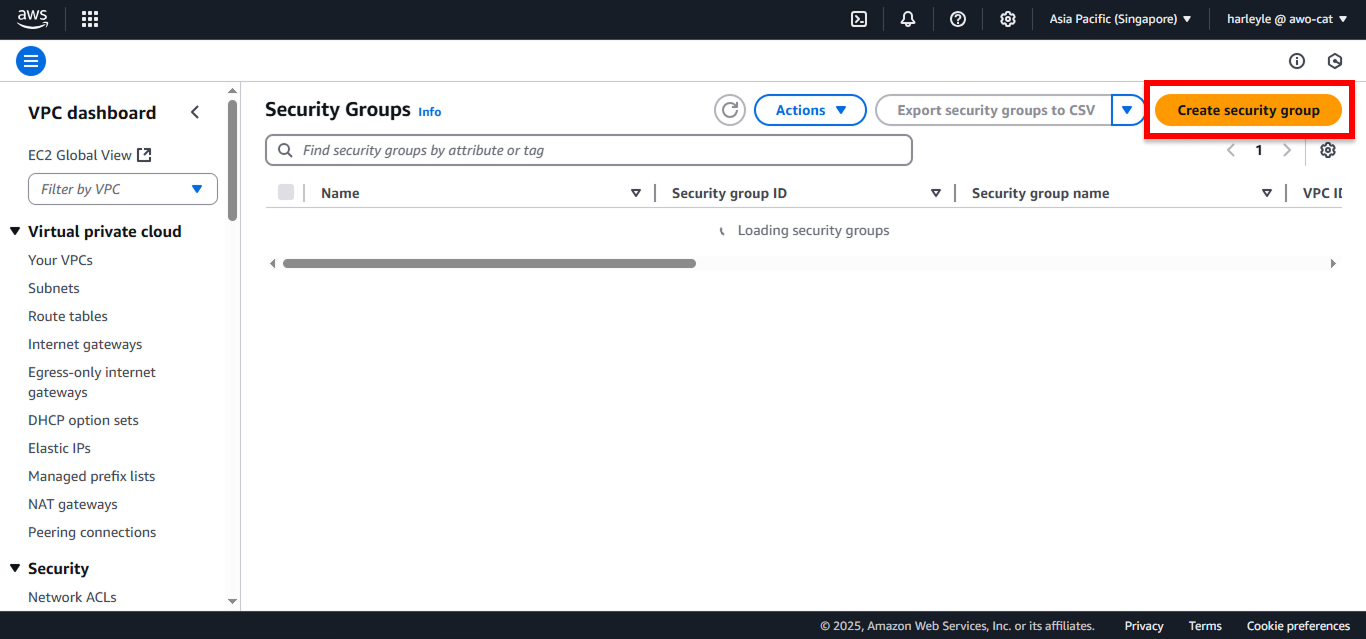
2. Click Create security group.
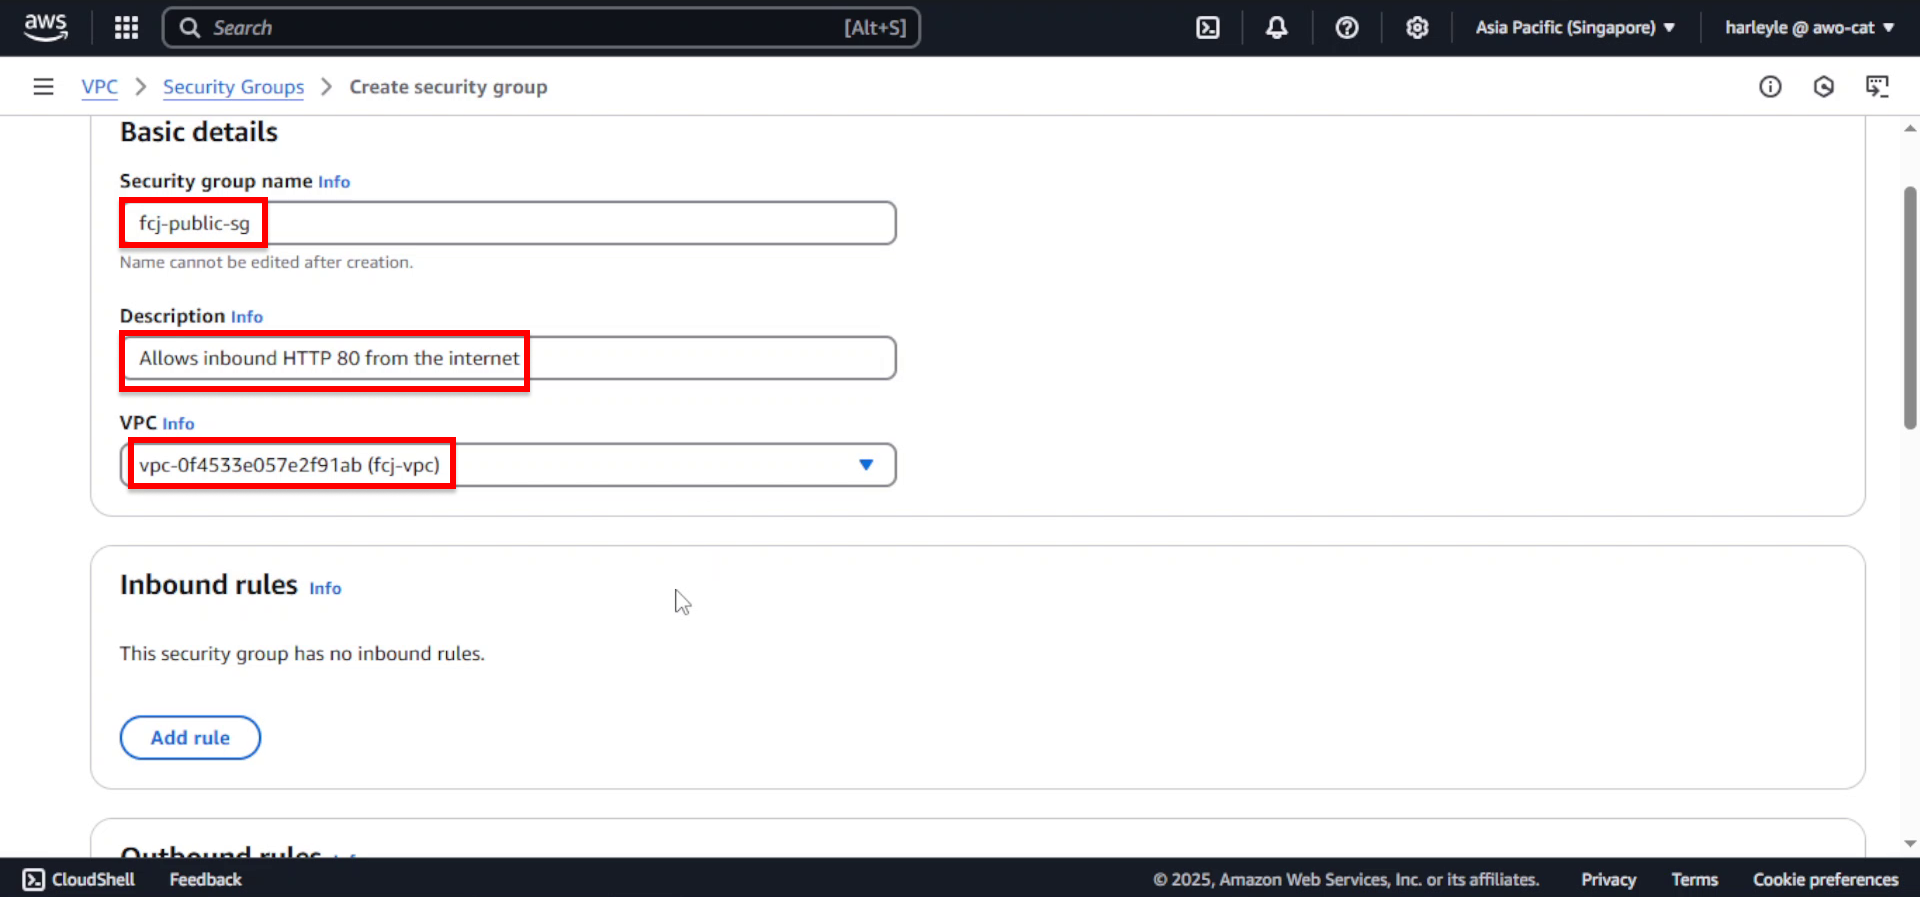
3. Configure the basic settings:
- Security group name: Enter
fcj-public-sg - Description: Enter
Allows inbound HTTP 80, 81 from the internet - VPC: Select fcj-vpc
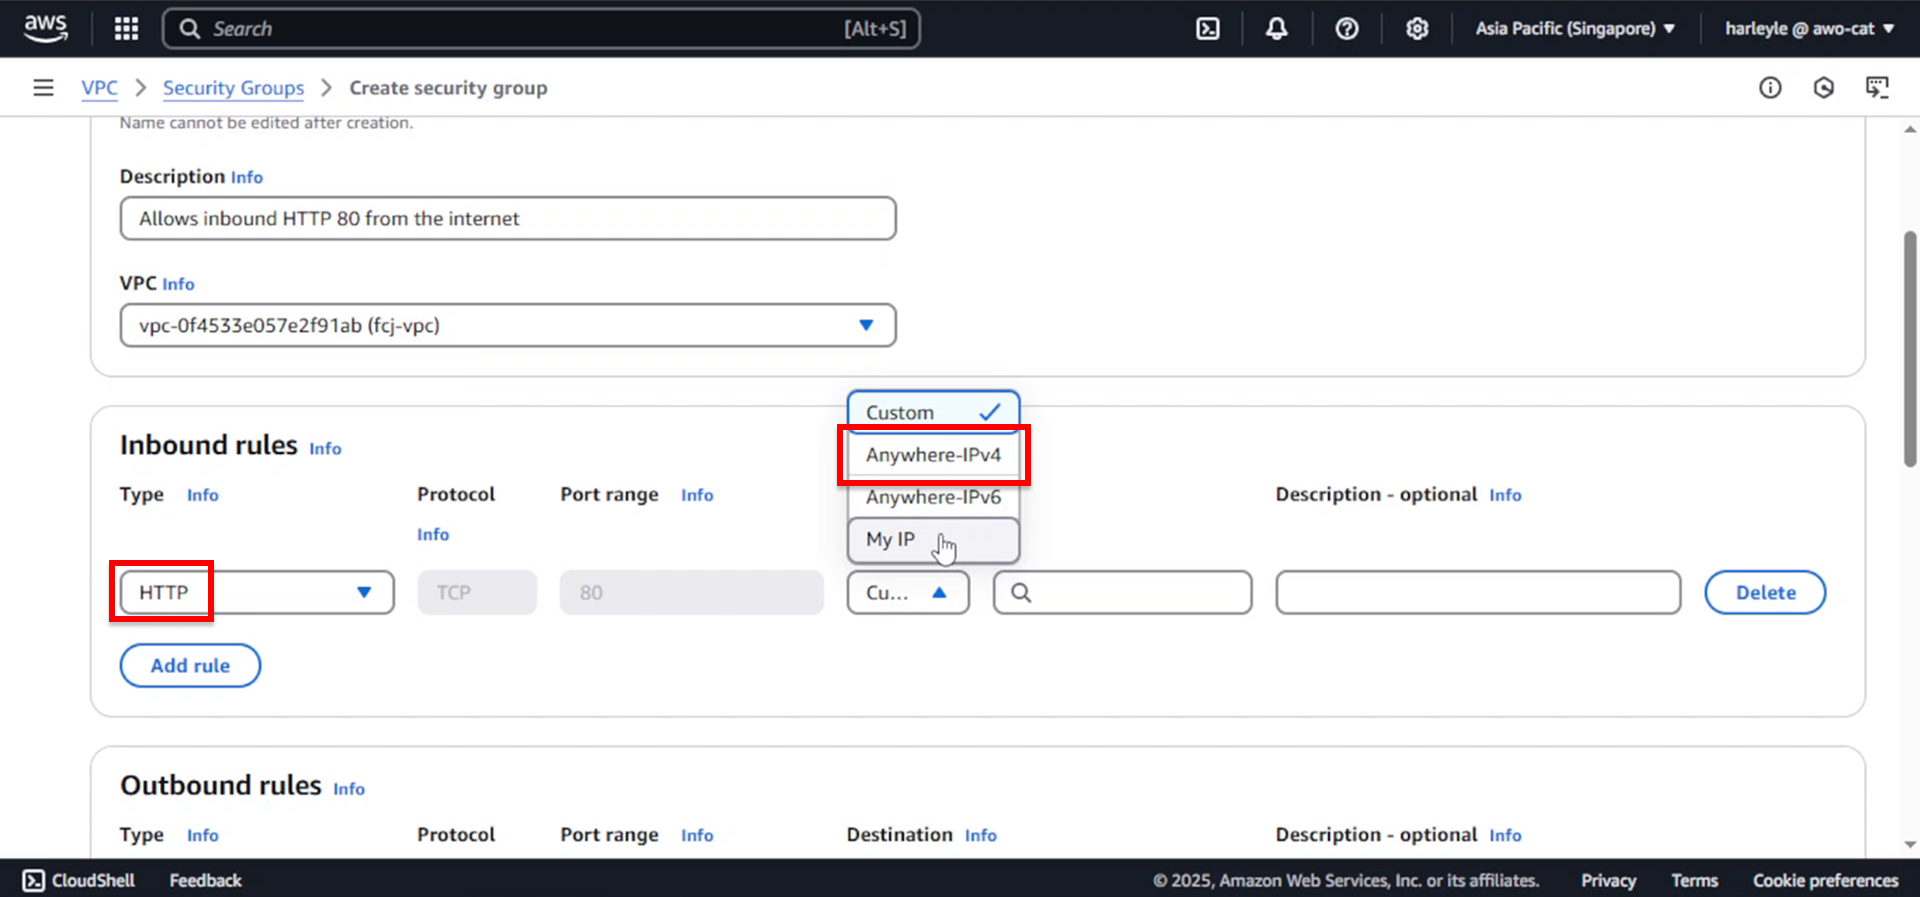
4. Add the first inbound rule for the core application:
- Click Add rule
- Type: Select HTTP
- Source: Select Anywhere-IPv4
This rule allows all inbound HTTP traffic from the internet through port 80.
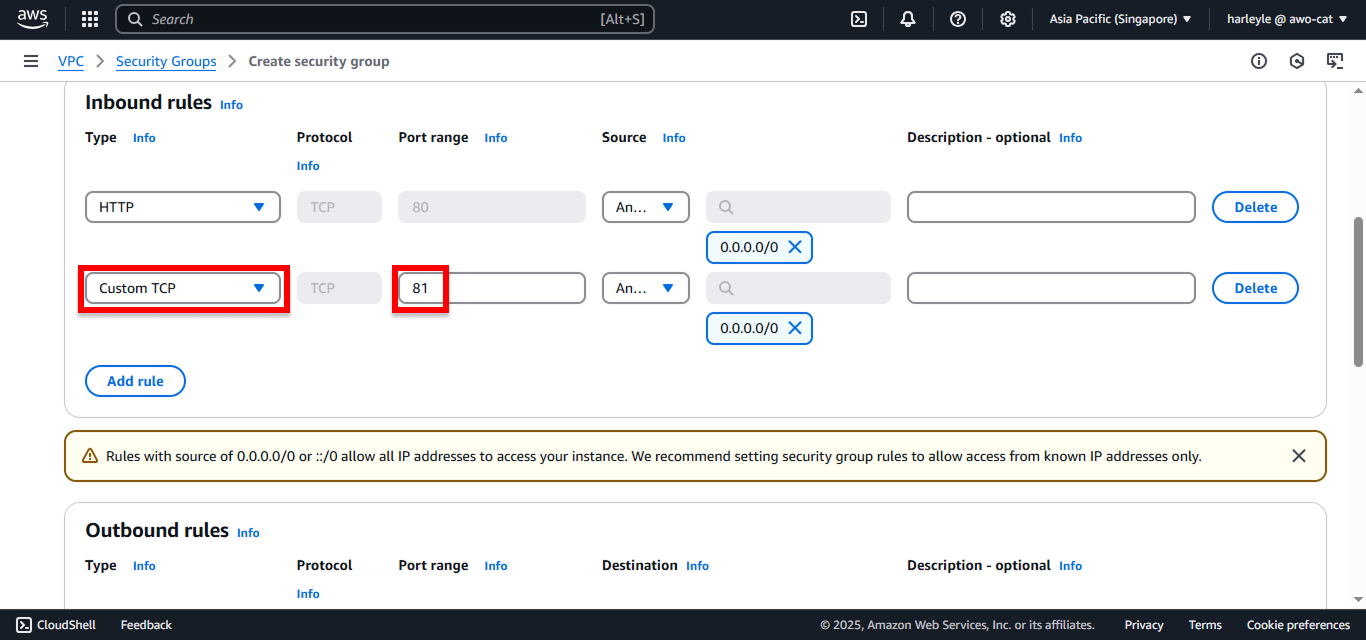
5. Add the second inbound rule for the admin application:
- Click Add rule
- Type: Select Custom TCP
- Port range: Enter
81 - Source: Select Anywhere-IPv4
This rule allows access to the admin application through port 81.
6. Scroll down and click Create security group.
7. Verify creation: Confirm that the fcj-public-sg security group appears in your list with the correct inbound rules configured.
This public security group will be attached to your Application Load Balancer to allow internet traffic on ports 80 and 81.
Configure Security Group for Private Subnets
This security group will allow all inbound traffic from the public subnets security group, implementing the principle of least privilege by only allowing access from authorized sources.
1. In the VPC Dashboard, under Security in the left navigation panel, select Security groups.
2. Click Create security group.
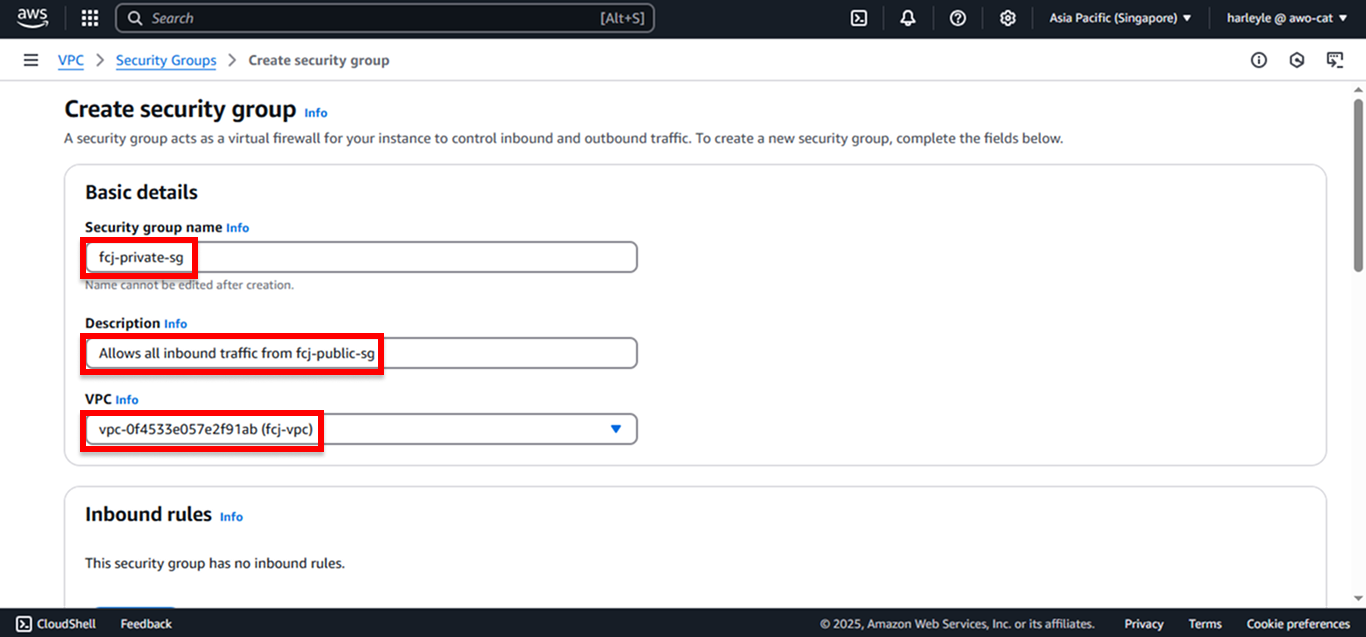
3. Configure the basic settings:
- Security group name: Enter
fcj-private-sg - Description: Enter
Allows all inbound traffic from fcj-public-sg - VPC: Select fcj-vpc
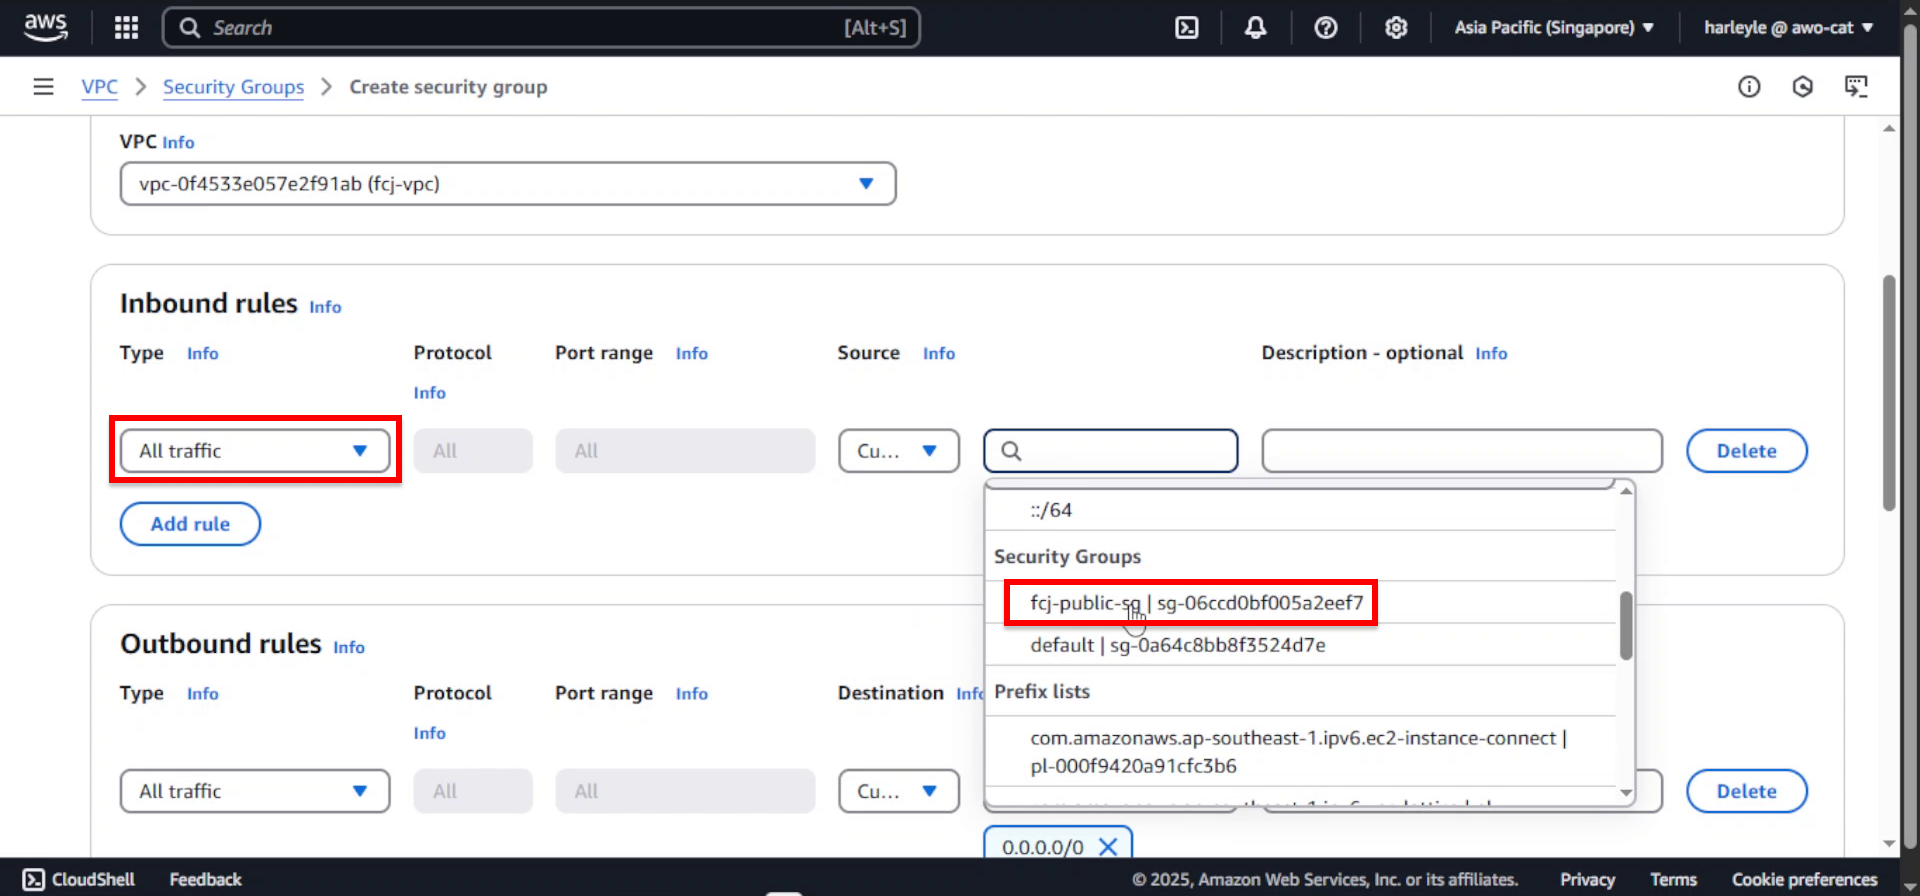
4. Add the inbound rule:
- Click Add rule
- Type: Select All traffic
- Source: Select Custom, then choose fcj-public-sg
This rule allows all traffic from resources in the public security group to reach private subnet resources.
5. Scroll down and click Create security group.
6. Verify creation: Confirm that the fcj-private-sg security group appears in your list with the correct inbound rule from fcj-public-sg.
This private security group implements a security layer by only allowing traffic from the public security group, ensuring that private resources can only be accessed through the load balancer.
Configure Security Group for Database Subnets
This security group will allow all inbound traffic from the private subnets security group, implementing the final layer of our tiered security architecture.
1. In the VPC Dashboard, under Security in the left navigation panel, select Security groups.
2. Click Create security group.
3. Configure the basic settings:
- Security group name: Enter
fcj-db-sg - Description: Enter
Allows all inbound traffic from fcj-private-sg - VPC: Select fcj-vpc

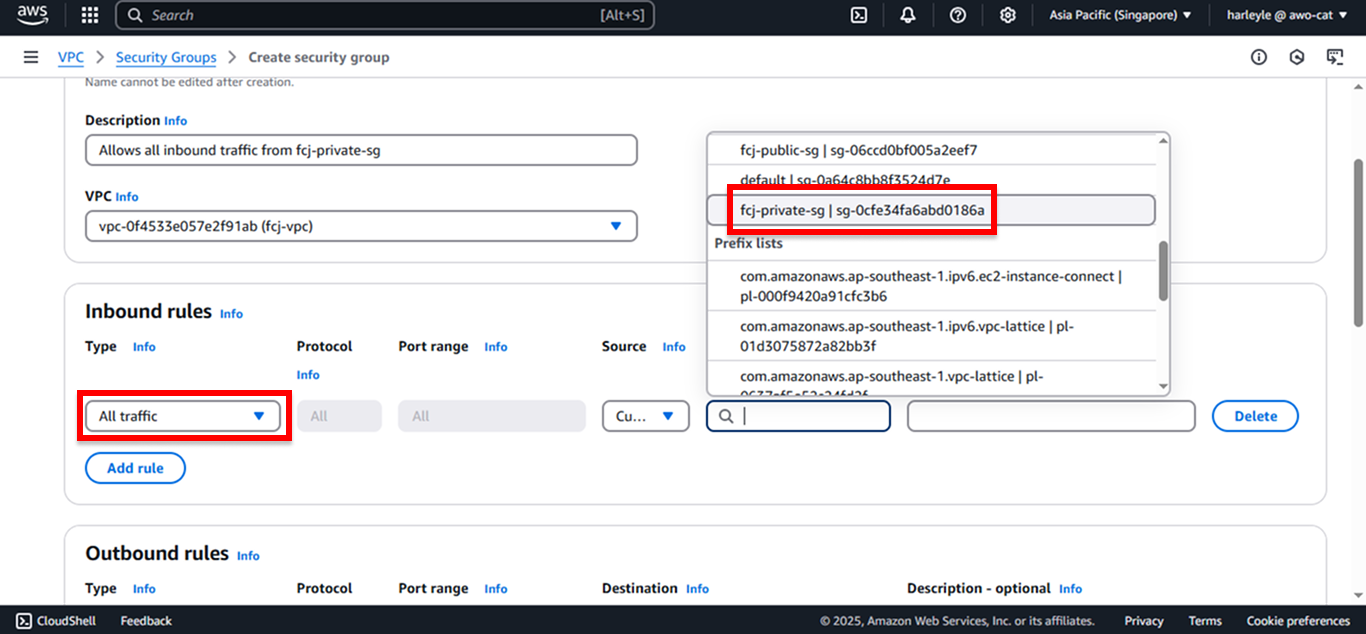
4. Add the inbound rule:
- Click Add rule
- Type: Select All traffic
- Source: Select Custom, then choose fcj-private-sg
This rule allows all traffic from resources in the private security group to reach database subnet resources.
5. Scroll down and click Create security group.
6. Verify creation: Confirm that the fcj-db-sg security group appears in your list with the correct inbound rule from fcj-private-sg.
This database security group completes our layered security architecture, ensuring database resources can only be accessed from the private subnets where your application runs.
You have successfully created all three security groups for your tiered architecture:
- fcj-public-sg: Allows internet traffic on ports 80 and 81
- fcj-private-sg: Allows traffic only from the public security group
- fcj-db-sg: Allows traffic only from the private security group